Showing posts with label winter preparation. Show all posts

Thursday, June 11, 2015

Summertime Food Scrounging

I don't know if it's some leftover primal urge leftover from our hunter gather days, whether it's the excuse of getting out into the sun, or maybe just a bit of wild desperation for nature after a long, cold Ohio winter has kept me under lock and key for months. For whatever reason, when the days are getting warm, I get to food scrounging.

Over winter, I eat a lot of foods that I put up over the previous warm season. Smoothies are made of frozen berries foraged in the neighborhood. Work snacks are crabapple candy, delicious sweet-sour treats of dehydrated "waste" fruit. Soups are made of a handful of this dehydrated goody and that bag of frozen greens and that ham bone that's been waiting in the freezer for a chance to shine. By the time June comes along, the pantry is a little more bare, the selection a bit more paltry. So out I go to restock the larder and prepare again for the cold days that will come.

Anyone who follows this page knows that I have two primary ways to cut my grocery spending: gardening and salvage grocery shopping. Both are fantastic ways to trim back the budget. Gardening requires little money, but lots and lots of time. Salvage grocery shopping takes little more time than regular grocery shopping, but still takes a fair amount of money. So while foraging doesn't make up a large percentage of the yearly calories, it is a worthwhile pursuit. It takes little time, compared to a full season of gardening, and it takes absolutely no money. It also adds lots of variety to the diet that would otherwise be impossible. Wild foods are very nutritious and can be delicious.

Starting out in early spring, but still viable in early summer, is foraging for wild greens. They are best early, and by this time of year (June) are a bit bitter. However, even now, they're worthwhile, especially if the bitter greens are going into a robust dish with lots of garlic and cream. Dandelion greens are the best green to get started with simply because everyone knows what dandelion looks like. You don't have to worry about accidentally poisoning your family (provided you pick from a yard you know is unsprayed). Harvest those dandelion leaves when they are tiny and haven't flowered yet for the tastiest treat. Once they flower, they are tougher and more bitter, so you'll want to use them in cooked dishes, rather than fresh salads.
Creasy greens with a baby bud in the center.

I also harvest creasy greens. These are a southern favorite that should be a northern favorite too. I love them steamed or tossed into a stir fry. Once they send up a flower stalk, stop harvesting the leaves, but then, oh then, you get the stalks. They look like mini broccoli stalks and taste like a wilder broccoli. Trucker loves broccoli, but I've never been able to grow it in my garden. This year I only harvested enough for us to eat fresh, but next year I plan to freezer in meal-sized portions for winter.

Research the wild greens that grow in your area, sample them and harvest bucketloads of the ones you like. To preserve them, simply steam them until they wilt, then cool and pack into freezer bags. Depending on family size, you can pack 1, 2 or 4 cups into each bag. Freeze flat for maximum storage in the freezer. Pull out a bag at a time to reheat as a steamed vegetable, add to omelets/frittata/quiche/souffle, or mix into a dip, similar to spinach dip but with free greens. Creasy green flower buds can be steamed or boiled a couple minutes, then dunked into an ice bath before packing in freezer bags.

Dandelion flowers can be fried for perfect fritters or the petals added to fresh salads. If you want to fill your larder with them, think of dandelion wine, dandelion jelly or dandelion syrup.

Edible flowers (Violets, Grape Hyacinths) add pretty color
to salads. Candied violets are great for cake decorating.
If you live in morel country, then it is the best foraging to be done. Nothing, absolutely nothing compares to a morel. If you have good huntin' ground, eat as many as you can fresh, as this is the best way to enjoy them. If you are really lucky and get a huge harvest, you can dehydrate them to use in winter. I once saw dried morels for sale for $230/lb.

Violets are edible and prolific, at least in my garden beds. You can eat the flowers or leaves in salads, or you could steam and freeze the greens. The flowers can be added to tea blends, mixed into sugar for a floral note for teas, or candied for decorating desserts.

Then it's berry season. For me, that means mulberries. When I was a kid, my grandma used to take me out mulberry picking. We'd pick bushes of them. After a long day of picking, Grandpa would come home and we'd all sit down to bowls of mulberries with milk. It's still my favorite way to eat them, but I do preserve some for winter. There are two main types of mulberries: red (which ripen to almost black) and white (which start lime green and fade to white when ripe). Then there are hybrids which can be pink or white with purple frosting. I prefer red berries to all other kinds due to the taste, but the other kinds don't stain the hands as badly. To harvest, you can pick them by hand, but it is labor intensive and wasteful. When mulberries are fully ripe, they fall off the tree at the drop of a hat, so if you pick one berry, five more fall to the ground. Instead, lay down a sheet or a blanket you don't care about. Gently shake the branches over the sheet. The perfectly ripe berries will fall onto the sheet. just grab the corners to pile the berries together, then bag up. This makes harvesting a breeze and you can get a whole tree harvested in twenty minutes. You can also harvest wild blackberries or raspberries if they grow in your area. These taste fantastic and you'll love them more than anything sold in stores. I freeze them on cookie sheets; one frozen solid, they are packed into freezer bags to dump a little at a time into smoothies or to eat as a chilly snack later on in summer.

Plantain seeds air drying on a cookie sheet.
Broad-leaved plantain is an edible green, but also provides some healthy seeds. When the stalks are mature and the tips of each seed is starting to turn slightly brown, I harvest them by the handfuls. I strip the seeds from the stalk by gripping near the top and pulling back to the base while holding it over a big bowl to catch the falling seeds. I don't worry about the immature seeds at the top. It doesn't add up to a lot, but it is nutrient rich and provides good variety. I use them in teas for respiratory problems sometimes, but often, I just crush some seeds into any baked goods/pizza crusts I'm making for extra fiber. It provides nominal cost benefits, but good nutrition. It also is nice, relaxing work for a warm evening with a beer on the patio, so I continue to do it.

Any and all surplus greens from the garden, and some wild greens are preserved into green powder. This bitter-as-heck powder has nothing going for it, flavor-wise, but is a healthy addition to the diet. I use greens with bad texture, like the full-sized greens on a radish bulb, carrot greens or tough dandelion greens. I dehydrate them until they are bone dry, then crumble them by hand or in the blender until they are a course powder. This powder is a nutritional powerhouse, and is an easy addition to meatloaf, casseroles, green smoothies, even brownies, anything that could use a little more veg. I try to limit its use to dishes with strong flavors to mask the bitterness. In winter, even that bitterness is welcome when there is such a limit to veg.

Crabapples waiting to be processed.
All season long, I keep an eye out for feral fruit trees. I know of countless crab apple trees, several apple trees, and 3 pear trees. All of these trees litter the sidewalks of hapless homeowners who don't connect the rotting fruit on ground with the self-sufficient thoughtfulness of previous owners. Since they don't want to bother with it, I help them out. Since I'm harvesting the stuff, they don't have to clean off their sidewalk. It's a public service, really. For apples and crabapples, taste them occasionally. Once they taste good, harvest. For pears, I tend to wait until I see the first pear on the ground, then harvest the tree clean. These apples and pears might not be the tastiest, but can be used creatively. Juice them with other apples, pears or other fruits. Add them to applesauce. Bake with them. Dehydrate them into chips. Blend with other, more tasty fruit and dehydrate into fruit leathers. If there aren't too many bug holes, they will even store in the frig for months.

Crabapple candy ready to go into the dehydrators.
Crabapples are a special thing. They take effort to use, due to their small size, but they are fantastic. They add great zing to apple juice, cider or sauce. The bright red ones in particular add fantastic color to a basic sauce. I add them to apple crisp for a bit of color. My favorite, albeit labor-intensive way to use crabapples is to make crabapple candy. I cut each crabapple into halves or quarters, then pop out any seeds. I toss in sugar until it is coated well. I load them onto dehydrator trays and dry until leathery. These candies are delicious, and while not a health food, go a long way to reduce consumption of scary store-bought candy. I think they are like a chewier sour patch kid.

Many herbal teas can be put up from foraged weeds. Use a dehydrator for quick drying to minimize flavor loss. If you don't have a dehydrator, use a low oven or hang in a cool dry place. Pineapple weed (related to Chamomile) is my favorite wild tea. It has a lovely exotic tropical floral taste and scent. You can also dry violets, dandelion leaves, mints, dead nettles, clover blossoms, strawberry leaves, or many more. Dandelion roots can make a mock coffee that's to die for.
By the end of the summer, I like to have scores of different wild foods put up for later. It makes winter much more enjoyable to pop open some jar of summery goodness and remember that spring will come again.

Monday, November 18, 2013

Salad from the Winter Garden

I am experimenting with winter gardening this year. Nothing big. I'm not going to be supplying all of the family's veg from the winter garden this year but it's still worth doing. I like the idea of learning some basics to supplement my families food. Being able to grow some food in winter will save us a bit of money, increase our self sufficiency, provide valuable fresh veggies in a season when they are hard to come by (eating either the stored veg dehydrated, frozen or canned in season, or veg from the grocery that's flown in 1500 miles before I eat it), and will possibly clean the air in the home as well. And it's fun!

In the back yard, I have carrots, radishes and kale planted. I planted them in late August and they are all very small. Growth is pretty slow. However, the last few winters have been pretty mild, so maybe if this year is mild too I'll get a bit more growth. I had loads of seed leftover from the main gardening season, and was given some seed while talking with gardeners at the World's Longest Yard Sale, so I lose nothing by putting some extra seeds in the ground. If a strong freeze hits and all the outdoor plants die, I'll just work the green matter back into the earth and call it fertilizer.


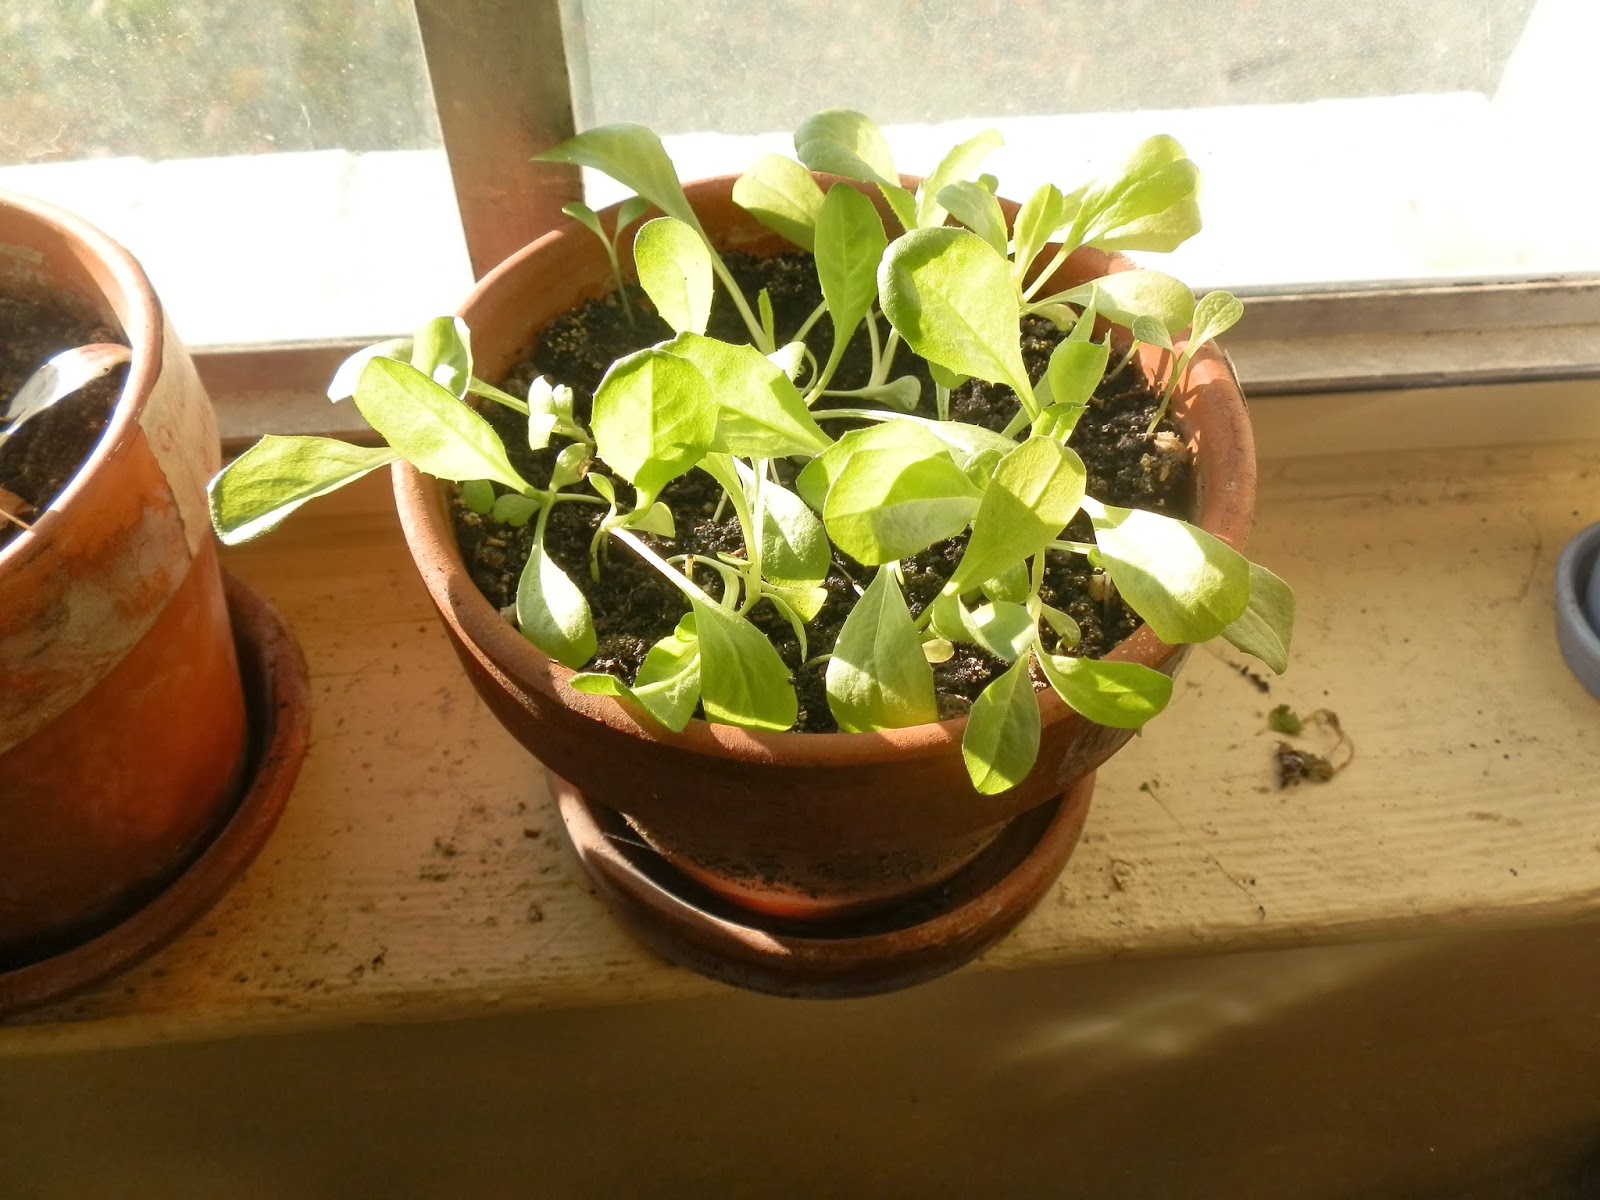
Indoors I started several pots of greens. They grow in my laundry room on the south-facing windowsill.  I have two pots of spinach and four pots of two different varieties of lettuce. They are still in the baby green stage of growth and have been growing for a few weeks. I need to plant a second batch of greens so that there is no (or not much) gap in fresh salads. The real problem I will run into is space, as Ray cat has claimed all of the other south-facing windowsills and will push off anything I put on them. 
I planted them in sterile potting soil I had leftover from starting seedlings this spring. When I harvest the last of these lettuces and replant, I will mix in a bit of compost from the bottom of the bin just to freshen it up a bit. I water them about once a day, when I remember. I'm bad about that. I know that using self-watering containers would be best, but I don't have any. These pots I found at yard sales for pennies apiece, so I use them. My parents saved the plastic seed packs from their flower garden last spring, so I can use those also. Again, these are seeds leftover from the main gardening season. So I'm not really out much money, just a few pennies worth of water over the season.

After reading this article on overwintering peppers indoors, I selected my best two pepper plants. They are Jimmy Nardello peppers. One plant was the plant that gave me the first pepper of the season. The other was the plant that gave me the highest number of peppers. I dug the plants out of the ground leaving as much dirt and roots intact as possible. I filled in the rest of the pot with potting soil. I sprayed them off and picked off all of the flowers and flower buds. I took them inside and have watered them a few times. I don't have any really cool areas to store them (the article recommends a constant 55 degrees), but I put them by a leaky patio door so once the cold weather hits, it should stay around 55-60. One of the plants produced a huge amount of flowers once it was brought in, but I picked them off. If they survive the winter, I'll plant them after the threat of frost. Hopefully I'll get an early bumper crop of my favorite pepper.

Yesterday I picked the first salad from the winter garden. From the outdoor garden, I had two baby kale plants, 3 medium sized radishes, 1 radish seedpod, 6 baby radishes, and 5 baby carrots. I left the leaves intact on the carrots and baby radishes for more bulk. I thinned out the lettuces in the indoor garden with a pair of scissors. I first trimmed out any tiny plants, then any that looked weaker than the others. From there, I thinned out any that were too close to each other. That gave me the little pile of greens you see in center right on the photo.

I added some mixed greens from the farmers market and had enough for two nice-sized salads to accompany dinner. They were delicious.

I'm very excited about getting fresh salad throughout the winter. I may plant a few containers of radishes for snacking. Wisconsin Vegetable Gardeners posted a video on growing carrots. They had good success planting carrots in a home-made hanging basket. I think I may try some of these as well so I can get some yummy carrots throughout winter and don't have to resort to those cardboard orange things at the grocery store.


Shared on:


From The Farm Blog Hop

Homestead Barn Hop
The Homesteaders Blog Hop


Sunday, September 8, 2013

Building a Winter Wardrobe on the Cheap

With summer ending, it's time to start thinking about getting ready for winter. If you have growing children to clothe, have changed sizes, or have moved to a colder climate, you'll need to build a winter wardrobe to stay warm and healthy. Rather than rush out to the mall as soon as the winter clothes hit the rack and spend a paycheck or two, make a plan and shop around to build a winter wardrobe for less.

Evaluate your clothing. Will last year's coat work? Can you pass down clothing from older children to younger children? Make a list of everything you'll need before you go out shopping.

Generally, you'll need a warm coat, some thick shirts (sweaters or flannels), thick socks, warm boots or shoes, a scarf, a hat and at least one pair or gloves/mittens. If you live in frigid areas or spend lots of time exposed to the elements, you'll need extremely warm gloves and a pair of long-johns. Tights/leggings can make looser fitting pants or even skirts appropriate for winter wear.

I would invest the most in a good pair of winter boots. While you can layer clothes under a thinner coat, there's not much you can do about an inferior pair of boots. Get a good, warm pair, especially if you/your children spend much time outside in the winter. Frostbitten toes are not worth the savings on buying cheap boots. If you see a great pair of boots on clearance in late winter/early spring, stockpile them for the next winter. A couple of years ago, I found a $100 pair of boots for Trucker for $19.99 and he still wears them.

If you are buying a new coat, consider buying a coat with a removable lining. My dad has a coat that is a medium weight coat with a jacket that zips together for a warm winter coat for frigid days. On warmer winter days he can wear only the medium weight coat and he can wear the jacket alone in autumn and early spring. It helps a lot during these weird winters where the temperature can go from 10 to 60 within a week.

Layering helps a lot. Where I live there are some frigid days, but generally speaking it's cold but not unbearable. I wear a long sleeved t-shirt with a short sleeved shirt over it on most days. On really cold days I'll also wear a flannel over that. This keeps me from needing to buy an expensive heavy-duty winter coat that I'd really only need a few days a year, and I can wear the coat for more months of the year. When I lived up North and lived without a car (aka spent hours waiting in below-freezing temperatures for a bus), my winter coat wasn't the warmest, but it was slightly loose so on the worst days, I'd wear 3-4 flannel shirts under it, with a thin scarf wrapped around my neck under the coat and a thicker one over the coat. By layering your clothes, you can wear items for more months of the year, so you need fewer items.

Call the thrift stores in your area and ask them about sales. All of the thrift stores in my area have at least one day a month that everything is half off. Go early on those days and be prepared for crowds. Go straight to the winter clothes as they will be picked over quickly. Most thrift stores have a tag sale, e.g. everything with a red tag is 50% off. One thrift store in my area has a $.50 sale each Monday on a particular tag color. Sometimes smaller thrift stores will have bag sales, say everything you can fit in a paper grocery bag for $5. Go then and cram in everything you can. Start by cramming in a coat, then work your way to cheaper items (flannel shirts to thick socks). Roll items to fit the most in one bag.

Thrift stores usually have a respectable selection of winter items. In late fall there are lots of winter coats to chose from. You can also find various styles of winter hats and more scarves than you can believe, from the dollar store junk to name brand to crocheted by a cute old lady scarves. Look for leggings and thick socks too, just make sure you wash them well before wearing.

If you need business or business casual wear, check mid- to upper-level consignment shops for winter apparel appropriate for the office. Consignment shops are especially good sources of nice looking winter coats, especially if your local thrift shops only have ratty coats. If you like the shop (and their prices), but don't see a coat you like, leave your number and size with the owner and ask for a phone call if something comes in.

End of season yard sales are an option for buying winter clothes at a bargain, especially sweaters. People are desperate to sell items so they don't have to store them overwinter, but shoppers are not thinking about needing sweaters when the temperature is over 80. Look for coats, sweaters, hats, gloves and flannels. If you find a sweater in a color that you like, but hate the style/size, check it over to make sure it is not pilled or felted. You can unravel that sweater to make scarves, hats, mittens or even another sweater. Here's a great article on unraveling sweaters.

If you are crafty, look for wool yarn at thrift stores and yard sales. There's still plenty of time to make scarves for the whole family. You can also make hats, mittens, arm warmers, leg warmers, socks, etc. Generally, it costs about the same to make a scarf from thrift-store yarn as to buy a thrift-store scarf, but you get more control of the end product. However, if you would be crafting anyway, you may as well make something you can use and avoid needing to purchase an item.

Shared on:


Saturday, September 1, 2012

Apple Processing Day

My mum has a couple apple trees on her property. At harvest each year, she gathers the clan together for apple processing day. We spend the day talking, listening to music, and usually order out a pizza from our favorite local pizza shop.

Just some of the harvest.
This year we got everyone together: mum and dad, my sisters and their beaus, my grandparents, Trucker and me. We spent six hours working, and produced enough that each family was able to fill their freezer with apple goods. We all pitched in whatever we had access to: apples, freezer bags, cinnamon, sugar or snacks for the workers. We spent around $5 for ingredients and another $5 for freezer bags by shopping sales. We each brought our own knives, cutting boards and a large pot to supplement Mum's kitchen.

Mum picked the apple trees before we arrived so we could get started immediately. She filled a wheelbarrow, 4 5-gallon buckets, 2 large coolers and three large boxes. 

Each family received two plastic grocery bags full of apples to eat out of hand. The rest were processed into slices for pie, applesauce, and apple juice. Next year, we hope to try out some new items such as apple jelly, dried apple rings, apple butter, fruit roll ups, and perhaps some hard cider! 

I filled up two sinks with water. One sink was filled with apples and we gently scrubbed them before moving them to the rinsing sink. We cut out any really nasty spots.

We peeled, cored and sliced most of the good apples for mum's famous apple pie. We packed the slices into gallon-sized freezer bags. These will save her a lot of money over the holidays as she bakes dozens of pies for parties, family gatherings and church/social functions.

Next came the applesauce making. All of the not-so-pretty apples (odd shaped, small, bug-bitten or fallen) were chopped into large pots. We weren't concerned about having white applesauce, but if we were, we could have added lemon juice to the water while slicing to prevent browning.

We added a small amount of water (about 1/4 c per pot) to help in steaming the apples before they released their juices. We added a lot of cinnamon to each pot. Since some of us have blood-sugar concerns, over half of the apple sauce was left unsweetened. To the remainder, we added about a 1/2 c of brown sugar to each pot. The apples cooked until fork-tender, and then I pureed them in the blender until smooth. By using the blender instead of just mashing the apples with a fork, I could leave the peels on without compromising the texture of the sauce. This saved a lot of time and had the added benefit of a higher fiber content.

Pots and bowls of applesauce were placed on cooling racks all over the kitchen. Once the sauce was cool, we ladled it into quart sized freezer bags. We marked each with the date and whether it was sweetened or unsweetened. The applesauce is great to eat as is, or warm with a scoop of vanilla ice cream (oh my!). We can also use it in baking cookies, muffins, breads and brownies. 
We also made some amazing apple juice. I hope to eventually get my hands on a cider press, but they are so pricey. For now, my dad and I both supplied our juicers. We juiced the cores and peels and ended up with several gallons of juice. This went into one-gallon freezer bags to drink warm during chilly winter evenings.

Any rotten apples as well as the pulp left over from juicing went into the compost bin. How wonderful to know that none of the apples grown went to waste!

I look forward to this day every year. It's a great way to spend time with my family. We also all get to have some amazing organic applesauce and juice almost for free. Not only that, but we are also learning about food preservation and increasing our self reliance.

Reposted on: Homegrown.org

And an expanded version is published here: Homegrown.org Five Ways to Preserve Apples


Shared with:
13 Heritage Homesteaders Hop #3The Self Sufficient HomeAcre

Sunday, December 11, 2011

How to Have a Lower Gas Bill

Shortly after the first winter gas bill arrives, many people vow to keep the thermostat set lower to avoid paying a third of their income to the gas company. If these lower temperatures are too uncomfortable, the thermostat will quickly be adjusted back up to its normal setting. Even if not, no one should spend an entire winter feeling cold, uncomfortable and possibly sick. There are some ways that you can feel more at ease in a lower temperature.

Drink lots of warm beverages. Hot tea, coffee, hot chocolate, hot cider, and warm lemonade are all great beverages to warm your insides. And a shot of whiskey is wonderful on a frigid night.

Crochet/Knit an afghan. Working with the yarn will keep your fingers warm, and you can snuggle under the work in progress as you go.

Move your bed. Move your bed to an interior wall, rather than an exterior wall. The exterior wall puts you closer to the elements, and subjects you to drafts. By putting your bed on an interior wall, you are closer to another warm room instead. If you live in an apartment, this can be a great way to lower your bill. My neighbors run their heat constantly, so I move my bed to a wall next to their apartment and make use of the heat wasted. One winter, I only had to turn my heat on three times.

Switch your bedroom. During the summer months, I sleep in one room of the apartment that has lots of big windows so I don't use the air conditioning. During the winter, however, I move my bed into another room that has smaller windows. There's fewer drafts and it is upstairs which works great as heat rises.

Wear socks constantly. Cold feet are one of the greatest trials of winter (besides digging your car out of a snowbank, catching a cold, and paying the gas bill), so by keeping those toes warm, you can bump the thermostat down a bit. Get thick wool socks for the greatest benefit. If you are a knitter/crocheter, you can buy wool sweaters when you find them cheap, unravel the yarn and make your own!

Eat appropriate foods. This is not the season to eat ice cream. Period (unless it's your birthday, then it's a judgment call). You also should avoid any frozen blended drinks, cold cut sandwiches, jello, pudding, etc. Soups and stews are perfect as they are warm and yummy, and you can cradle the warm bowl in your hands.

Bake lots of goodies. During the summer, baking isn't very pleasant as it requires excessive use of the air conditioning to compensate for the heat lost from the oven. In winter however, that heat is wonderful! So plan a day of baking and enjoy the warmth of both the kitchen and the yummy breads and sweets. You can freeze some to eat during the summer when you don't want to bake.

Try to stay active. You may be stuck inside, but you can still be productive. Tackle those tasks you mean to do all year long, cleaning out the closets, organizing the pantry, high dusting, caulking around windows, cleaning out closets. You'll warm up quickly, and by staying active you'll be better able to battle the winter blahs.

If you have to be still, cuddle under a blanket. You can find afghans and lapghans at thrift stores for a few dollars.

If you have a big house, use a space heater (while you are awake and in the room) close to where you are, so you can turn down the thermostat significantly. Your electric bill will be a bit higher, but if you use it correctly, your gas bill will be lower. Turn down the thermostat for the rest of the house down significantly, say to around 45-50 degrees. Don't run the space heater on high constantly, turn to low or medium as you can. If you live in an apartment, this will likely not be of much use to you. If you work from home, this can be a great way to stay comfortable.


Turn down the thermostat significantly when you leave the house. If you'll be gone for more than an hour, turn it town ten degrees or so. The house will be a bit uncomfortable when you first arrive home, but the savings on your bill will more than compensate. The U.S. Department of Energy says that for each degree you turn down your thermostat for 8 hours, you'll save up to1% on your bill.

Exercise. Winter tends to lead to weight gain since you're cooped up inside all the time. Battle this by lifting hand weights, walking up and down the stairs, doing pushups or situps or jumping jacks/rope. You'll not only save money by not buying new clothes, but you'll feel warmer.

Dress for success. If you think that you can wear shorts and a tank top in winter, you deserve to be cold. Instead, wear warm pants, a long sleeved shirt or two, thick socks, and maybe a hat.

One of the great, beyond money benefits is health. I've found that when I keep the thermostat set at a lower temperature for a winter, I get sick fewer times than in previous years. I am not walking out of an 80 degree house into 5 degree weather, which is definitely less shocking on my body.

Shared on:

Monday, September 12, 2011

Early Winter Preparation

I know, I shouldn't be talking about it. It comes quicker every year. Like it or not, winter will be here soon, but it is never too soon to start getting ready. I start preparing for winter early on in the season,  to keep my family warm, safe and comfortable. There are many little steps that can be taken and most will not take much time at all. Start now so that when winter comes, you are warm and cosy.

* Caulk around drafty windows and doors. To check for drafts, close all windows on a windy day, then hold a lit candle up. Move it slowly around the border of the window. If the flame flickers, you've got a draft.

* Make draft busters for all doors. These can easily be made by using a leg from an old pair of pants, tying on end closed, stuffing (with anything from a rolled up towel, scraps of yarn, old rags) and tying the other end closed. Just lay them at the bottom of the door-either the outside door, or to a room that you want to keep warm (or cool) so air doesn't move between rooms.

* Start shopping for more blankets. Thrift shops and any yard sales still going on will have them at good prices. If you wait until winter is here, the selection (and price) will be less desirable.

* Make blankets. If you craft, make an afghan, quilt or blanket.Since it takes forever to crochet an afghan, starting now will allow you to cuddle under the length of it while you finish it later.

* Stockpile food. You don't want to be one of those people crowding at the grocery because there's a storm on its way. Stock up when you find something on sale and have a coupon. Fill the freezer with meat and veggies. Have some canned foods that can be heated for easy meals if you can't get to the grocery.

* Evaluate your wardrobe. Do you have warm pants, long sleeved shirts, flannels, warm socks, scarves, a good coat with no rips, winter boots that will repel water and keep your toes warm, ear muffs, hats, and gloves or mittens that actually block the wind? Find your weaknesses and fill them with thrift store finds. Once November gets here, you won't be able to find this stuff easily at thrift stores and you'll be forced to buy new.

* Take care of the house and lawn. Any odd jobs that need done around the homestead should be done sooner rather than later. Mend the fence, fix the roof on the chicken coop, clean out the dryer vent. Get it all out of the way so you won't have to think about it when it's cold.

* Get a new apartment. If you are in the market for a new apartment that you'll be in this winter, it is worth considering your utility bills. Since heat rises, look for a second or third story apartment so you can take advantage of your downstairs neighbor's lost heat. Consider if the bedroom is against an interior wall or an exterior wall, as the exterior walls allow a lot of cold in. Consider where the air will flow in when you open the door. In my current apartment, the front door lets in a lot of air directly into the room I sleep in, which will not work during winter.

By getting a few of these little jobs out of the way now, you can lower your bills and increase your comfort levels during the frigid months.

Happy living!
Related Posts Plugin for WordPress, Blogger...