Showing posts with label frugal food. Show all posts

Sunday, August 27, 2017

Flavoring Mixes for Popcorn

I have a new favorite snack: flavored popcorn. Somewhere in the last few months, we had started eating chips. While I suppose the occasional Pringles pop isn't going to kill anyone, I didn't want to eat high fat/salt/sugar snacks and pay a lot for the privilege. We eat popcorn a lot as a cheap and healthy snack, but it got boring for me. Trucker eats his with salt and butter and is quite happy. As a self-declared frugal foodie, I need some variety, some novelty, some spice.

When we went to the Amish grocer, I checked out the spice blends they offered and I'm so glad I did! Their bulk prices are amazing and they had a decent range of blends. I got a fairly large container for around $2.

I got my cheddar cheese powder (which is seriously one of the greatest things ever), bbq seasoning and a honey mustard powder. My favorite store bought snacks are bbq chips and honey mustard pretzels.

When we popped popcorn with our air popper, I spritzed with some oil and the added a generous sprinkling of bbq seasoning. It tasted very similar to bbq chips. Granted, it didn't have the same texture and not quite the same flavor (I think the main thing is that this is less in fat), but it was pretty darn close. The honey mustard popcorn has since become my very favorite snack.

I use cheddar cheese powder on popcorn, sometimes adding taco seasoning for a nacho popcorn. I also have a zesty dip powder I got at the salvage grocer that is pretty tasty on popcorn.

I can't wait to get back for more yummy flavors. Buffalo. Chipotle Cheddar. Thai Chili. Cajun. Jerk.

Granted, I could make my own mixes. However, with my busy work load, I have noticed that the convenience foods are becoming more tempting. For me, I find that sometimes picking one convenience item is acceptable when it prevents a more unhealthy alternative (pre-made mixes for flavored popcorn compared to store-bought chips). I love being able to have just as many options in my flavored popcorn as there are store-bought chips. I get my novelty, but a little bit healthier and a lot cheaper.

Beckie on Facebook shared: I bought a bunch of ranch dressing packets on sale at our local store and I've used that on popcorn too, delish!

Kathy shared: My kids like it with cheap lemon pepper seasoning.

Sunday, July 23, 2017

Pepper Poppers

Pepper poppers are one of the cheapest and easiest appetizers you can make. They are also incredibly popular and go well whether you are serving a taco bar or having a party for a sporting event. They don't take long to make and can even be assembled in advance and tossed into the oven a little before guests show up. My garden is producing loads of peppers this year, and this is a great way to use up a bunch. The farm stands also have them pretty affordably as well. When peak pepper season is on, I like to core whole peppers and freeze them.

Jalapenos are my go-to, but I also use small hungarian hot wax, large padrons or shishitos, sweet banana, mini bells and lunchbox or other small sweet peppers. Depending on the size of the pepper, ease of removing the seeds and desired presentation, I'll either core them out and shake out as many of the seeds as possible or cut in half longways and scoop out the guts. Reminder: Don't forget to wear gloves if handling hot peppers.

I don't use a recipe, I just guesstimate based on what I have that needs used up. I will use sour cream, cream cheese or cottage cheese, as I have it. Sometimes if I have a little bit of a creamy dip I'll use that as all or part of the creamy addition. I'll also use up little bits of salsa or hot sauce. Sometimes I'll mince onion in. If the filling needs some oomf, I'll use either a packaged seasoning blend or just add some black pepper, salt, chili powder, onion powder and granulated garlic. Blend all well, then put into a piping bag or sandwich bag and cut the tip. Squeeze the blend into the pepper. If you are using frozen peppers, you don't need to even thaw them. Just fill when frozen and bake a little longer than you otherwise would.

I place them all in a baking dish, overlapping some. Sometimes I cover them all with enchilada sauce or cheese. Sometimes I leave them plain. I bake at around 350 until the peppers are soft, around 30-40 minutes. I often use the toaster oven to keep from heating up the kitchen.

These are always popular and disappear fast. If I do have any leftovers, they are great for my work lunches and I think are even better chilled.

What are your favorite frugal and easy appetizers or sides?

Saturday, July 15, 2017

Basic Galette, Pie, or Tart Instructions


When I teach someone to cook, I like to teach a skill rather than a recipe. If you learn a recipe, you know how to make one dish, but if you learn a skill, the whole world opens up. When teaching a newbie to cook, I often make Goldenrod Eggs. That teaches two important skills: how to hard boil an egg and how to make a bechamel. From those two skills, you can make a wide variety of dishes for a wide variety of circumstances.

When I teach someone to bake, I aim to do the same thing and galettes are the perfect intro to baking. Even for someone who has been baking for years, the endless variations make this one of my favorite dishes to bake. The hardest part of this recipe is making a good pie dough, but even if you take the cheater's way out and buy a pre-made crust, it will still turn out good. (Moment of confession: I did use a store-bought crust once because I was doing my last-minute grocery shopping for company coming over in a little over an hour). The recipe is super flexible and can be modified in a nearly infinite number of ways.

First, make a nice pie crust. I always use the King Arthur recipe: 2 c AP flour, 1 T sugar (leave out if making a savory dish), 1 t salt,  2 sticks of butter cut into pats, 1 egg, 2 T milk. If it is really hot, you can toss the ingredients into the freezer to prevent the butter melting (which would result in a tougher, less flaky crust, which no one wants). Sift together AP, sugar and salt, then cut in butter just til it holds together if you squeeze it, but you still want to see little lumps of butter as this will result in a flaky crust. Gently mix in the egg and milk just until moistened and no more. Divide in two, shape, wrap and let it rest in the refrigerator for at least a half hour or up to 2 days. You can freeze if desired. I've found that this batch of dough will make several galettes, so freezing the extra can make it much easier to whip up a dessert later.

Generously flour your work surface and roll out your dough to roughly 1/8 inch thick (it doesn't have to be perfect). When making galette, I usually pull off a chunk of dough and roll it into a really rough circle, about 8-9 inches across. Once I have the dough rolled, I put it back in the refrigerator to rest while I make the filling.

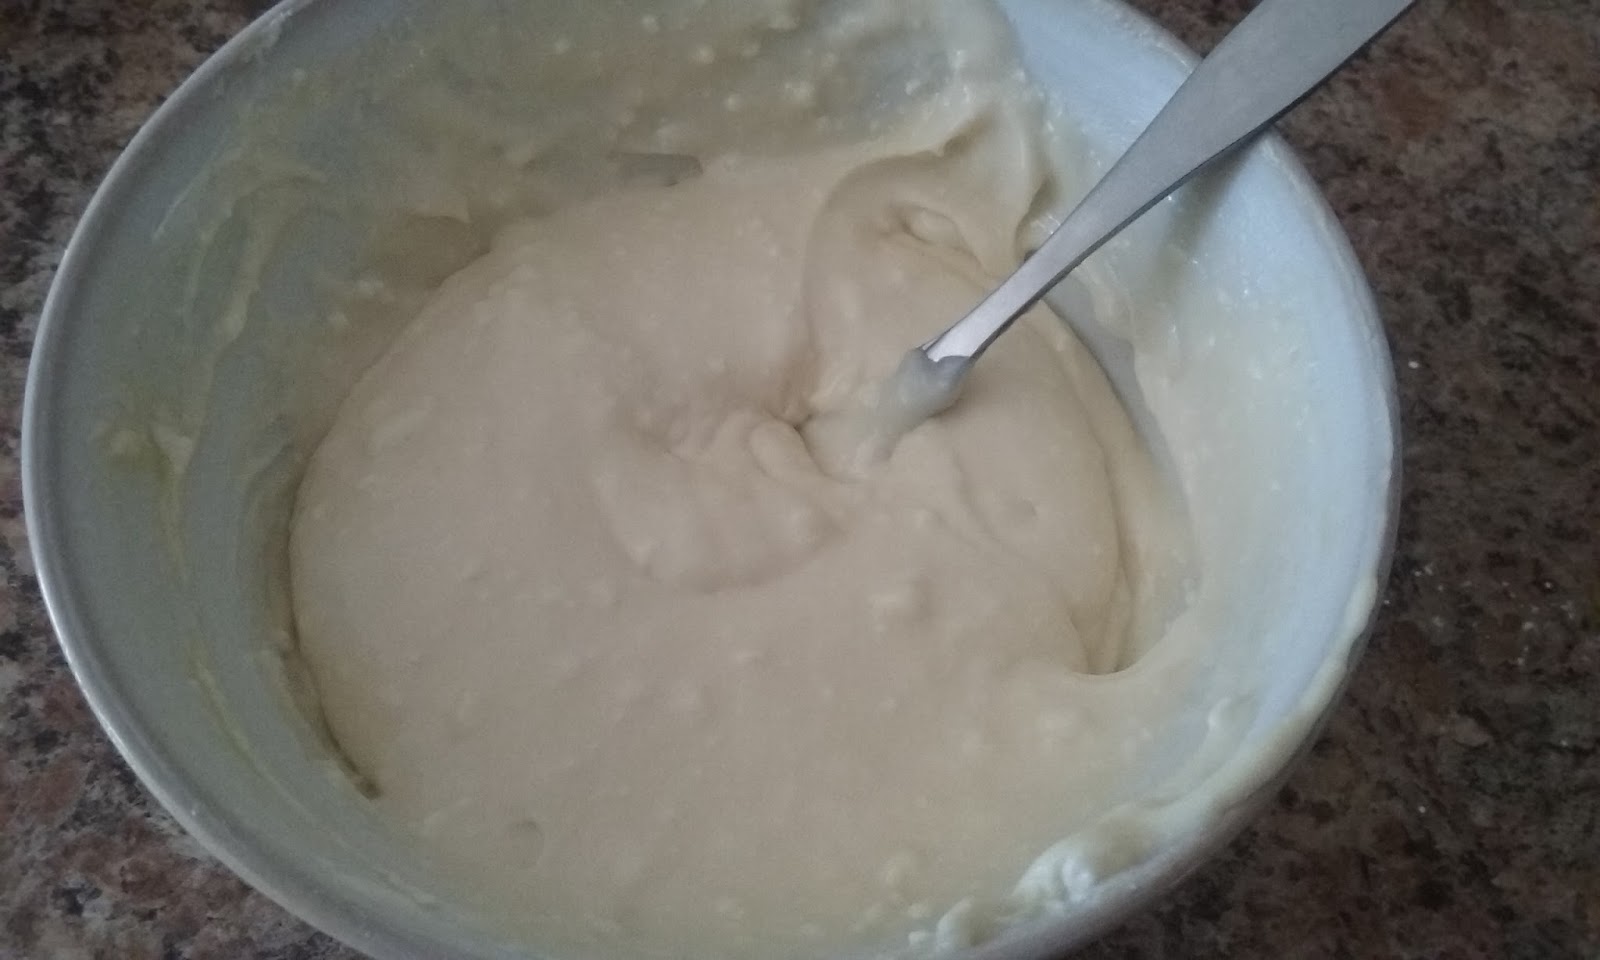
I use a basic cream cheese filling for a lot of my fruit galettes. I can't remember where I found the recipe originally, but most recipes are just variations of this recipe: 1 8-oz package cream cheese, softened, 1/2 cup sugar (leave out if making a savory dish), 1 egg and a tsp of vanilla. This recipe is pretty flexible. You can use a little less cream cheese or a little more egg or reduce the sugar and it will still turn out. Beat together well. If you do it by hand, it will feel like it is taking forever, then all of a sudden it is ready. It doesn't have to be perfectly smooth and it will still bake fine. This recipe is enough for 2-3 galettes and it stores well for a few days in the refrigerator. If you want to make a smaller batch, just halve everything and you can either use the full egg (I've tried it and it works fine) or use about half the egg and use the other half as an egg wash (which makes for a great color and allows you to sprinkle the crust with some grainy sugar). This filling is really forgiving which is why I love it.

I spread a layer of filling over the middle of the dough, leaving about an inch around the edge. You can do a thin layer (makes for a less filling dessert) or thicker (cooks up fine and you can serve smaller slices). Layer on some fruit. Basically use whatever you like that you have on hand. I love to use apples or peaches. Sometimes I mix a variety of fruits, placing in a pretty design. Whatever you do, either slice thin (pears, apples, peaches, plums) or cut in half (larger blueberries, cherries) if needed so they cook through. Smaller berries can be left whole.

Fold over the extra dough around the edges. Don't make it too pretty. I like having some variation. Some slices of galette have less crust, others more so everyone can get a piece they like best (I like the extra flaky crust). Plus if you try to make it perfect, you really need to make it perfect. If you aren't trying to make it perfect, there's less pressure. Every little "mistake" just gives it more rustic charm.

If you'd like, you can brush some egg wash onto the edges and sprinkle with some grainy sugar. The egg wash will give a nice shine and color to the crust, but left bare it has more ruggedness.

Bake in a preheated oven at 350 degrees for 25-30 minutes, or until golden brown. You want the bottom to be nicely golden as well.

Beef Pot Pie is an easy way to give
life to leftover beef stew.
I love how flexible this recipe is. If made free-form and flat, you have a galette. You can make a rustic pie by quickly placing the dough in a pie plate and coarsely folding the excess pie dough back in. You can make a large tart or little tartlets. Put the filling on just one half, then fold over, crimp the edges and you have a hand pie. Roll dough into a rectangle, cut into smaller rectangles, put filling on one and top with another rectangle and you have pop tarts. Put into a pie plate and add a savory custard for a great quiche. Put in a pie plate, add some leftover beef stew and cover with another layer of crust for a quick beef pot pie.
I placed some curly garlic scapes
on top of this quiche for great
presentation as well as flavor.

 The basic cream cheese filling goes brilliantly with a variety of fruits, or you could leave out the sugar and make a savory galette. It would be perfect to mix in some fresh herbs or scallions before layering on some roasting tomatoes (especially heirlooms in a variety of colors), caramelized onions, bacon, ham or asparagus. Garlic scapes or fern fronds would make unbelievable presentation.

You don't have to stick with cream cheese filling. I like to use a goat's milk caramel when I make apple galettes. Try real maple syrup, honey, jelly or jam. Spread nutella on the dough under strawberries.

Use fresh fruit. Use frozen fruit. Cook down some overripe fruits into a lovely compote. Add nuts. Make a streusel topping. Sprinkle with cinnamon. Sprinkle with salt and freshly cracked pepper if making a savory dish or sprinkle some cheese around the edges.

Make it your own. Make it for breakfast, brunch, a light lunch, appetizer, dinner entree or dessert. Make it tonight!

Have fun baking!

Thursday, May 18, 2017

Grocery Shopping While Travelling

Coming from someone who values locality in food, this seems heresy to say, but sometimes my food travels. Or rather, when I travel, I look for local food to take home with me. I don't travel far away and I never fly. I do take day trips to see family an hour or so away, and I take weekend trips within the state or maybe the state over. When I do, I look for opportunities to enjoy local or "exotic" food at a good price, and bring it home. The gas consumption is minimal since I'd be taking the trip anyway, so perhaps a tiny bit extra for the extra weight (although I'm sure 10 pounds of food isn't adding to my gasoline consumption too much).
When I visit my parents an hour away, I visit a favorite grocery store. It's a scratch and dent grocery and it's phenomenal. I find organic cereal for $.33/box and whole grain pasta for $.59/lb. Every so often, I find ends-and-pieces of local jerky for $5.99 for a 5 lb bag. However, since it is an hour away, I don't make a special trip just for that store. It's only ten minutes from my parents, so I stop when I'm already out that way. The savings over buying those items at the grocery store is more than the cost of gas, meaning I essentially get paid to take the trip out there. Win.

When we drive out to the boonies to go for a day-hike, I like to stop at farm shops and roadside stands to get the local's garden surplus. Just outside my favorite state park, there is a little roadside stand. The offerings are just whatever the home-gardener has a surplus of, but it's fantastic produce and a great price. $1/lb for tomatoes, $.50/large squash, $.25/zucchini or small squash. I prefer my money to go to a real-life family, rather than some grocery store.

When we took our honeymoon to Amish country a few hours away, we really hit the food jackpot. There were several scratch n dent groceries. We bought pasta and canned veg at bargain prices. We drove by a grain mill that sold whole wheat flour at the same price per pound that white flour cost in our city. We bought a few bags, and tossed all in the freezer upon returning home. Our honeymoon package included a $150 gift certificate good at the inn's restaurant, bakery, gift shop, or general store. We ate our meals at the restaurant. On the last day, we had over $100 left. We went to the bakery and got a few loaves of bread (some for the freezer) and a few sweets. Then we went to the general store and spent the $90 left on jams, jellies, coffee, tea, pasta,spices and bags of trail mix.

When we go to Chicago to visit family, we have a few stops that we have to make, mainly to bakeries. One bakery sells cookies for $.20 each and sub rolls for $.33. A few ethnic bakeries offer some of our favorites that we can't find here, and don't (yet) know how to make. This provides a little splurge, but at a discounted price. We'll sometimes stop in Chinatown for our stockpile of herbal teas and other items, or we'll stop by a neighborhood with a fantastic selection of exotic produce at bargain prices.
By keeping our eyes open when we travel, we're able to get great scores on food. We often save money over buying more exotic selections in our town, and we get to try lots of new things without the cost of going to a trendy restaurant. Often, the grocery savings is close to the cost of gasoline, thus making our trip less expensive. Whenever you venture away from your neighborhood, keep your eyes peeled for some fun, new food adventures.

Sunday, February 12, 2017

The Veggie Snack Box

Trucker and I are both prone to rampant snacking. Generally this is when we are either bored or hungry but too lazy to cook anything. During those times, it is all too easy to grab chips, candy or cookies. And we all know how easy it is to snarf down a while tin of Pringles in one sitting (just me?).
Daikon and watermelon radishes,
celery, purple/orange carrots
As a preventative measure I've started prepping vegetables for easy snacking. This takes the effort out of prep during those lazy moments. Simply cut everything into an acceptable snack-sizes pieces. I like to do this while doing meal prep since I already have all the tools out and am in a groove. It takes an extra minute to wash a few extra stalks of celery or chop a couple extra carrots into coins.
Tiny French Breakfast radishes can be kept whole after trimming

I use whatever I grow or whatever I find cheap. At farmer's markets and farm stands, the best bet is to get whatever is in peak season. If everyone has it, the price will be lower than if it is an early harvest. Aldi often has great bargains on produce (I often find $.25 cukes). A "foodie" grocery in my area is kind of pricey, but they have outrageous produce bargains to get you in the door (things like $.50 bunches of radishes). Sales at the regular grocery store can yield good results. If your store has a manager's special produce rack, definitely check it out; just make sure the items aren't too far past their prime. Also check the prepped produce section. I often find fantastic prices this way and the work is already done! Buy items however they are cheapest. Sometimes I find that baby carrots are half the price per pound compared to full carrots; other times it is the opposite. Sometimes the cleaned, topped and bagged radishes are cheaper than the bunches with tops; other times I buy the bunches and use the tops in my cooking greens. The important thing is flexibility. Use whatever is cheapest that you like and get a good variety so you get a broad spectrum of nutrients.
Hakurei turnips, purple carrots
white radishes

We use a wide variety and the mix is always changing: radishes, celery, cherry/grape tomatoes, carrots, sweet peppers, hakurei turnips, cucumbers, certain summer squashes, sweet peas, young green beans (this was my favorite snack as a kid on the farm. My parents always planted the green beans next to the corn. My friend and I would hide in the cornrows and sneak the beans as soon as they were a few inches long. My parents never knew why all their beans did well except that one row, every year), broccoli, cauliflower, asparagus, fennel, mushrooms, baby corn, scallions, kohlrabi, winter squash (I still don't know why more people don't snack on this raw. It has great texture and incredible taste), parsnips, or even chioggia or touchstone beets (don't use the traditional red beets as they stain everything, including your fingers).

Cherry tomatoes, vine ripened, are the ultimate snack food.
I keep most items mixed together in a container in the refrigerator. The exception to this is tomatoes. I refuse to use tomatoes larger than a large cherry since those require refrigeration after cutting and refrigerated tomatoes are an abomination. Tomatoes are washed and then kept in a cute shallow bowl on the counter.

It is more convenient to grab one of these containers and head back to the desk rather than to get a bag of chips (which I conveniently keep at the very top shelf near the ceiling so it can barely be reached without fetching a step stool). If we are going to take a road trip, we grab a large container and will easily hit our 3-5 servings by the time we arrive at our destination. Sometimes we will pile a bunch of items on a plate and watch a movie, while munching on crunchy snacks that aren't loaded with salt and fat. It also helps if I am making dinner in a hurry. The veggies are all chopped to roughly the same size, so it is nothing to toss into a skillet to saute and  serve over rice or pasta, toss into stock for an easy soup, or toss with olive oil and seasoning for a quick side of roast veg.

Our epic date night snack while playing board games:
 lunchbox peppers, Hakurei turnips, purple carrots,
 pickled Jimmy Nardello peppers, watermelon radishes,
cheddar cheese,  some caviar we found for a whopping $1.99
at the salvage grocer and  some store brand crackers.
This has helped us get a lot more produce into our diet, while at the same time reducing the unhealthy snacks that are too easy to indulge in. I've also found that since we use items we grow or find cheaply, it is much cheaper than any other snack food. We love the convenience and knowing that we are actively creating a healthier future with lower medical bills.

Thursday, November 24, 2016

Frugal Snacks: English Toffee

Every winter, I read over my copies of The Tightwad Gazette I, II, and III. They revamp my commitment to frugality, give me new ideas and help me think more creatively about my daily doings.

While I was rereading them, I found a recipe for English toffee that for some reason I hadn't tried, and wow! I can't believe I haven't been making this before!  It is unbelievably easy, frugal and delicious. Here is the basic recipe, along with ideas for changing it up a bit for variety. This is a great, easy snack to whip up for dessert, for company coming over or to give as a gift.

* 1/2 cup butter
* 3/4 cup packed brown sugar
* 1/2 cup chocolate chips (or shaved chocolate of any sort)
* Optional: nuts such as almonds, walnuts, peanuts, etc, chopped.

Grease a 8x8" baking dish (or use whatever baking dish or pie plate you want. Bigger will give a thinner toffee, smaller will give a thicker hunk of candy). If you want to add nuts to the toffee, sprinkle them on the bottom of the dish.

Over medium heat, cook the butter and brown sugar, stirring constantly with a rubber spatula. Remove from heat immediately once it starts to smoke (7-9 minutes). Be extremely careful not to spill this super-hot mixture on anyone as it will burn like the dickens. Don't allow to cook after it starts to smoke or it will burn. Immediately pour the toffee mixture into the baking dish. Spread with the spatula as needed to cover the bottom. Add chocolate chips to the top and cover with a plate or cookie sheet so the chocolate will melt. Once it has melted, spread smooth with a knife or spatula. Garnish with more nuts if you want.

Allow to cool completely. Once cool, break into pieces. You can score the toffee while it is still hot to try for more even pieces, but I never bother.

This stuff is addictive and lovely. It is a great gift item. For me the cost is very affordable. I buy butter when it goes on sale for $2/lb, so the cost is $.50. I buy brown sugar for $1.50/2 lbs. Each pound contains about 4 cups, so the cost is around $.14 for the sugar. For the chocolate, I used some semi-sweet baking cocoa squares that I got at the salvage grocer for $.99/4 oz. I used half of it, so that cost $.50. So not including nuts, I spent $1.14 for a batch of candy.

Variations and ideas (Use plain toffee without chocolate if desired):
* Don't add chocolate to the top. Once toffee is cool, break into pieces and dip into melted chocolate, either completely or just half for pretty presentation. Or you could drizzle with dark, milk or white chocolate (or with some of each).
* QUICKLY drop the hot toffee mixture into circles on a baking sheet for pretty round candies that can be decorated with chocolate, nuts, etc.
* You could use sprinkles on the melted chocolate for decoration.
* Use small broken pieces as an ice cream topping.
* Add broken pieces to milk shakes for a Blizzard type dessert (Heath candy; caramel apple, etc).
* Pour toffee and then chocolate over saltine crackers.
* Add coconut and/or dried fruit.
* Pour into candy molds for adorable gifts.
* Make into candy bars.
* Add bits to brownies or cookies or to decorate a cake.
* Pour over pretzels and peanuts.
* Add M+Ms to the top of the melted chocolate.
* Add to cookies or shortbread
* Add to homemade ice cream
* Add bits to the top of a caramel apple cheesecake.
* Add bits (without chocolate) to banana bread
* Add bits to biscotti (or use to garnish after dipping in chocolate)
* Add bits to caramel popcorn.
* Use bits to garnish chocolate dipped pretzel sticks
* Use bits to garnish cake pops
* Add to caramel apple scones
* Add bits to cinnamon roll filling

This is an easy introductory recipe to candy making, so feel confident. I've made it a dozen times and only once did it not work perfectly (and that time I was trying to quadruple the batch, so I think that was the issue). It makes a perfectly delicious and frugal gift.

Monday, April 4, 2016

Healthy Snacks: Pumpkin Pie Pudding

I discovered a fantastic recipe recently. It is a frugal, easy and healthy recipe that provides a good portion of beta-carotene. I found the recipe in an old cookbook called Homemade Snacks by Nell B. Nichols from Farm Journal. I was excited to try it because last year I got a dozen or so large cans of pumpkin puree on manager's special for $.25 and they are getting a little too far past sell-by date.
Pumpkin puree is a fantastic thing to put into pudding. It doesn't detract from the flavor or sweetness of the butterscotch pudding, but only has 80 calories per cup (compared to 260/cup for pudding). It contains no fat (compared to 5.6 grams in pudding), no cholesterol (1 cup of pudding contains 85% of the cholesterol you should eat in a whole day!), 10 grams of sodium (versus 436 grams in pudding) and very little sugar (8 grams vs. 41 grams). It also adds a whopping 10 grams of fiber, which is something Americans are desperately short on (and honestly, given the horrific health issues that can result from a low-fiber diet, we'd all do better to add as much as we reasonably can) and a moderate amount of protein. Due to the beta-carotene and other antioxidants, they may help the eyes, reduce cancer risk, and protect the skin. It also contains a good amount of Vitamins C and E, potassium and iron. In short, it is a fantastic thing to include in the diet, especially when it helps you cut back on something less healthy.

This recipe uses boxed pudding mix, although you could certainly use from-scratch pudding as well. I used the boxes pudding for a couple reasons. One: I got the boxed mix on a really, really good sale and have a lot in the stockpile. Two: I know that nutrition and cost have to be balanced with time constraints. The way I see it, while this uses a processed food, it is a reasonably nutritious snack and, being so simple to make, it is just as easy as buying pudding packs. This makes it realistic for working moms to make for kids lunches, or for anyone who wants a yummy dessert but who is short on time. It's one of the simplest desserts I've made.

Basically, you make a package of butterscotch pudding according the package instructions. Then you mix in 16 oz of plain pumpkin puree, 1 tsp of pumpkin pie spice (or to taste) and mix it together. Allow to set up in the refrigerator. It won't set up as solid as straight pudding, but has a good texture.

To serve as Pumpkin Pie pudding, simply top with some crumbled graham crackers and a bit of lightly sweetened whipped cream. I also love to top it with vanilla ice cream. With or without crumbled graham crackers. With candied pecans. With a sprinkling of cinnamon. With a drizzle of caramel sauce. You could also use dried and crumbled leftover sweets like snickerdoodle cookies. Or add a pie crust cookie.

Sometime soon I want to try making this into a frozen pie. I think I'll bake a graham cracker crust, then fill with the pudding mixture and freeze. To serve, I'd add a scoop of vanilla ice cream. It might be something fun to try.

Don't stop at pumpkin and butterscotch pudding. There are lots of fun ideas to try. Replace the pumpkin puree with cooked and mashed carrots or butternut/acorn squash. Maybe use applesauce and a caramel pudding. Use vanilla instead of butterscotch. Maybe even try chocolate. Add leftover mashed sweet potatoes. There are lots of ways to sneak veggies into dessert.

Most of us aren't going to give up having dessert just to be healthy. However, looking for ways to limit fat and sugar while adding nutrients will help us be healthier without feeling deprived.

Shared on:
   Wordless Wednesday Hop

Thursday, June 11, 2015

Summertime Food Scrounging

I don't know if it's some leftover primal urge leftover from our hunter gather days, whether it's the excuse of getting out into the sun, or maybe just a bit of wild desperation for nature after a long, cold Ohio winter has kept me under lock and key for months. For whatever reason, when the days are getting warm, I get to food scrounging.

Over winter, I eat a lot of foods that I put up over the previous warm season. Smoothies are made of frozen berries foraged in the neighborhood. Work snacks are crabapple candy, delicious sweet-sour treats of dehydrated "waste" fruit. Soups are made of a handful of this dehydrated goody and that bag of frozen greens and that ham bone that's been waiting in the freezer for a chance to shine. By the time June comes along, the pantry is a little more bare, the selection a bit more paltry. So out I go to restock the larder and prepare again for the cold days that will come.

Anyone who follows this page knows that I have two primary ways to cut my grocery spending: gardening and salvage grocery shopping. Both are fantastic ways to trim back the budget. Gardening requires little money, but lots and lots of time. Salvage grocery shopping takes little more time than regular grocery shopping, but still takes a fair amount of money. So while foraging doesn't make up a large percentage of the yearly calories, it is a worthwhile pursuit. It takes little time, compared to a full season of gardening, and it takes absolutely no money. It also adds lots of variety to the diet that would otherwise be impossible. Wild foods are very nutritious and can be delicious.

Starting out in early spring, but still viable in early summer, is foraging for wild greens. They are best early, and by this time of year (June) are a bit bitter. However, even now, they're worthwhile, especially if the bitter greens are going into a robust dish with lots of garlic and cream. Dandelion greens are the best green to get started with simply because everyone knows what dandelion looks like. You don't have to worry about accidentally poisoning your family (provided you pick from a yard you know is unsprayed). Harvest those dandelion leaves when they are tiny and haven't flowered yet for the tastiest treat. Once they flower, they are tougher and more bitter, so you'll want to use them in cooked dishes, rather than fresh salads.
Creasy greens with a baby bud in the center.

I also harvest creasy greens. These are a southern favorite that should be a northern favorite too. I love them steamed or tossed into a stir fry. Once they send up a flower stalk, stop harvesting the leaves, but then, oh then, you get the stalks. They look like mini broccoli stalks and taste like a wilder broccoli. Trucker loves broccoli, but I've never been able to grow it in my garden. This year I only harvested enough for us to eat fresh, but next year I plan to freezer in meal-sized portions for winter.

Research the wild greens that grow in your area, sample them and harvest bucketloads of the ones you like. To preserve them, simply steam them until they wilt, then cool and pack into freezer bags. Depending on family size, you can pack 1, 2 or 4 cups into each bag. Freeze flat for maximum storage in the freezer. Pull out a bag at a time to reheat as a steamed vegetable, add to omelets/frittata/quiche/souffle, or mix into a dip, similar to spinach dip but with free greens. Creasy green flower buds can be steamed or boiled a couple minutes, then dunked into an ice bath before packing in freezer bags.

Dandelion flowers can be fried for perfect fritters or the petals added to fresh salads. If you want to fill your larder with them, think of dandelion wine, dandelion jelly or dandelion syrup.

Edible flowers (Violets, Grape Hyacinths) add pretty color
to salads. Candied violets are great for cake decorating.
If you live in morel country, then it is the best foraging to be done. Nothing, absolutely nothing compares to a morel. If you have good huntin' ground, eat as many as you can fresh, as this is the best way to enjoy them. If you are really lucky and get a huge harvest, you can dehydrate them to use in winter. I once saw dried morels for sale for $230/lb.

Violets are edible and prolific, at least in my garden beds. You can eat the flowers or leaves in salads, or you could steam and freeze the greens. The flowers can be added to tea blends, mixed into sugar for a floral note for teas, or candied for decorating desserts.

Then it's berry season. For me, that means mulberries. When I was a kid, my grandma used to take me out mulberry picking. We'd pick bushes of them. After a long day of picking, Grandpa would come home and we'd all sit down to bowls of mulberries with milk. It's still my favorite way to eat them, but I do preserve some for winter. There are two main types of mulberries: red (which ripen to almost black) and white (which start lime green and fade to white when ripe). Then there are hybrids which can be pink or white with purple frosting. I prefer red berries to all other kinds due to the taste, but the other kinds don't stain the hands as badly. To harvest, you can pick them by hand, but it is labor intensive and wasteful. When mulberries are fully ripe, they fall off the tree at the drop of a hat, so if you pick one berry, five more fall to the ground. Instead, lay down a sheet or a blanket you don't care about. Gently shake the branches over the sheet. The perfectly ripe berries will fall onto the sheet. just grab the corners to pile the berries together, then bag up. This makes harvesting a breeze and you can get a whole tree harvested in twenty minutes. You can also harvest wild blackberries or raspberries if they grow in your area. These taste fantastic and you'll love them more than anything sold in stores. I freeze them on cookie sheets; one frozen solid, they are packed into freezer bags to dump a little at a time into smoothies or to eat as a chilly snack later on in summer.

Plantain seeds air drying on a cookie sheet.
Broad-leaved plantain is an edible green, but also provides some healthy seeds. When the stalks are mature and the tips of each seed is starting to turn slightly brown, I harvest them by the handfuls. I strip the seeds from the stalk by gripping near the top and pulling back to the base while holding it over a big bowl to catch the falling seeds. I don't worry about the immature seeds at the top. It doesn't add up to a lot, but it is nutrient rich and provides good variety. I use them in teas for respiratory problems sometimes, but often, I just crush some seeds into any baked goods/pizza crusts I'm making for extra fiber. It provides nominal cost benefits, but good nutrition. It also is nice, relaxing work for a warm evening with a beer on the patio, so I continue to do it.

Any and all surplus greens from the garden, and some wild greens are preserved into green powder. This bitter-as-heck powder has nothing going for it, flavor-wise, but is a healthy addition to the diet. I use greens with bad texture, like the full-sized greens on a radish bulb, carrot greens or tough dandelion greens. I dehydrate them until they are bone dry, then crumble them by hand or in the blender until they are a course powder. This powder is a nutritional powerhouse, and is an easy addition to meatloaf, casseroles, green smoothies, even brownies, anything that could use a little more veg. I try to limit its use to dishes with strong flavors to mask the bitterness. In winter, even that bitterness is welcome when there is such a limit to veg.
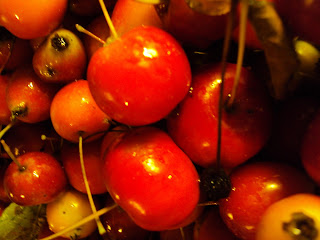
Crabapples waiting to be processed.
All season long, I keep an eye out for feral fruit trees. I know of countless crab apple trees, several apple trees, and 3 pear trees. All of these trees litter the sidewalks of hapless homeowners who don't connect the rotting fruit on ground with the self-sufficient thoughtfulness of previous owners. Since they don't want to bother with it, I help them out. Since I'm harvesting the stuff, they don't have to clean off their sidewalk. It's a public service, really. For apples and crabapples, taste them occasionally. Once they taste good, harvest. For pears, I tend to wait until I see the first pear on the ground, then harvest the tree clean. These apples and pears might not be the tastiest, but can be used creatively. Juice them with other apples, pears or other fruits. Add them to applesauce. Bake with them. Dehydrate them into chips. Blend with other, more tasty fruit and dehydrate into fruit leathers. If there aren't too many bug holes, they will even store in the frig for months.

Crabapple candy ready to go into the dehydrators.
Crabapples are a special thing. They take effort to use, due to their small size, but they are fantastic. They add great zing to apple juice, cider or sauce. The bright red ones in particular add fantastic color to a basic sauce. I add them to apple crisp for a bit of color. My favorite, albeit labor-intensive way to use crabapples is to make crabapple candy. I cut each crabapple into halves or quarters, then pop out any seeds. I toss in sugar until it is coated well. I load them onto dehydrator trays and dry until leathery. These candies are delicious, and while not a health food, go a long way to reduce consumption of scary store-bought candy. I think they are like a chewier sour patch kid.

Many herbal teas can be put up from foraged weeds. Use a dehydrator for quick drying to minimize flavor loss. If you don't have a dehydrator, use a low oven or hang in a cool dry place. Pineapple weed (related to Chamomile) is my favorite wild tea. It has a lovely exotic tropical floral taste and scent. You can also dry violets, dandelion leaves, mints, dead nettles, clover blossoms, strawberry leaves, or many more. Dandelion roots can make a mock coffee that's to die for.
By the end of the summer, I like to have scores of different wild foods put up for later. It makes winter much more enjoyable to pop open some jar of summery goodness and remember that spring will come again.

Thursday, April 16, 2015

Frugal Snacks: Popcorn

Popcorn is definitely one of my favorite snacks, but I never buy the microwaved stuff. It's loaded with questionable ingredients, has a strange taste (at least, it is strange to me now that I've been making my own for a decade), is expensive and there's a ton of packaging for a snack. For these reasons, I make my own. It's ridiculously easy (barely more effort than microwaving, really) and very cheap. I pay $.99/lb and 1 lb will make 27 c of popcorn, so it's $.15/4 cups compared to the very cheapest price of $.33/bag microwaved popcorn/4 cups popped. I buy my popcorn kernels in bulk and bring back my plastic container to reuse over and over, so there's very little packaging waste compared to microwave popcorn. There are two simple ways to pop bulk popcorn without using a microwave (some people make their own microwavable popcorn using a paper bag, but then you're increasing the packaging waste needlessly).

An air popper is fairly straight forward. Just put in your 1/4 c of popcorn kernels, put a bowl in front of the chute and turn it on. Easy. This is also great for making a super-low-fat snack since there is no oil used in popping the popcorn. It's also very frugal considering you can use bulk purchased kernels, no oil, and only a little electricity. The downside to using an air popper is that some kinds have a higher rate of widows (unpopped kernels) and you have to buy the appliance and store it even when not in use. On the other hand, if you want to get into roasting your own coffee, you can always use the popcorn popper making it a dual-use appliance.

You can pop popcorn on the stove top very easily. It uses oil, so it isn't low-fat, but is certainly less fatty than microwaved popcorn. Simply pour just enough oil to lightly cover the bottom of the pan, and heat until it is sizzling. Add a layer of popcorn kernels to the oil and put a lid on it. Shake the pan occasionally to keep the popcorn on the bottom from burning.

Of course, this is just for basic, run-of-the-mill popcorn. There are a lot of fun ways to jazz it up so it never gets boring. Here are some of my favorites.

Kettle corn-After heating the oil (about 1/4 c) til sizzling over medium heat, toss in 3 kernels and wait for them to pop. As soon as they do,  add a thin layer of white sugar (about 1/4 c) to the bottom of the pan then add your popcorn kernels (1/2 c). Shake frequently and dump out the popcorn as soon as it pops to keep it from carmelizing. Add salt to taste. This is a perfect sweet and salty snack and much cheaper than buying it at festivals and fairs.

Caramel corn-This is made the same as kettle corn, but using brown sugar instead of white. Add peanuts right at the end if you'd like.

Buy cheddar cheese powder in bulk for a cheesy popcorn. Just toss in the powder after popping and salt to taste.

Basic savory-Sprinkle with seasoning salt.


Taco popcorn-Use taco seasoning and perhaps some cheddar cheese powder.

Pizza-Add oregano, basil, garlic powder, cheese powder and dehydrated tomato powder.

Cinnamon sugar-1/4 c white sugar + 1 tbsp cinnamon, blended well.

Chili cheese- Mix a little chili powder or cayenne powder into cheddar cheese powder.

Everything-sesame seeds, poppy seeds, salt, garlic powder, onion powder

Maple Bacon-Drizzle with maple syrup and add crumbled bacon. Needs no extra salt.

What are your favorite homemade popcorn recipes?

Shared on:
Wordless Wednesday Hop

Wednesday, March 25, 2015

Goldenrod Eggs, an Easter Favorite

Every year for Easter lunch, my grandma made the same meal: egg gravy and toast (also called, more favorably, Goldenrod Eggs). It was a simple meal, made of simple ingredients. Mainly it was just a way to use up a surplus of hard-boiled eggs that we had at that time of year. We only had it one day a year, and so, naturally, it was my favorite meal. All year long I pined for it and when Easter came, I ate until I could not eat more. Decades later, I still love it just as much. It's a very frugal meal and uses items that are in most pantries. It is a good meal for times when there's more week than paycheck. Use the surplus of Easter eggs or just leftover hard-boiled eggs. If a carton of eggs gets a little too much past the use-by date, hard boil them for this dish.
It's not pretty, but it's oh so good!

Grandma's recipe is simple and frugal. It is the first recipe I ever learned to make myself. This recipe makes around 2 servings. I often make extra so we can have leftovers the next day.

2 Tbsp butter
2 Tbsp flour
1 1/4 c milk
~4 hard boiled eggs (you can add more or less, depending on what you have and how hungry you are)
2-4 slices of bread

Melt the butter in a sauce pan. Sprinkle the flour over the butter and allow it to cook for a few minutes. Slowly pour in the milk while whisking. Allow to cook over medium heat until it starts to thicken, stirring frequently. While it is cooking, separate the egg whites from the yolks. Chop the whites into small bite-sized pieces. Mash the yolks. Toast the bread. Once the gravy is almost as thick as you'd like it, remove from heat and mix in the whites. The gravy will thicken slightly as it cools. Pour the egg gravy over the toasted (and buttered, if you'd like) bread. Sprinkle a generous portion of yolks over the top. Salt and pepper to taste.

The gravy gets very thick when it cools. If you are reheating leftovers, add some milk and mix it in before microwaving so it thins out.

Now I play with the recipe quite a bit to alter the taste a bit, make it healthier or use up something from the refrigerator. Here are some ways I like to alter it:

* Use homemade stock in place of half of the milk when making the sauce. If you are using bones leftover from cooking (thus making the stock almost free), you will lower the cost significantly. This is especially important if you pay extra for raw, organic, pastured or lactose-free milk. I am always looking for ways to sneak more stock into our diets for it's joint-healing benefits. If you are trying to limit dairy consumption, this is also helpful.
* Serve over good bread, not cheap white bread. It's perfect over a strong sourdough bread, but I've used everything from asiago bread to rosemary bread to foccacia. I've served it over bread-sliced bagels, english muffins and biscuits. I've also used savory scones like the bacon cheddar chive ones Trucker brings home from his job. Serve over whole grain bread if you want maximum nutrition and fiber.
* Replace some of the white flour with whole grain flour. It won't be as silky a gravy, but it works.
* Use bacon, sausage or other fats left over from cooking in place of the butter. This adds flavor and reduces the cost of the dish.
* You could mix in crumbled bacon or sausage to amp it up a bit, although there's plenty of protein in the dish without it.

Monday, February 23, 2015

Splitting Seed Orders

We grew 7 varieties of beans, including
Scarlet Runner beans (the pretty ones)
This mix of fresh snap beans is Scarlet
Runner, Dragon's Tongue, Dean's
Purple Podded pole, Yellow Wax and
Kentucky Wonder.
If you want to try lots of different vegetables or varieties, but don't have a lot of space (or money) for all those seeds, find a gardening friend/family member who will split an order with you. My dad, sister and I all make our lists of what we want to grow and any specifications (I have to select carrots that grow well in clay soil, and my dad will only grow Silver Queen sweet corn). I read through seed catalogs and make selections. Then I call each of them and get their okay on the variety selections. For things we only need a few seeds each (say for squash or tomato varieties), we order the smallest packs possible. For others, we may each want lots of seeds (like for beans or lettuce) and we order a larger pack, but save money over each buying a smaller pack. We save money on shipping since we split the cost 3 ways.

This "thinnings" salad has a variety of
greens, two types of carrots, and two
kinds of radish.
We were each able to grow a variety of tomatoes which made
salads incredible!
When the seeds arrive, I split them up according to what we discussed beforehand. I have a surplus of tiny bags leftover from other year's seed orders, and either reuse those or make simple envelopes out of junk mail. I keep the order form nearby as I package seeds and write down the cost for seeds for each person. For example, my dad grows lots of spinach, but I only grow a little, so I take 1/4 of the seeds and give him 3/4. I write down a quarter of the price of the total packet in my column and three quarters the price in his column. I don't grow any corn. My sister grows all of the popcorn and she and my dad grow the sweet corn. At the end, I divide the shipping cost and add it. They each reimburse me for their portion of the seeds when I give them their seeds.

I love these purple carrots for adding variety and color, but
I also love the taste of Red Cored Chantennay carrots and
Little Finger carrots actually give me the best yield per square
foot in my soil.
If I had to buy seeds on my own, I'd only grow one type of carrot because I don't have enough space to grow more than one packet of carrot seeds. By splitting it, I can grow a few varieties. I get to grow lots of varieties and try new things that I otherwise wouldn't be able to justify. Also, even with growing a few dozen varieties, my seed cost is usually under $30.


Shared on:
Wordless Wednesday Hop


Wednesday, December 24, 2014

Egg Drop Soup, or: The Easiest Dinner Ever

I love going out for Chinese. The entrees are good, sure, but it's the side stuff that rocks my world. The first time I made crab rangoon at home I was in heaven and called that dinner.

Today I made stir-fry for dinner. I was craving some good Chinese restaurant soup. I had some chicken stock in the refrigerator, so decided to try my hand at egg drop soup. Oh my. How had I not been making this for years?

This is simply the easiest, cheapest, tastiest soup I've ever made, and it's pretty healthy too. It takes five minutes, tops. The recipe is not exact; you can tweak it based on how hungry you are, what you have on hand, and how many you are serving. The amounts given are what I made tonight. It gave us enough for four side servings.

1 quart of chicken stock
2 eggs
1 green onion
salt and pepper

Heat the chicken stock on the stove until it's boiling. Beat the egg well. Drizzle the egg into the boiling chicken stock while stirring vigorously. Ladle into bowls, and garnish with chopped green onion. Sprinkle with salt and pepper to taste. That's it.

I make my stock at home, so the cost is negligible (made using bones and veggie scraps leftover from cooking). Two eggs cost me about $.30. The green onions have been regrowing in my windowsill, so we can call those free. This recipe cost me $.08 a serving.

Featured post on:
WNWNW4

Shared on:
The Self Sufficient HomeAcre

Thursday, December 11, 2014

Use It Up: Stale Baked Goods

Many things are tossed into the garbage can when they still have lots of good life left in them. Use It Up is a section on how to use this "trash" to make new useful items for your home or to re-purpose items to avoid a purchase.

Trucker gets a lot of free day-old baked goods from his job and sometimes they get stale before we get a chance to eat them. They would have been thrown away otherwise, but I did want to use them if at all possible.

Our aim is to completely eliminate all food waste. This is for both environmental and economic values. Americans throw away about half of the food they buy, and that's not including the food wasted at the farm and grocery levels. While I can't change some aspects of food waste, I can work really hard to reduce the amount my family wastes. So many resources-land, fresh water, fertilizers (both artificial and natural), and time-go into producing food and it is immoral to throw it in the garbage, where it produces gases that poison our air. Then there's the financial side of it. I have to spend time and money to get to work, then work long hours, and then drive home every day. I get my paycheck and pay taxes on it. Then I pay taxes at the store. Why would I want to let any food go to waste when I had to work so hard to get it? If I can reduce that expense, I can save more money and then not have to work as much in the future. The case of a crunched muffin is a small thing, but it is a part of a larger lifestyle modification that allows me to live in accordance to my goals, dreams and values.

A lot of people get squeamish about using "less than fresh" items in cooking at home, but our grandparents did this as a matter of course. Throwing away food that was still edible just wasn't an option when food was hard to come by. Not only this, but I have worked in bakeries for the better part of a decade, and let me tell you, bakeries know how to use it up! Every bakery I've worked at had recipes for using up items that didn't sell to make a new, fresh item. It helped profits, reduced waste and some of the items were customer favorites. If it's good enough for a professional bakery, it's certainly good enough for your home kitchen. If your family is squeamish about the idea, don't tell them.


The other day I had a scone for breakfast, but wasn't hungry enough to eat the entire thing. The other half was hard by the time I got back to it. One of the muffins that Trucker brought home from his job got smooshed in his backpack. Rather than throw them away, I crumbled them and let them air dry. This morning I wanted to make an apple crisp, and decided to use these sweets crumbles in place of the flour or oats in the topping. As you can see in the photos, I used a variety of crumbs: cranberry scone, a crunched chocolate chip cookie, the crumbs from the bottom of the bag from the bakery we visited on our trip, and a morning glory muffin (carrot, pumpkin, coconut, oats, and raisins).

 I simply melted a stick of butter, and added in the crumbles. Since the baked goods were already sweetened, I didn't add any more sugar (although I always drizzle a bit of maple syrup over the apples before topping). I baked as usual. It turned out perfectly!

There are many other ways to use up baked sweets that get stale before you eat them, or get broken, or simply the crumbs at the bottom of the bag. This will not only reduce your waste, but can save you money on the ingredients you are replacing (In the case of my crisp, I avoided using 2 cups of oats, 1/2 cup of flour, and a cup of sugar!)

Use crumbs of baked goods for a crunchy topping for muffins, pies and sweet breads.

Make bread crumb cookies with either regular bread crumbs, or crumbled sweets. I first heard of this idea in the Tightwad Gazette books. Sounds weird, but tastes fine and is a very frugal dessert.

Use stale or broken cookies in place of graham crackers to make crusts for cheesecakes and pudding pies.

Bread pudding is a great way to use up not just stale bread, but also muffins, bagels, croissants, waffles, cookies, doughnuts or cake.

One of the bakeries I've worked at makes crisps from stale pies. When they are still perfectly edible, but the pie crust is less flaky and wonderful, we would smoosh the entire pie, pack into a baking dish, top with struesel and bake until the top was golden. People loved them and never realized that they were just a way to reduce our shrink.

Cake pops are a perfect way to use up cake that is dry or stale. It's an easy and kid-friendly recipe. I've taken it to potlucks and it has disappeared in minutes.

Slice bagels thin, like bread. Then use them to make french toast dippers-a fun breakfast for kids. Plus the smaller size will allow you to fit more pieces into the skillet at a time. Cinnamon raisin bagels are particularly amazing for this.

Use baked goods either as an ice cream topping or to make homemade blizzards. Use brownies, cheesecake, chocolate chip cookies, 7-layer bars, buckeye bars, etc. Crumble if using as a topping, or chuck the whole thing in the blender when making shakes.

If you make your own ice cream, you can mix some items into the custard right before freezing for treats such as "brownie ice cream" or "red velvet cake ice cream".

Make a trifle with leftover cake or muffins.

Use as the stuffing in stuffed apples. This is a good use for muffins or scones or anything cinnamony or caramelly.

Once at a bakery I worked at, we put chunks of leftover cheesecake into brownie batter. It was good in a strange way and had its fans.

Use berry based muffins to make a sweet crouton for topping fruit salads.

Add crumbled scones to granola mixes.

While not a baked good, I have another apple crisp tip. Save the crumbs at the bottom of cereal bags and use this as the topping. Bran flakes, cheerios or other bland cereals are perfect and the more colorful ones are okay, as long as you don't get overwhelmed by the psychedelic colors.

I've already written posts on using stale bread and making breadcrumbs if you'd like more tips for using up baked goods.

Did I miss anything? Do you have a favorite way to use up baked goods that are broken or stale? Share in the comment!

Shared on:
Wordless Wednesday Hop!
Related Posts Plugin for WordPress, Blogger...