Showing posts with label recipes. Show all posts

Sunday, July 23, 2017

Pepper Poppers

Pepper poppers are one of the cheapest and easiest appetizers you can make. They are also incredibly popular and go well whether you are serving a taco bar or having a party for a sporting event. They don't take long to make and can even be assembled in advance and tossed into the oven a little before guests show up. My garden is producing loads of peppers this year, and this is a great way to use up a bunch. The farm stands also have them pretty affordably as well. When peak pepper season is on, I like to core whole peppers and freeze them.

Jalapenos are my go-to, but I also use small hungarian hot wax, large padrons or shishitos, sweet banana, mini bells and lunchbox or other small sweet peppers. Depending on the size of the pepper, ease of removing the seeds and desired presentation, I'll either core them out and shake out as many of the seeds as possible or cut in half longways and scoop out the guts. Reminder: Don't forget to wear gloves if handling hot peppers.

I don't use a recipe, I just guesstimate based on what I have that needs used up. I will use sour cream, cream cheese or cottage cheese, as I have it. Sometimes if I have a little bit of a creamy dip I'll use that as all or part of the creamy addition. I'll also use up little bits of salsa or hot sauce. Sometimes I'll mince onion in. If the filling needs some oomf, I'll use either a packaged seasoning blend or just add some black pepper, salt, chili powder, onion powder and granulated garlic. Blend all well, then put into a piping bag or sandwich bag and cut the tip. Squeeze the blend into the pepper. If you are using frozen peppers, you don't need to even thaw them. Just fill when frozen and bake a little longer than you otherwise would.

I place them all in a baking dish, overlapping some. Sometimes I cover them all with enchilada sauce or cheese. Sometimes I leave them plain. I bake at around 350 until the peppers are soft, around 30-40 minutes. I often use the toaster oven to keep from heating up the kitchen.

These are always popular and disappear fast. If I do have any leftovers, they are great for my work lunches and I think are even better chilled.

What are your favorite frugal and easy appetizers or sides?

Saturday, July 15, 2017

Basic Galette, Pie, or Tart Instructions


When I teach someone to cook, I like to teach a skill rather than a recipe. If you learn a recipe, you know how to make one dish, but if you learn a skill, the whole world opens up. When teaching a newbie to cook, I often make Goldenrod Eggs. That teaches two important skills: how to hard boil an egg and how to make a bechamel. From those two skills, you can make a wide variety of dishes for a wide variety of circumstances.

When I teach someone to bake, I aim to do the same thing and galettes are the perfect intro to baking. Even for someone who has been baking for years, the endless variations make this one of my favorite dishes to bake. The hardest part of this recipe is making a good pie dough, but even if you take the cheater's way out and buy a pre-made crust, it will still turn out good. (Moment of confession: I did use a store-bought crust once because I was doing my last-minute grocery shopping for company coming over in a little over an hour). The recipe is super flexible and can be modified in a nearly infinite number of ways.

First, make a nice pie crust. I always use the King Arthur recipe: 2 c AP flour, 1 T sugar (leave out if making a savory dish), 1 t salt,  2 sticks of butter cut into pats, 1 egg, 2 T milk. If it is really hot, you can toss the ingredients into the freezer to prevent the butter melting (which would result in a tougher, less flaky crust, which no one wants). Sift together AP, sugar and salt, then cut in butter just til it holds together if you squeeze it, but you still want to see little lumps of butter as this will result in a flaky crust. Gently mix in the egg and milk just until moistened and no more. Divide in two, shape, wrap and let it rest in the refrigerator for at least a half hour or up to 2 days. You can freeze if desired. I've found that this batch of dough will make several galettes, so freezing the extra can make it much easier to whip up a dessert later.

Generously flour your work surface and roll out your dough to roughly 1/8 inch thick (it doesn't have to be perfect). When making galette, I usually pull off a chunk of dough and roll it into a really rough circle, about 8-9 inches across. Once I have the dough rolled, I put it back in the refrigerator to rest while I make the filling.

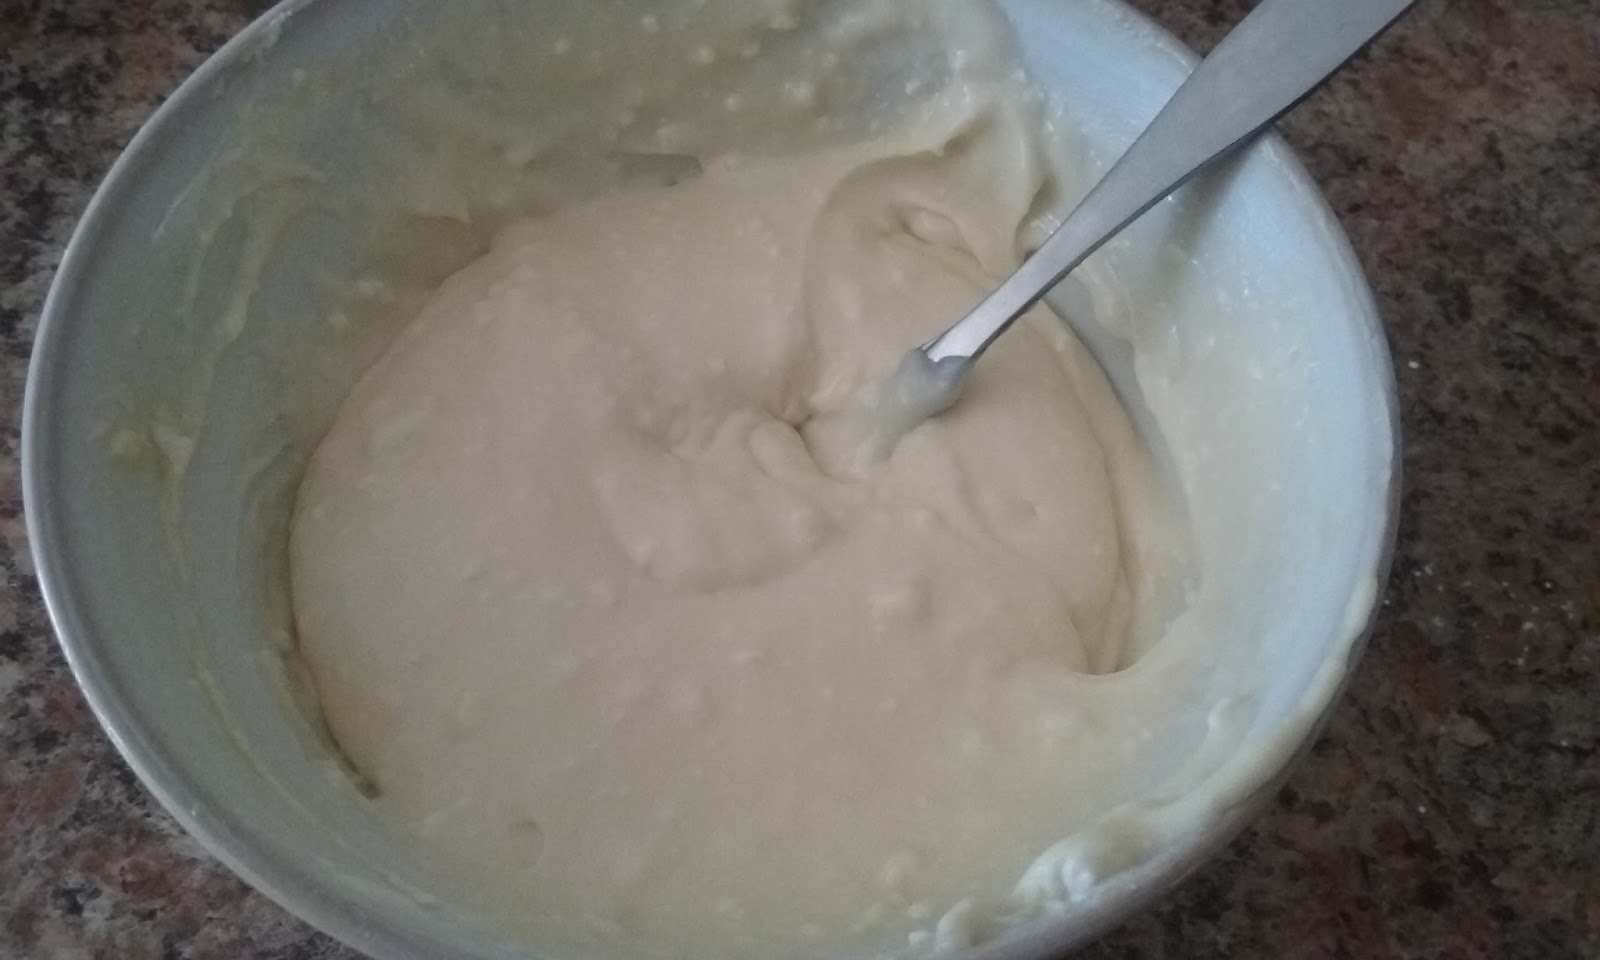
I use a basic cream cheese filling for a lot of my fruit galettes. I can't remember where I found the recipe originally, but most recipes are just variations of this recipe: 1 8-oz package cream cheese, softened, 1/2 cup sugar (leave out if making a savory dish), 1 egg and a tsp of vanilla. This recipe is pretty flexible. You can use a little less cream cheese or a little more egg or reduce the sugar and it will still turn out. Beat together well. If you do it by hand, it will feel like it is taking forever, then all of a sudden it is ready. It doesn't have to be perfectly smooth and it will still bake fine. This recipe is enough for 2-3 galettes and it stores well for a few days in the refrigerator. If you want to make a smaller batch, just halve everything and you can either use the full egg (I've tried it and it works fine) or use about half the egg and use the other half as an egg wash (which makes for a great color and allows you to sprinkle the crust with some grainy sugar). This filling is really forgiving which is why I love it.

I spread a layer of filling over the middle of the dough, leaving about an inch around the edge. You can do a thin layer (makes for a less filling dessert) or thicker (cooks up fine and you can serve smaller slices). Layer on some fruit. Basically use whatever you like that you have on hand. I love to use apples or peaches. Sometimes I mix a variety of fruits, placing in a pretty design. Whatever you do, either slice thin (pears, apples, peaches, plums) or cut in half (larger blueberries, cherries) if needed so they cook through. Smaller berries can be left whole.

Fold over the extra dough around the edges. Don't make it too pretty. I like having some variation. Some slices of galette have less crust, others more so everyone can get a piece they like best (I like the extra flaky crust). Plus if you try to make it perfect, you really need to make it perfect. If you aren't trying to make it perfect, there's less pressure. Every little "mistake" just gives it more rustic charm.

If you'd like, you can brush some egg wash onto the edges and sprinkle with some grainy sugar. The egg wash will give a nice shine and color to the crust, but left bare it has more ruggedness.

Bake in a preheated oven at 350 degrees for 25-30 minutes, or until golden brown. You want the bottom to be nicely golden as well.

Beef Pot Pie is an easy way to give
life to leftover beef stew.
I love how flexible this recipe is. If made free-form and flat, you have a galette. You can make a rustic pie by quickly placing the dough in a pie plate and coarsely folding the excess pie dough back in. You can make a large tart or little tartlets. Put the filling on just one half, then fold over, crimp the edges and you have a hand pie. Roll dough into a rectangle, cut into smaller rectangles, put filling on one and top with another rectangle and you have pop tarts. Put into a pie plate and add a savory custard for a great quiche. Put in a pie plate, add some leftover beef stew and cover with another layer of crust for a quick beef pot pie.
I placed some curly garlic scapes
on top of this quiche for great
presentation as well as flavor.

 The basic cream cheese filling goes brilliantly with a variety of fruits, or you could leave out the sugar and make a savory galette. It would be perfect to mix in some fresh herbs or scallions before layering on some roasting tomatoes (especially heirlooms in a variety of colors), caramelized onions, bacon, ham or asparagus. Garlic scapes or fern fronds would make unbelievable presentation.

You don't have to stick with cream cheese filling. I like to use a goat's milk caramel when I make apple galettes. Try real maple syrup, honey, jelly or jam. Spread nutella on the dough under strawberries.

Use fresh fruit. Use frozen fruit. Cook down some overripe fruits into a lovely compote. Add nuts. Make a streusel topping. Sprinkle with cinnamon. Sprinkle with salt and freshly cracked pepper if making a savory dish or sprinkle some cheese around the edges.

Make it your own. Make it for breakfast, brunch, a light lunch, appetizer, dinner entree or dessert. Make it tonight!

Have fun baking!

Thursday, November 24, 2016

Frugal Snacks: English Toffee

Every winter, I read over my copies of The Tightwad Gazette I, II, and III. They revamp my commitment to frugality, give me new ideas and help me think more creatively about my daily doings.

While I was rereading them, I found a recipe for English toffee that for some reason I hadn't tried, and wow! I can't believe I haven't been making this before!  It is unbelievably easy, frugal and delicious. Here is the basic recipe, along with ideas for changing it up a bit for variety. This is a great, easy snack to whip up for dessert, for company coming over or to give as a gift.

* 1/2 cup butter
* 3/4 cup packed brown sugar
* 1/2 cup chocolate chips (or shaved chocolate of any sort)
* Optional: nuts such as almonds, walnuts, peanuts, etc, chopped.

Grease a 8x8" baking dish (or use whatever baking dish or pie plate you want. Bigger will give a thinner toffee, smaller will give a thicker hunk of candy). If you want to add nuts to the toffee, sprinkle them on the bottom of the dish.

Over medium heat, cook the butter and brown sugar, stirring constantly with a rubber spatula. Remove from heat immediately once it starts to smoke (7-9 minutes). Be extremely careful not to spill this super-hot mixture on anyone as it will burn like the dickens. Don't allow to cook after it starts to smoke or it will burn. Immediately pour the toffee mixture into the baking dish. Spread with the spatula as needed to cover the bottom. Add chocolate chips to the top and cover with a plate or cookie sheet so the chocolate will melt. Once it has melted, spread smooth with a knife or spatula. Garnish with more nuts if you want.

Allow to cool completely. Once cool, break into pieces. You can score the toffee while it is still hot to try for more even pieces, but I never bother.

This stuff is addictive and lovely. It is a great gift item. For me the cost is very affordable. I buy butter when it goes on sale for $2/lb, so the cost is $.50. I buy brown sugar for $1.50/2 lbs. Each pound contains about 4 cups, so the cost is around $.14 for the sugar. For the chocolate, I used some semi-sweet baking cocoa squares that I got at the salvage grocer for $.99/4 oz. I used half of it, so that cost $.50. So not including nuts, I spent $1.14 for a batch of candy.

Variations and ideas (Use plain toffee without chocolate if desired):
* Don't add chocolate to the top. Once toffee is cool, break into pieces and dip into melted chocolate, either completely or just half for pretty presentation. Or you could drizzle with dark, milk or white chocolate (or with some of each).
* QUICKLY drop the hot toffee mixture into circles on a baking sheet for pretty round candies that can be decorated with chocolate, nuts, etc.
* You could use sprinkles on the melted chocolate for decoration.
* Use small broken pieces as an ice cream topping.
* Add broken pieces to milk shakes for a Blizzard type dessert (Heath candy; caramel apple, etc).
* Pour toffee and then chocolate over saltine crackers.
* Add coconut and/or dried fruit.
* Pour into candy molds for adorable gifts.
* Make into candy bars.
* Add bits to brownies or cookies or to decorate a cake.
* Pour over pretzels and peanuts.
* Add M+Ms to the top of the melted chocolate.
* Add to cookies or shortbread
* Add to homemade ice cream
* Add bits to the top of a caramel apple cheesecake.
* Add bits (without chocolate) to banana bread
* Add bits to biscotti (or use to garnish after dipping in chocolate)
* Add bits to caramel popcorn.
* Use bits to garnish chocolate dipped pretzel sticks
* Use bits to garnish cake pops
* Add to caramel apple scones
* Add bits to cinnamon roll filling

This is an easy introductory recipe to candy making, so feel confident. I've made it a dozen times and only once did it not work perfectly (and that time I was trying to quadruple the batch, so I think that was the issue). It makes a perfectly delicious and frugal gift.

Wednesday, March 25, 2015

Goldenrod Eggs, an Easter Favorite

Every year for Easter lunch, my grandma made the same meal: egg gravy and toast (also called, more favorably, Goldenrod Eggs). It was a simple meal, made of simple ingredients. Mainly it was just a way to use up a surplus of hard-boiled eggs that we had at that time of year. We only had it one day a year, and so, naturally, it was my favorite meal. All year long I pined for it and when Easter came, I ate until I could not eat more. Decades later, I still love it just as much. It's a very frugal meal and uses items that are in most pantries. It is a good meal for times when there's more week than paycheck. Use the surplus of Easter eggs or just leftover hard-boiled eggs. If a carton of eggs gets a little too much past the use-by date, hard boil them for this dish.
It's not pretty, but it's oh so good!

Grandma's recipe is simple and frugal. It is the first recipe I ever learned to make myself. This recipe makes around 2 servings. I often make extra so we can have leftovers the next day.

2 Tbsp butter
2 Tbsp flour
1 1/4 c milk
~4 hard boiled eggs (you can add more or less, depending on what you have and how hungry you are)
2-4 slices of bread

Melt the butter in a sauce pan. Sprinkle the flour over the butter and allow it to cook for a few minutes. Slowly pour in the milk while whisking. Allow to cook over medium heat until it starts to thicken, stirring frequently. While it is cooking, separate the egg whites from the yolks. Chop the whites into small bite-sized pieces. Mash the yolks. Toast the bread. Once the gravy is almost as thick as you'd like it, remove from heat and mix in the whites. The gravy will thicken slightly as it cools. Pour the egg gravy over the toasted (and buttered, if you'd like) bread. Sprinkle a generous portion of yolks over the top. Salt and pepper to taste.

The gravy gets very thick when it cools. If you are reheating leftovers, add some milk and mix it in before microwaving so it thins out.

Now I play with the recipe quite a bit to alter the taste a bit, make it healthier or use up something from the refrigerator. Here are some ways I like to alter it:

* Use homemade stock in place of half of the milk when making the sauce. If you are using bones leftover from cooking (thus making the stock almost free), you will lower the cost significantly. This is especially important if you pay extra for raw, organic, pastured or lactose-free milk. I am always looking for ways to sneak more stock into our diets for it's joint-healing benefits. If you are trying to limit dairy consumption, this is also helpful.
* Serve over good bread, not cheap white bread. It's perfect over a strong sourdough bread, but I've used everything from asiago bread to rosemary bread to foccacia. I've served it over bread-sliced bagels, english muffins and biscuits. I've also used savory scones like the bacon cheddar chive ones Trucker brings home from his job. Serve over whole grain bread if you want maximum nutrition and fiber.
* Replace some of the white flour with whole grain flour. It won't be as silky a gravy, but it works.
* Use bacon, sausage or other fats left over from cooking in place of the butter. This adds flavor and reduces the cost of the dish.
* You could mix in crumbled bacon or sausage to amp it up a bit, although there's plenty of protein in the dish without it.

Tuesday, December 16, 2014

Homemade Pop Tarts


I never cared much for those pathetic Pop Tarts that come in a blue box. The pastry didn't taste good, the fillings were off, and they left you hungry as soon as you finished them. I stopped eating them as a child and never bothered again—until one beautiful day: the day I made pop tarts from scratch. Oh, my.

They were wonderfully flaky. The pastry was rich with butter and of perfect texture. The filling was real and explosive. And wonder of all wonders, two of these little pastries filled me up for a glorious breakfast.

Making pop tarts from scratch is easy, frugal, and allows you to experiment with lots of fun flavors. In my two-person household, we used to have a hard time using up an entire jar of jam or jelly in a reasonable timeframe. But now that I make pop tarts, we’re able to use up a jar before it goes bad. Homemade pop tarts are also incredibly frugal. I did a cost analysis of the flour, butter, egg, and fillings and found that the homemade variety is about 16 to 20 cents each, with two or three being a decent breakfast for me or my husband. This is cheaper than the store-bought ones that cost about 33 cents a pop where I live and aren't nearly as delicious or filling—or free of suspicious-sounding ingredients, for that matter.

Making pop tarts is ridiculously simple, although it does take some time. I like to set aside a couple of hours to make a massive batch, all at once. Raw pop tarts freeze brilliantly, so you can pull out a couple and toss them in the toaster oven for an easy breakfast or a sweet-tooth fix. Make a few different flavors at once and you'll satisfy any craving!
I use a pie dough recipe from King Arthur, but you can sub in the pie dough of your choice.

What you'll need:

* 2 cups all-purpose flour
* 1 Tbsp sugar
* 1 tsp salt
* 2 sticks butter, cut into pats
* 1 large egg
* 2 Tbsp milk
* filling of your choice, such as jams or jellies, nut butters, spreads, etc. (See ideas below!)
* rolling pin (or wine bottle, in a pinch)
* butter knife or bench knife
* fork
* baking sheet
* brush
* pastry blender (or a stand mixer—just be careful not to overwork the dough)
* paring knife

To make your pie dough as flaky and tender as possible, you need all of your ingredients as cold as can be. Crack one egg into a bowl and put it back in the fridge. Cut the butter into pats and place them in the freezer until just before you begin. If you want your dough to be perfect, you can even pop the flour, sugar, and salt in the freezer. If the butter melts, it will absorb a lot of flour, making for a tough dough, so you want to do whatever you can to prevent that—including handling it as little as possible.

When you're ready to make your dough, mix together the flour, salt, and sugar. Add the butter pats then, using your pastry cutter, mix in the butter until it’s in pea-sized pieces, not fully blended. These little bits of butter will make for a flaky crust. Once the butter is roughly pea-sized, add one egg and the milk. Mix just until it’s combined. Don't over-beat it. You can (and should!) store this prepared dough in the fridge until you're ready to make your tarts.


Clear a workspace and liberally sprinkle it with flour. Pull the pie dough out of the refrigerator and place it on the flour. Sprinkle the dough lightly with flour and very lightly coat your rolling pin to keep the dough from sticking. Roll the dough out to 1/8 inch thick.


Using a butter knife or a bench knife, cut the dough into rectangles about 3 by 4 inches, or whatever size your heart desires. You can even use cookie cutters to cut out fun shapes or you can make tiny two-bite pop tarts. If you make super small pop tarts, roll the dough a little thinner to keep the filling-to-pastry ratio in balance.


Beat the second egg to use as an egg wash. Place about a tablespoon of filling on one half of each pop tart. You can use jam or jelly, nut butters, or one of the suggestions listed below. Spread evenly but make sure you leave a good centimeter of space around each edge and the other half bare. Brush the egg wash around the edge; this will act like glue to keep the filling inside.


Fold the bare half over the filled half and gently press the edges to seal the pieces together. Using the fork tines, press about 1 centimeter in all the way around the edges. This seals the dough closed and looks beautiful.


Steam will need to escape, so you’ll need to cut some holes in the pastry top. Either prick the top side of the dough several times with a fork or use the paring knife to cut out shapes or initials. If you have mad scoring skills, you can cut notes, initials, or simple drawings into the pop tarts for fun.


Now it's time to chill the pop tarts. You can either chill them for half an hour in the refrigerator or freeze them to bake another time. If freezing, do so on a flat surface then transfer them to a freezer bag once they’re completely frozen.

When it's time to bake them, brush the top of the pastry liberally with egg wash, if desired. (I enjoy them either way. They’re shinier with the egg wash but look more rugged without it.) If you'd like, you can sprinkle the tops with decorative sugar—the bigger grain, the better—which the egg wash will hold in place. If you plan to ice the pop tarts, don't add sugar. Bake in a 350 degree oven for 25 minutes or until the tarts are golden brown and solid on the bottom. Perfect doneness occurs just after you smell something so incredible, you’ll be prepared to burn your tongue off just to get those tarts in your mouth RIGHT NOW.


Allow the tarts to cool for 10 to 15 minutes—if you’re able to wait that long. If you want to ice them, you can use any icing you'd like. My favorite simply requires mixing together 1 cup powdered sugar with 1 to 2 Tbsp milk. You can make this thick (less milk) to spread over the still-warm tarts, allowing it to run off the sides, or you can make it thinner (more milk) and drizzle it across the top with a fork.

If you bake a large batch of tarts at once and plan to reheat them in the toaster later, don't ice them. Wait until they come out of the toaster. Unlike the store-bought pastries, this homemade icing won’t stick to the pastries when they’re standing straight up in the toaster. And really, when you think about it, what's in the store-bought stuff that makes it impervious to toasting? Shiver.


FILLING SUGGESTIONS
Unless otherwise specified, use 1 Tbsp filling per pop tart.

* Apple butter. For a nice complement, you can sprinkle cinnamon sugar after egg washing/before baking or sprinkle cinnamon over the icing.
* S'mores: 1 Tbsp marshmallow cream, a pinch of crushed graham crackers, and several chocolate chips. For a campfire touch, sprinkle a bit of smoked sugar over the egg wash before baking.
* PBJ: 2 tsp peanut butter plus 1 tsp grape jelly
* Nutella...yes, oh yes!
* Cinnamon sugar (King Arthur calls for a mix of 1/2 cup brown sugar, 1 to 1 ½ tsp cinnamon, and 4 tsp all-purpose flour.)
* Peanut butter cups—or Buckeyes, if you're from my home state of Ohio: 2 Tbsp peanut butter mixed with 1 tsp powdered sugar and several chocolate chips
* Lemon curd
* Apple: 1 Tbsp diced apple and 1 tsp brown sugar


Shared on:

Wordless Wednesday Hop

Tuesday, December 2, 2014

Use It Up: Fried Rice

Many things are tossed into the garbage can when they still have lots of good life left in them. Use It Up is a section on how to use this "trash" to make new useful items for your home or to re-purpose items to avoid a purchase.

Fried rice is one of my favorite meals. It's simple, it's satisfying, it's delicious. To top it all off, it's also ridiculously cheap and a great way to use up leftovers and therefore reduce your waste. It's also an easy meal to make when I'm busy or tired. From start to finish, it's about 10 minutes.


When I make fried rice, I never go with a recipe. I know basically how to make it, but I leave room for experimentation, using up something that I have in surplus or using up leftovers or items that are getting a little too close to turning.

The basics: cooked rice, egg, fat of some sort.

Heat the fat over medium heat until sizzling, add the egg and scramble lightly. Once the egg just starts to solidify, add the rice. Cook thoroughly until heated through. Season with soy sauce if you'd like. That's it.

Now, of course, this is boring. So to jazz it up, look through your refrigerator and pantry and get creative.

Use different fats. Don't just stick to vegetable oil or butter. Use bacon fat. Or chicken fat. Or tallow. Or fat leftover from cooking this morning's sausage. Animal fats add a load of flavor without the cost of added meat. In fact, if you save the fat from cooking (draining the grease after cooking bacon, sausage or ground beef) or from making stock (just pop the fat cap off the top of cooled stock, scrape off the bit of stock clinging to it and store in the frig for weeks), it is free.

Before you add the egg to the skillet, saute garlic or onions til lightly golden, then add egg.

Use rice leftover from another meal. The older the rice (to an extent, of course) the better it works for frying. I never make rice just to fry it, but I will make extra when I do make rice so I can make fried rice later that week. This is especially good if the rice is cooked in stock (and then, oh my!). We've found that stir fry served over rice cooked in stock doesn't need meat and is very filling.

Add leftover vegetables of any kind-carrots, peas, corn, celery, broccoli, green beans, peppers, radishes. Dice any large pieces. This is a great way to use up random leftovers or bits of vegetables that are getting a little old in the crisper. If you make fried rice frequently, save little bits of vegetables as you cook throughout the week so you can add lots of yummy veggies.

Add leftover bits of meat-pork, beef, chicken, turkey, shrimp. This is a great way to use up little random bits of meat that aren't enough for a meal by themselves. If you are wanting to eat less meat for health or financial reasons, this is a perfect meal. Dice the meat small and you'll get regular bits of meat and good flavor, but what would otherwise be a single serving of meat will turn into 4 servings.

Serve with green onions, especially if you are growing them yourself. You can also use greens from garlic in the garden, garlic or onion scapes or even just the sprouts from onions that start growing in the pantry.

Shared on:
Wordless Wednesday Hop!WNWNW4

Thursday, October 2, 2014

Grilled Apple Crisp

I'm a bit obsessed with apples. They are my favorite part of autumn. I go to pick-your-own orchards a few times a season, and also buy apples at market. I dehydrated 200 lbs of apple chips last year-enough for lots of snacking over the winter. My very favorite way to use them is to make apple crisp. And seriously, what's not to love? Apples, sugar, oats, cinnamon and baked til the sugar is all rich and caramelly (It's my blog; I can make up my own words if I want to!) and you have found paradise. I thought it couldn't get any better. Until I put it on the grill.

Oh my.

Take all that goodness and now add just a hint of smokiness for an out of this world dessert.

As usual, I don't have a formal recipe to follow and just sort of wing it each time I make it. Here's the basics:

* Cast iron skillet in whatever size suits your needs. For a big family, pull out the giant one. I use my mini cast iron skillet for a perfect dessert for two.
* 3-6 tbsp+ butter, depending on the size of your crisp, plus extra or pan spray for greasing the skillet
* Apples of any sort, but I prefer the more flavorful apples like granny smithy or fuji rather than bland ones like "delicious" (I've never thought so) or gala. For a small skillet, you will use around 2 large or 3 small apples, for a large skillet you will use 6-7 large.
* 2 tsp - 2 Tbsp cinnamon (the more the merrier, I think)
* 1/2-1 c sugar-brown, white or raw (use more or less to taste; I like to use less so I can taste the apples more than just sweetness)
* 2-3 c oats, any kind (I've even been known to use packets of instant oats that had been given to me) or a mix of oats and flour or just flour or even some kind of plain breakfast cereal.
* maple syrup (optional, but encouraged)

Grease your skillet. Slice the apples into bite-sized pieces, enough to fill the skillet to the brim. When you add the crumble, it will be higher than the top of the skillet, but it will sink as the apples cook down. Melt the butter and add the oats, flour, sugar and cinnamon. Mix together thoroughly with your fingers then sprinkle it liberally over the top of the apples, making sure to cover to the edges. It's always better to err on the side of extra crumble, so make more if you don't have enough. If you'd like, drizzle maple syrup over the top of the crumble.

Place the skillet on the grill grates over direct medium heat. I cook it while grilling other items to maximize my propane use. Cook for 20-30 minutes until the filling is bubbly, the sugars are caramelized and the topping is browned, but not burned.

This dessert is perfect as is, hot and bubbly off the grill. If you want to be really naughty, add a scoop of vanilla ice cream. It's also perfect the next morning cold for breakfast.

Shared on:
The Self Sufficient HomeAcre photo ftfhopbutton.jpgWordless Wednesday Hop!

Wednesday, September 17, 2014

Crazy Easy Tomato Soup

I can't believe that I ever bought tomato soup in a can. It's so delicious when made with garden fresh produce and is one of the easiest recipes ever. It's also very quick, less than a half hour from ingredients to table. I made it for the first time last week, and I've made it three times since then. It's that awesome. I don't have a set-in-stone recipe, I just go with the flow, tweaking it based on what I have on hand. Here are the basics:

* Tomatoes, any sort is fine, roughly 3-4 lbs
* Peppers, as mild or spicy as you'd like, 3-5 optional
* Onion (1 medium) and/or garlic (3-4 cloves)
* Cream, milk, or half and half (1/2 c)
* Butter or oil (3 tbsp)
* Flour (6 Tbsp)

* Soup pot
* Sieve or strainer
* Blender
* Ladle

First, clean your tomatoes well and chop roughly into a pot. If you'd like, you can add a few peppers or other veggies that the garden has given you. Allow to cook for 10 minutes on medium heat.

Meanwhile, chop an onion or mince some garlic.

Pour the hot tomatoes into the blender and blend thoroughly. Pour out of the blender into the sieve or strainer. Work the tomatoes through the strainer. Compost the seeds/skins that are strained out.

Heat the butter  in the soup pot until melted. Add the onion and cook til translucent (If you have more time, cook til carmelized). Add flour and stir to combine. Cook until the flour is a light golden color. Slowly add the milk, whisking to combine thoroughly. Slowly add in the strained tomatoes, whisking as you add. Allow to cook a little longer, 5-10 minutes.

Salt and pepper to taste and add fresh basil, if desired. Top with sour cream, cheese or croutons. This stuff is incredible with grilled cheese, quesadillas, or thick slices of a good artisan bread.

You can add other veggies from the garden if you'd like, or you can add cooked, chopped veggies after blending and straining the tomatoes for a chunky garden veg soup.


Shared on:
From The Farm Blog Hop

Monday, August 4, 2014

Homemade Chocolate Syrup

Do you crave chocolate milk? How about a sundae with chocolate syrup drizzled over the top? As for me, I love chocolate syrup in my morning peanut-butter-and-banana smoothie. What I don't love are all of the scary ingredients in a bottle of the store-bought stuff. Fortunately, whipping up homemade chocolate syrup is not only doable, it's ridiculously easy and tastes just as wonderful as anything you can buy. Here's how!

WHAT YOU'LL NEED
» 1 ½ cup organic sugar (You can use white, raw, brown, or a mix, although brown makes for the richest flavor.)
» 1 cup unsweetened baking cocoa
» 1 tsp salt
» 1 cup water
» 2 tsp vanilla extract (Make your own using the Homemade Extract 101!)
» Whisk
» Pot, large enough to leave 2 inches of headspace for expansion
» Storage container (mason jar, old syrup bottle, empty vodka bottle, etc.)
» Funnel

WHAT TO DO
Sift together the sugar, baking cocoa, and salt, breaking up any clumps.

Put those dry ingredients in a medium pot then whisk in the water until the consistency is uniform. Heat the pot over medium low heat, stirring frequently to keep from burning and occasionally scraping the sides.

Boil until the syrup reduces by a quarter or so—about half an hour. You want the syrup to be thick, but don't worry if it still seems a little runny. It will thicken considerably as it cools.

Remove the pot from heat and let cool 10 minutes before stirring in the vanilla extract. Pour the results into your storage container, using the funnel to avoid a hot, sticky mess. Allow the syrup to cool completely before putting a lid on your container. Your syrup will keep in the fridge for several months.

I don't like wasting a single bit, so after I have scraped as much syrup from the pan as I can, I add some milk and heat the reamainder for a wonderful hot chocolate.

This recipe is flexible, and after you've made it a time or two, you might want to experiment. You can try using honey or agave nectar instead of granulated sugar; just be sure to decrease the amount of water. You can mix half white sugar with half brown sugar. You can add orange extract for a chocolate-citrus syrup or mint for a HOMEGROWN peppermint patty effect. Make it your own!


I originally published this on Homegrown.

Shared on:
Homestead Barn HopThe Self Sufficient HomeAcreWildcrafting Wednesday
Related Posts Plugin for WordPress, Blogger...