Showing posts with label gardening. Show all posts

Monday, February 23, 2015

Splitting Seed Orders

We grew 7 varieties of beans, including
Scarlet Runner beans (the pretty ones)
This mix of fresh snap beans is Scarlet
Runner, Dragon's Tongue, Dean's
Purple Podded pole, Yellow Wax and
Kentucky Wonder.
If you want to try lots of different vegetables or varieties, but don't have a lot of space (or money) for all those seeds, find a gardening friend/family member who will split an order with you. My dad, sister and I all make our lists of what we want to grow and any specifications (I have to select carrots that grow well in clay soil, and my dad will only grow Silver Queen sweet corn). I read through seed catalogs and make selections. Then I call each of them and get their okay on the variety selections. For things we only need a few seeds each (say for squash or tomato varieties), we order the smallest packs possible. For others, we may each want lots of seeds (like for beans or lettuce) and we order a larger pack, but save money over each buying a smaller pack. We save money on shipping since we split the cost 3 ways.

This "thinnings" salad has a variety of
greens, two types of carrots, and two
kinds of radish.
We were each able to grow a variety of tomatoes which made
salads incredible!
When the seeds arrive, I split them up according to what we discussed beforehand. I have a surplus of tiny bags leftover from other year's seed orders, and either reuse those or make simple envelopes out of junk mail. I keep the order form nearby as I package seeds and write down the cost for seeds for each person. For example, my dad grows lots of spinach, but I only grow a little, so I take 1/4 of the seeds and give him 3/4. I write down a quarter of the price of the total packet in my column and three quarters the price in his column. I don't grow any corn. My sister grows all of the popcorn and she and my dad grow the sweet corn. At the end, I divide the shipping cost and add it. They each reimburse me for their portion of the seeds when I give them their seeds.

I love these purple carrots for adding variety and color, but
I also love the taste of Red Cored Chantennay carrots and
Little Finger carrots actually give me the best yield per square
foot in my soil.
If I had to buy seeds on my own, I'd only grow one type of carrot because I don't have enough space to grow more than one packet of carrot seeds. By splitting it, I can grow a few varieties. I get to grow lots of varieties and try new things that I otherwise wouldn't be able to justify. Also, even with growing a few dozen varieties, my seed cost is usually under $30.


Shared on:
Wordless Wednesday Hop


Sunday, January 25, 2015

Identify Gardening Goals for Seed Selection

Right now is a really fun time: it's seed selection time! These frigid days are perfect for curling up with a cup of hot chocolate or tea, a big stack of seed catalogs, and a highlighter. My big problem is succumbing to the siren call of full-color photos and poetic descriptions and buying way more seeds than I can fit into my small garden, or attempting to grow things that will never work for me.

If you also fall prey to this, identify your goals in gardening. That way you'll make sure you get just what you want out of your garden. There are lots of reasons to garden, and each one requires different things. Here are some common considerations or goals in gardening that can help you narrow down your seed selection.

Trying to grow as much food as possible; severely limited grocery budget. For many people, the constant rising of food prices has put a strain on the family budget. It's hard to buy high-quality, super-fresh produce when you are barely scraping by. If you are on a limited budget, your goal in gardening will be to grow as much food as possible to prevent buying as much as possible. When you are looking through seed catalogs, look for the following keywords: prolific, highly productive, grows fast, reliable, high yields, second harvest, long harvest. These words indicate that you should get good harvests. When looking for lettuce seeds, look for loose-leaf instead of butterhead or head lettuces. These ones can be picked over several weeks as needed, first as baby greens, then as full-sized leaves whereas other types are typically a one-harvest plant. Pick varieties that are well-suited for your zone. While you may get a harvest from something that does best in a different climate, you'll have lower yields. In some cases it may be worthwhile, but you are sacrificing a good harvest for a small one for the same space in your garden. If you see that something is an heirloom for your state and it says it gives high yields, your chances of a bumper crop are great. Chose indeterminate tomatoes rather than determinate (the former gives a larger harvest over a longer period) and pole or runner beans instead of bush beans (bush beans give one big harvest, whereas runner and pole beans give fair harvests, but over a long period so you get much more per plant). For things that give a harvest over a longer period, such as indeterminate tomatoes, peppers, okra, loose-leaf lettuce, or beans, look for the shortest days to maturity time-frame so you start getting a harvest as soon as possible and continue harvesting until frost.

You're a foodie. If you consider yourself a foodie, then flavor and texture are highest priority, perhaps above yield and ease of growth. Look for keywords like: best flavor, delicate texture, high quality, slow to bolt. Homegrown tomatoes are a completely different thing than anything a grocery store sells, so this is a no-brainer. Other items are also worlds different than their store-bought counterparts: greens, carrots (The first time I tasted a homegrown carrot I realized that I'd never actually eaten a carrot, only orange cardboard impostors!), okra, peas and sweet corn (the second it's picked the sugars start converting to starch so even farmer's market sweet corn won't be as sweet as the stuff you pick while the water is already on to boil). Grow these vegetables that have the greatest difference over anything you can buy.

Milkmaid Nasturtiums are as delicious as they are edible.
Dodging the HOA restrictions. If you have a Home Owners Association that doesn't allow food gardens, or a city that doesn't allow front-yard gardens, but that is your only or best growing zone, you have to be sneaky. Your goal is to grow some edibles, but ones that are pretty enough to look like they were planted exclusively for decorative purposes. You'll do best looking in catalogs with full-color photos simply so you can plan the *cough cough* "flower beds" artistically. Look for frilly lettuces that are red, purple or speckled. Pick things with funky colors that match the overall theme, like Ruby Red Swiss Chard. Some root vegetables can be hidden in between other plants if the tops are pretty: beets, carrots (they really have lovely leaves), even radishes. You make not be able to grow many traditional vegetables like tomatoes, but maybe you can get away with some "ornamental" peppers. These are typically smaller plants with small, vibrantly colored peppers. In my experience, the peppers don't taste as good as uglier varieties, but they are edible, and in the right applications (mixed into chili or pickled in a flavorful brine) might be good enough. Look through the flower selections for "edible" or "medicinal" listed in the description. I grow lots of nasturtiums in my front garden. They are lovely beyond words and the flowers, leaves and seedpods are all edible. Scarlet Runner beans have elegant red flowers that attract hummingbirds; the green beans are really just a side benefit.
This speckled lettuce is pretty enough for the front garden.

Optimum Nutritional Benefits. If your soil is good, pretty much anything you grow will have better nutrition than the weeks old stuff you find at the grocery store. However, some items are going to be nutritional powerhouses compared to lightweights. For example, grow vibrant leafy vegetables like spinach, red lettuces, Rainbow Swiss chard and purple kale instead of iceberg. In fact, don't grow iceburg ever. It is low nutrition, low flavor and gives a smaller yield for the space. Try growing the new variety Indigo Rose tomato as it is rumored to be one of the most nutritious tomatoes in the world and I've never seen it for sale. In general, the most nutritious vegetables are cruciferous (broccoli, kale, brussels sprouts, mustard greens, turnips), green leafy vegetables (in addition to the cruciferous greens: spinach, lettuce, parsley), alliums (especially garlic, leeks, scallions) and tomatoes. Low scores go to iceburg lettuce, radishes, cucumbers and celery.

Food preserving. If you are an avid food preservation artist, you likely want to grow a garden that you can put up into lovely pickles, jams, vegetable chips and other goodies. To be able to preserve food at the peak of freshness, you need to have enough of a harvest to put up a batch from one or maybe two day's harvest. Look for determinate tomatoes as these put on a larger harvest just once whereas indeterminates give several smaller harvests over a long period of time. Look for bush beans over pole or runner beans for the same reason. Look specifically for pickling cucumbers over slicers or salad cucumbers; these have lower moisture and hold up better for longer-term storage.

Garlic scapes are delicious and fun!
Want to try new food. If you want to just try new foods that you can't find at the grocery store, the world is your oyster. Keep in mind your zone, space and soil, but have fun. Look through the catalogs looking for funky shapes, odd colors and vegetables you've never seen. Look through seed catalogs that offer heirloom varieties for the best selection. Some catalogs offer both hybrid and open pollinated varieties, and these will likely have selections that are very similar to what you'll find at your grocery store or have grown in the past. Some of my favorite catalogs for finding new varieties are: Southern Exposure, Seed Savers and Baker's Creek. Baker's Creek is by far the best place to start if your goal is to grow new vegetables and varieties. Their offerings are beyond comprehension.

Want to eat fancier than you can afford. If you are able to afford a healthy diet but of the most basic kind, but want to try exotic, fashionable items, you're in luck! A lot of fancy foods can be grown easily at home. When you are at the market (or just thinking back to when you were), look out for the really high-ticket items. Grow those. Don't grow items that are cheap to buy, even at high quality. For example, zucchini and summer squash are relatively cheap when in season, so don't bother growing those. Cucumbers are also cheap. Grow hardneck garlic (plant in autumn). Not only are there lots of beautiful and tasty varieties, but hardneck (opposed to softneck) varieties send up a scape in late spring or early summer. These exotic beauties sells for $6 for a bundle of 5 at my market. They are out of this world: mild garlicy flavor but crisp and perfect for quiche, stir fry or soups. Edible flowers are expensive, but can be grown easily; look for Nasturtiums, marigolds, chrysanthemum, carnations, sunflowers, day lily, and pansies. Baby carrots are costly per pound compared to larger carrots, but easier to grow than larger ones. Look for Little finger, Babette,  Romeo, Thumbelina, an parisienne. Any vegetables that you like as a "baby" version can be simply picked early: carrots, radishes, greens, and beets. You can even thin every other plant in rows and eat the thinnings while allowing the others to continue growing. When growing greens, whether salad or cooking, look for varieties that you've never seen at the grocery store: dinosaur kale instead of Curly, tatsoi or mizuna instead of bok choi, ruby streaks mustard instead of southern giant curled. Tomatoes are a few dollar a pound minimum. You can also get a large yield per square foot (especially if you grow an indeterminate variety). Grow cherry tomatoes or fun colored tomatoes for the greatest cost savings, rather than run of the mill Romas or beefstakes.
Watermelon radishes are striking and a
fun surprise to cut open.

Teach children about food/healthy eating. If your goal is to get children excited about growing (and eating!) real food, look for fun varieties. Instead of plain orange carrots, look for purple, red or yellow ones. Grow watermelon radishes for their lime green exteriors and hot pink interiors. Look for terms such as: reliable, grows in wide range of soils, predictable, disease resistant. These make it more likely that your child will experience encouraging success instead of defeat.  If you have kids (or partners) who are picky eaters, you can grow things that can help get around the objections. Perhaps kids would be okay with eating neon green tomatoes (for TMNT fans call the slimy interiors "mutagen ooze") or purple carrots or tiny lemon cucumbers when they would be squeamish about the traditional counterparts.

Crystal Apple cucumbers are perfect
mini-sized treats.
Small space/container/indoor. If you are severely limited in your space whether due to having a small garden or needing to plant in containers either on a patio or indoors, you need to look for different varieties than you would if space was not an issue. Look for the following keywords: mini, baby, patio, container, short, compact. Certain vegetables grow better in containers than others. For example, you can grow squash in a container, but not well. Greens on the other hand do fantastically. If you decide to grow carrots in a container, look for shorter ones and especially for mini or baby carrots. For containers, grow "patio" or at least "determinate" tomatoes as these are likely to do better than the massive, sprawling indeterminates (I've had some indeterminates get over 10 feet tall in the garden). If you have a small garden, look for pole beans, indeterminate tomatoes, and climbing cucumbers and put up cages, fences, lines and poles for them to climb up. A single pole bean plant will produce more beans than a bush bean, but it needs room to climb.

Frugal gardening. If you have very little money to start your garden, look for basic varieties from cheaper sources. Dollarseed.com offers a smaller, but thorough selection of seeds at $1 a pack with $1 shipping. They are good quality, but not terribly exciting. That's okay if you're just trying to get started on the cheap. In most seed catalogs, the more common seeds sell a little cheaper than the fancier kinds. Don't diversify too much. While diversity is great, it can also be expensive. So while it would be fun to grow 10 varieties of tomatoes, it would also require buying ten packets only to use a few seeds from each. Instead, buy one or two packets and perhaps save the extras for next year (when you buy two more varieties). Get one or two lettuce varieties instead of a dozen. If you must have variety, it can be worthwhile to buy variety packs/salad mixes instead of several different packs. Do know, however, that these usually cost more and have fewer seeds, so if you are growing a lot, it can be more costly than buying a few different varieties. You can also split seed orders with family or friends to get more varieties while saving money on seeds and shipping. Chose open pollinated versus hybrid varieties and save your own seed so eventually you don't have to buy any seeds.

Before placing your order, do a search for "vegetable varieties" or "heirloom vegetable varieties" and your state to get an idea of what varieties grow best in your region. Identify the number of days in your growing season and make sure any varieties you chose not only will grow during that time-frame, but add a bit of a buffer just in case (my shady yard adds a good week or two til harvest for tomatoes).

By identifying you gardening goals before you place your seed order, you can ensure that you get what you want out of the garden. A little planning can be the difference between a disappointing chore and a fantastic, exciting adventure.

Daylilies are edible, pretty and grow easily.

Thursday, October 16, 2014

Planting Garlic

Italian Purple Stripe
Garlic is one of my all-time favorite veggies. I love the flavor and I appreciate the incredible health benefits of garlic. However, the cost of garlic can be prohibitive when using it in the volume I like. That's why I started growing my own.

Hardneck garlic. Notice the single layer of large
cloves around the central stalk.
Planting garlic is incredibly frugal and insanely easy. It is one of the easiest gardening projects I've undertaken (unlike garlic's cousin onion which I've given up on for the time being). You can buy a single bulb at the market and turn it into 4-8 new bulbs, with some leftover to eat beforehand. You can get a few different harvests from garlic, depending on what type you plant, allowing you to try new things. Garlic helps to repel pests from the garden, so planting a border or planting throughout the beds may help to keep pests from preying on your other veggies or flowers.

The best part of all is choice. At the grocery store you get...garlic. When you grow your own, you can grow Music (high yield, easy to peel with a strong, lasting garlic flavor), Purple Glazer (great for baking), or Chinese Pink (early with a mellow flavor). In short...you can grow the type of garlic you most like to eat/cook with instead of just getting whatever the grocer sells you.

Softneck garlic. Notice the multiple layers of cloves.
First...get yourself some good garlic. You can order it through a reputable seed catalog if you'd like, and especially if there is a certain variety you want to try. This is high quality garlic for planting, but will cost more and you'll have to pay shipping. On the opposite side of the spectrum, you can gamble with grocery store garlic. Sometimes store-bought garlic is sprayed to keep it from sprouting which is the exact opposite of what you want it to do. Some grocery stores don't do this, and if you regularly have garlic purchased from a particular store that sprouts, you can assume it will grow okay. In my opinion the best way to get "seed" garlic is to go to a local farmers market where the farmers only sell what they grow. I've never heard of a small truck farmer spraying their garlic with anti-sprouting chem. Often, they will supply you with lots of details about the variety, how it tastes and how to best cook/use it. Also, since it is grown locally, if it looks great, it will most likely do great in your climate. It is also priced somewhere between the cheap stuff at the grocery and the expensive stuff in catalogs.

Mixture of cloves. I chose the largest cloves to plant.
There are two types of garlic, plus elephant garlic. Softneck garlic produce more cloves than hardneck, but they are smaller. Softneck garlic stores longer and can be braided. It grows better in milder climates. Hardneck garlic produces fewer but larger cloves. It doesn't store quite as long as softneck and can't be braided. It grows best in cooler climates. The big benefit to hardnecks, I think, is that it sends up a scape. The scape is a crunchy, flavorful seedstalk that can be eaten as a vegetable. It gives you a garlicy harvest a month or so early and is one of my favorite veggies. Elephant garlic looks like garlic, but is closer related to a leek than to garlic. It has huge, milder cloves. It is grown similarly to regular garlic, but a few inches deeper (6 inches deep) and a foot apart because it grows so much bigger. I like to grow a mixture of different varieties of hardneck and softneck garlic for diversity in flavor, storability and in case weather causes issues for one variety.

Plant garlic in fall for the biggest harvest, about 2-8 weeks before the first hard frost of the year. I've seen gardening sites/books vary greatly on this date, so I assume that as long as it's got some time to get established before the ground freezes, you're fine. I plant in mid-October in Zone 5b and had a fantastic harvest last year. You can also plant it in spring, about 4-6 weeks before the last frost, although spring-planted garlic doesn't get as big as fall-planted (but any garlic is better than none).

There is a great variety of sizes in a single bulb.
Plant the biggest ones.
The day you are going to plant, gently break apart your garlic bulbs.  You can remove the outer papery covering to get the cloves separated, but don't remove any more of the covering than you have to. Once you've broken apart your bulb, select the biggest cloves in the bunch. Chosing the biggest cloves ensures a bigger bulb next summer. Look them over for any blemishes: mold, rot, cuts, or removed papery covering.

Don't throw away the smaller or blemished cloves! These are perfectly edible and should be enjoyed. After I plant my larger cloves, I remove the papery covering from the smaller cloves, trimming away any bad spots. I put them in a jar in the refrigerator to use within the next couple of weeks. The inner covering can be added to stock (Avoid the outer layers to avoid getting dirt in your stock). Outer coverings can be composted. No waste!

Soaking garlic in water and baking soda.
You can soak the cloves or not. Again, there is a lot of talk about whether or not it is better to soak before planting, but it probably makes less of a difference than the debate wouldn indicate. Some people soak in manure or compost tea. Some soak in a vinegar, baking soda and alcohol mixture. Some soak 2 hours, some soak every night.The first year I grew them, I didn't soak them at all and they grew fine. This year I soaked them for 1/2 hour in a baking soda and water mixture. I doubt it will have any affect, but we'll see.


Plant garlic about 4 inches apart.
The ideal soil is a good loam, but don't let imperfect soil deter you. I grew garlic well in my clay to clay-loam soil with no issue. Prep your bed by working in some good compost. Smooth the bed, then dig furrows 4-6 inches apart. Plant the garlic cloves 4-6 inches apart with the pointy side sticking up and the root side down. Cover with 4 inches of soil.


Garlic in autumn. The leaves die back when
it freezes, but come right back in spring.
Over the next few weeks, if the weather doesn't turn really cold, the garlic shoots should pop up (Don't worry if they don't sprout yet; they'll be fine in spring) These little shoots are so beautiful in late autumn when the rest of the garden has been put to bed and the threat of winter looms. Mulch heavily with shredded leaves or straw (I always go with leaves because it's free and sourced on site), piling them up deeper as the shoots grow. When a freeze is coming, pile a bit more on and leave til spring.

In the early days of spring, you'll see them start to grow again. Sometimes they'll even pop up through the snow-another beautiful sight! Keep the beds well weeded for the biggest bulbs possible. Water them every 3-5 days, unless it rains.

Garlic scape harvest.
Garlic scapes on hardneck garlic.
If you are growing hardneck garlic, you'll get a scape. It is a round stalk that comes up through the middle of the leaves, straight at first, then curling. There is an arrow-point at the end. If left on, this will turn into a flower and you'll get bulbils to plant. However, leaving them on may take some of the energy away from big bulbs, so there is a trade off. I harvest them when they curl once by cutting the entire scape at the point where it meets the leaves. This allows the plant to put all its energy towards big bulbs and gives me a garlicy harvest a month early. The scapes are absolutely delicious. These can be added to soups, salads, mashed potatoes or they can be steamed or stir fried. They can be added to quiche or omelets.

Garlic bed in early summer.
Garlic in summer. The stalks are thickening up.
Towards the end of summer (depending on your climate), the leaves will start to die back. Once the leaves are yellow and falling over, harvest the bulbs. Don't wait too long as this will decrease their storage life. Use a garden fork to dig 6 inches away from the leaves. Gently brush away soil from the bulb, but don't scrub or wash them. Allow them to cure by sitting or hanging outside in an airy, dry spot for a couple of weeks. If it rains, bring them inside (warning: this will make your entire house smell like garlic. If this is an issue, put them in the garage or shed). At this point the soil will have dried and you can brush off a bit more of the dirt, again, gently. If you have softneck garlic, you can braid it. Hardneck varieties should be trimmed so the stem is only about 2 inches long. Store in a dry area.

Garlic harvest. Not bad for the first time!
In a couple of months when it's time to replant, select your biggest bulbs and repeat the whole process. Some people say that the longer you grow garlic in your microclimate, the bigger the bulbs will become. At any rate, you'll save a lot of money over buying garlic at the store and you get the supreme pleasure of flavoring your food with homegrown garlic. What could be better?


Shared on:
The Self Sufficient HomeAcre

Sunday, October 5, 2014

Overwintering Peppers

Last year I read somewhere about peppers being perennial, not annual (they are frost-tender, so they act as annuals up north) and that they could go dormant in the cold months and come back strong in spring. So I decided to give it a try. I'm pleased to announce that it was a wild success.

Being in zone 5b, I have a fairly short growing season. Last year, I didn't get much of a pepper harvest. I hoped that overwintering my pepper plants would lead to a better harvest this year. I selected two Jimmy Nardello's pepper plants for my experiment. One was the pepper plant that gave me my first pepper of the year (it only gave me one) and the plant that gave me the most peppers (it gave me three). What did I have to lose other than a bit of water and space?

Freshly potted up
Before the first frost, I dug about a foot out from the plant all the way around. Keeping the rootball as intact as possible, I gently removed the pepper plant from the ground by easing the shovel under the plant about a foot underground. I didn't brush off any dirt. I placed the plant in a large container that had a bit of potting soil at the bottom. I filled in the gaps with more potting soil, but kept the soil at the same level as it was in the ground. I gently sprayed the plant off just in case there were bugs and brought it inside. I plucked off all tiny peppers and flowers and gave it a thorough watering.
The one on the right was actually in a
less sunny spot than the one on the left but
still grew bigger than the other. It also
gave me a bigger harvest this year, so it
will be coming back inside for another go-round.


Going from 60 degree days and 40 degree nights to a steady 64 degrees, the plants went nuts. They grew taller, put on new leaves and branches and then exploded with flowers. I picked every single flower off because I wanted it to conserve its energy for next spring instead of burning out putting on fruit. I kept it by the back patio door. The patio door is a bit drafty, and gets a moderate amount of sunlight. After a couple of weeks, the plants went dormant. The growth stopped, a few of the leaves dropped off, and it just sort of paused. The plants stayed this way for most of the winter.

I watered them whenever the soil got dry, about once every week to week and a half. The shades on the patio door were opened most days, although we did forget to some days. Ray cat wanted to dig in the dirt, so I laid down a mulch of newspaper sheets and she left it alone. I didn't do anything else for the plants.

In mid spring, the plants came back. All of a sudden, they started growing again and putting on flowers. I kept picking off the flowers, but as soon as they started growing, I moved them to a warmer, sunnier window. They put on flush after flush of flowers, each of which I picked off, until we were past our last frost date. I moved the plant outdoors during the day, and brought it back in at night for a few days, then planted it in the garden. After a few days of recouping from transplantation, it started growing fruit like crazy. I planted some nice, sturdy first-year transplants the same day in the same bed. The overwintered peppers had provided me with 10 full sized (but still green) peppers before the first-year plants had set a single fruit. I ended up getting dozens of peppers from each of the overwintered plants, much more than from the newer plants. I picked them when they were full sized but not ripe and they put on a new batch for me.

This first flush of peppers were full-sized and
harvested before the new plants had even
set fruit.
Both plants gave me a phenomenal harvest, but one did a little better than the other. I will overwinter that plant again this year, as well as a few other high performers. On a home-gardener scale, this is a fantastic way to increase yields of peppers. It is also nice to have the plants in the house, even if they are dormant. I'm sure they also do a bit to help with air-purification, too, so there's no reason not to put up a couple plants over winter.

Has anyone else tried this? Any tips, tricks or warnings?


Shared on:
The Self Sufficient HomeAcre


Monday, August 25, 2014

Broadleaf Plantain

Now is the time of year when I'm really starting to get into putting food by. I always feel a little more secure knowing that my food stores will see us through the roughest weeks of winter. I don't currently put up enough food to not have to shop for groceries at all, but I try to keep enough on hand to keep grocery bills modest and provide a bit of safety in case of winter weather emergency. Any time I can get free food to put by, I'm thrilled.

Broadleaf plantain  (plantago major) is such a food. It's nutritious, versatile, free and easy to preserve. The seeds are rich in fiber and are a great way to add back some nutrition to white-flour based baked goods. They make a nutritious tea and can be added to a variety of dishes.

It's insanely easy to harvest and preserve. The day before you mow your lawn (so the stalks have plenty of time to mature and you get the largest stalks possible), simply walk around the yard and yank up any large stalks that are mature. What you are looking for is green stalks with the slightest bit of brown on the tips of the seeds. If it's pure green, they aren't fully mature and will be harder to strip. If it's pure brown they are also harder to strip and may be too old. Get at least a huge handful to make it worth the effort. It's best to let them sit for a couple of days on the counter before stripping the seeds. This lets the stalks dry out just a little so they don't break as easily.

I like to watch gardening videos on youtube while stripping them. It's mindless work, and gives me an excuse to sit down and relax with another Wisconsin Vegetable Gardeners video. To harvest, simply grasp the stalk at the top and pull your fingers towards the bottom while holding the stalk over a large bowl or cookie sheet. You'll end up with a small handful of tiny seeds. Some seeds will scatter, so it's best to do this at a table so you can sweep them up. 

After you have them stripped, you can air dry them. I simply put them in a thin layer on a cookie sheet, and throw them in a cabinet for a couple of weeks (or a couple of months by the time I remember). When they are fully dry, put them in an air tight jar. If you want to speed things along, use a dehydrator on a low-medium setting and check after a few hours, or use a low oven. 

To use them, you can either make a tea by pouring a cup of boiling water over a heaping tablespoon of the dry seeds.  This has a grassy flavor, but it is not unpleasant. My favorite way to use them is to add fiber and nutrients to baked goods. I replace up to 1/5 of the flour in a recipe with ground up plantain seeds when making pizza dough, highly flavored muffins, or even pancakes. If using a smaller amount, the taste isn't noticeable, but if you want to use a larger amount, make sure that there are other strong flavors to outweigh it. I've even mixed a small amount into granola.

If you are making tea, you can leave them whole. If you are adding them to baked goods, it's best to grind them up. I usually just pinch a small amount and smash them with my fingers a bit. If you want a more uniform grind or want to grind a large amount at once, use a blender or coffee grinder and then work through a sieve, regrinding the larger pieces as needed. These store really well over the winter. The longest I've kept some in storage was a year and a half, and they weren't rancid at that time, so feel free to put up a lot.

The leaves are also edible, but are best when young and tender. Harvest them while small and use like you would spinach. You could also dehydrate some of the leaves to add to your veggie powder jar. You can also use leaves of any age as a poultice for wounds. Just mash/chew up a leaf or two and place on the wound. Place a bandage or cloth over the area to hold in place. The young, softer green shoots can be steamed or stir-fried.

Shared on:

Homestead Barn Hop

Saturday, July 19, 2014

The Garden Experiments Update

I love experimenting in the garden. It's the greatest joy to garden, especially when I get to try new ideas. It starts with a "hmm, wonder what would happen if..." and then I start experimenting. I have a challenging yard for gardening: shade, clay soil, and crowding. I've mentioned both on this blog and on social media some of the experiments that I'd either started or wanted to start. Some are great successes, and some wild failures. I thought I'd post some updates and let you know what I'm learning. I'll definitely give more details as the season progresses, but this stuff is so exciting, I wanted to share it with you all ASAP.


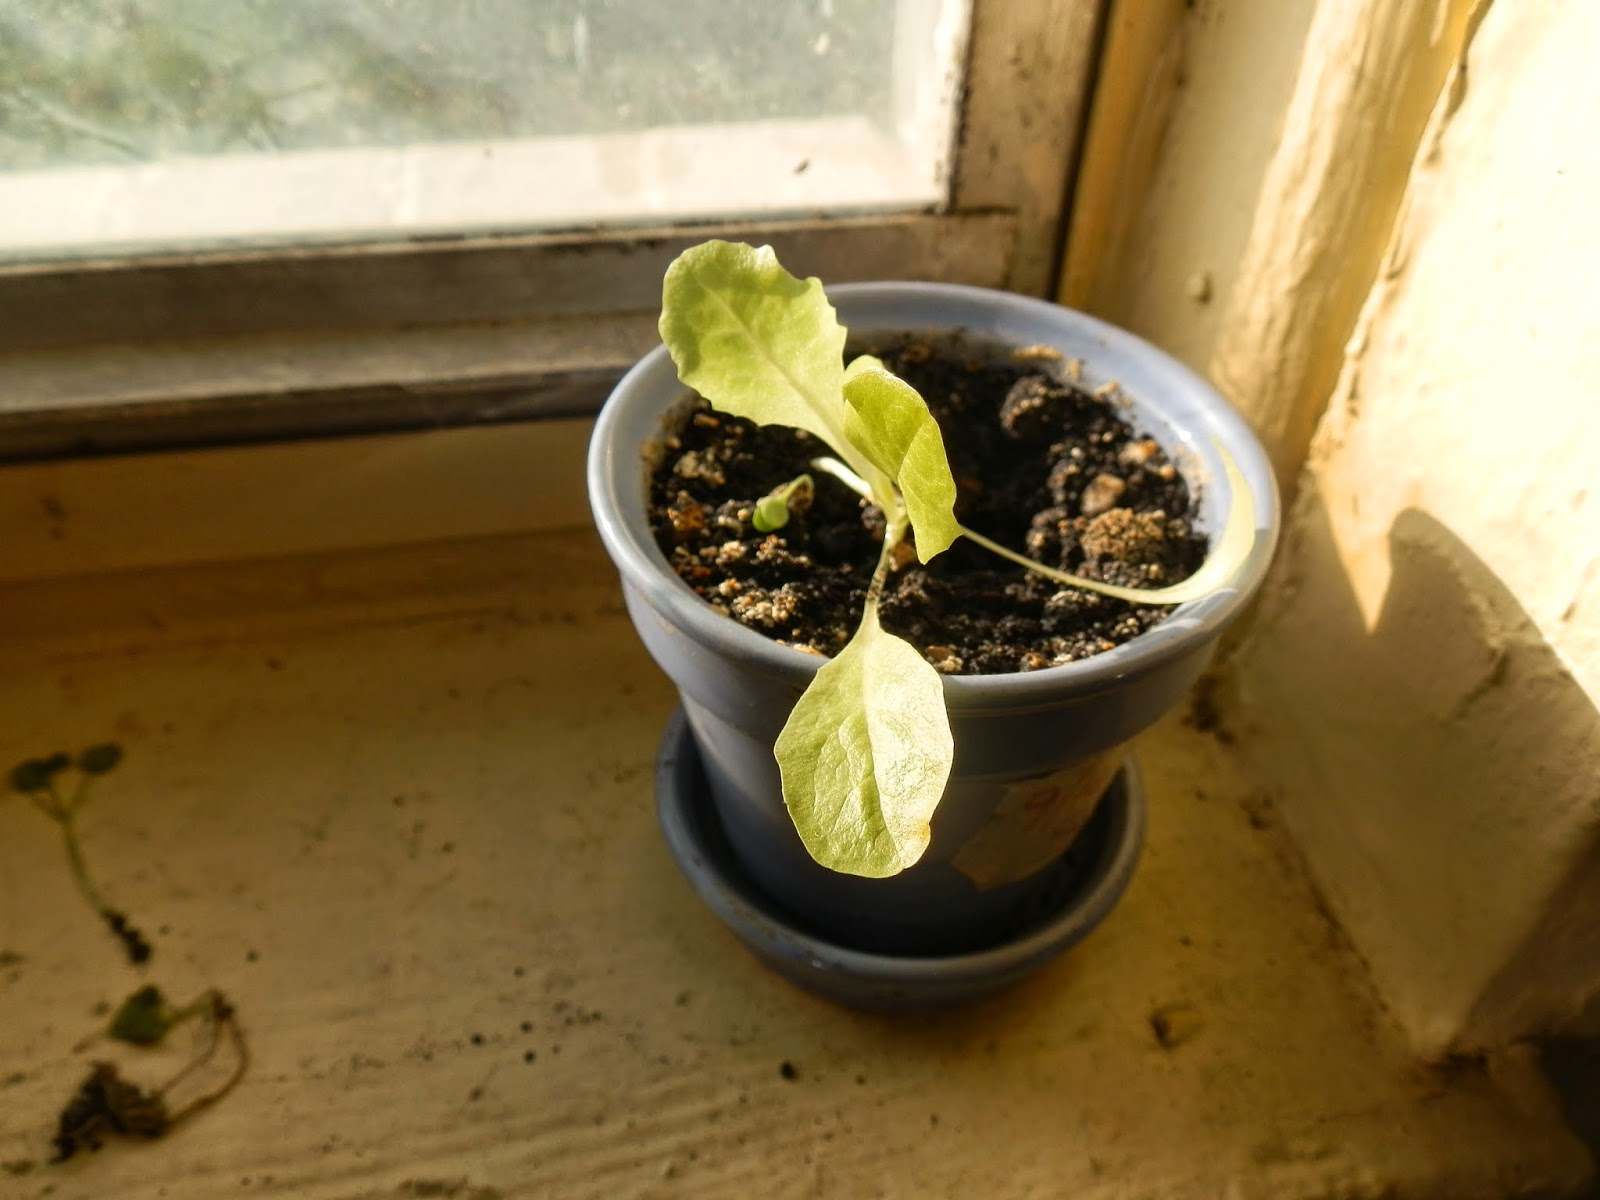
The Indoor Winter Paradise. Over this past winter, I grew lettuce indoors. I wrote a detailed piece on it here. To sum up: I planted 6 containers. One was a tiny container with 6a single Black-Seeded Simpson lettuce plant. It was cute, to be sure, but a waste of space. Next year, I'm sticking to 6" containers or bigger. 2 were planted to spinach, and 3 more to red sails lettuce and endive. I planted the last 5 heavily. The spinach never grew large, but the tiny leaves were wonderful in salads. However, the two containers barely produced any real bulk, and so this coming year I will not plant more spinach indoors. The lettuce and endive containers were incredible. We ate loads of salad all winter long. A thorough harvest of the containers was enough for 2 large side salads. I will definitely do this again every. single. year. There is no better way to beat the doldrums of a bleak winter than to harvest a fresh salad. Seriously, though.

The Senior Citizen Peppers. Last year I heard about overwintering peppers and so I decided to give it a go. I'd only got 1-3 peppers per plant last year, so I figured I had nothing to lose. I chose the best two Jimmy Nardello peppers I had last year: the one that gave me the first pepper (although only the one) and the one that gave me the most (3). I dug out about 8" from the stem and plopped the plant into a medium-large container. I filled it in with earth and reused potting soil. When I first brought them in from the crisp autumn air to the warm indoor climate, they exploded with new growth and flowers. I didn't want them to pucker out, so I picked off all of the flowers so they wouldn't put energy into producing fruit. I put them into an area that got some indirect light, but no direct light. It was by a leaky window, so it was cool, but not freezing. After a couple of weeks, they dropped some of the leaves and went dormant. I watered them every week or two but didn't give them any food. Then, in spring, quite on their own, they vamped back up. Lots of new growth and flowers, so I moved them to an area with some good light. I picked off all the flowers so they could focus on growth for now. I planted them out into the garden the same day as my first-year transplants. Now, several weeks later, the results are in. First year plants: 1 of 7 has two small peppers, the rest have flowers only or nothing at all yet. Overwintered plants: I've already harvested 5+ full sized peppers (unripe, but huge) from each plant. Some readers have said you can overwinter a plant for several years. I'll definitely do this again every year.

The Pairing. Tomatoes and Pole Beans. Last year, I planted my Scarlet Runner Beans next to my tomatoes. They kept going off their trellis and onto the tomato plants. At first, I tried to put them back on the trellis, then just let them go. The bright red flowers looked beautiful next to the rich green of the tomato plants and they seemed happy enough together. This year, I picked some pole beans to plant with my tomatoes intentionally. I picked Dean's Purple Podded Pole Beans so I could see the beans among the leaves for easy harvest. I planted 4 beans around the tomato cage. The beans grew up the cages, then over to another cage, then out, then dropped down to lower on a cage, and back up. They are all over the tomato plants. The flowers and stems are a lovely purple and it looks incredible. I have no pole beans yet, but lots of flowers, so hopefully soon. Of the 8 tomato plants with beans growing around them, 5 have tomatoes and loads of them. 3 do not have any tomatoes or flowers yet, but they are the plants in the back and in the shadiest part of the bed (remember that I have little full sun, and this affects my garden a lot), so I assume that the shade is the cause, and not the beans. I will update as the harvest season arrives.


The Perpetual Lettuce Bed. I dug up an overgrown, ugly area of the yard. It is shaded by a big tree in the neighbor's yard. I want it to become a perpetual lettuce bed. For this year, I planted a lot of random things: broccoli (all eaten by bugs), cauliflower (all eaten by bugs), spinach (disappeared overnight), cilantro (spotty germination), pak choi (all eaten by bugs), mustard greens (fantastic harvest that has lasted months so far), summer squash (loads of flowers, but no fruits yet), beans (no germination whatsoever, but they were old seeds). Now, I have some radishes and lettuce planted in some of the spaces where other things had failed to grow. The radishes seem fine, but the lettuce had a poor germination. I think the giant tree that shades the entire area may be responsible for the spotty germination, as the plants that have done okay are farther from the tree. There are some tomato and pepper plants that volunteered from the homemade compost I dumped on last autumn (black soldier flies turned that batch into a horror-show of writhing, so I dumped it out for the birds to feast on...it was terrifying, really). The tomatoes have fruited and the peppers have flowers. There are a lot of weeds, but I've been removing it as I go. This winter, I plan to dump on some compost and loads of leaves and plant it to lettuces in early spring. For this year, I've gotten some food and hope to get a little more, but it is not wildly successful. I do have hope that it can grow something, and I'm not giving up on it quite yet. If next year the germination is pathetic, I'll just sow it to something like mint and let it go wild.

The Decorative Container Garden. I decided that for the front garden, in the area between the sidewalk and the street, I wanted to put some large containers planted to pretty edibles. I decided on Burgundy Okra as the thriller based on it's rich stems and fruits, milkmaid nasturtium as a spiller, and freckles lettuce as the filler.They were not as brilliant as I expected. It's a boring planting really, and just didn't work out as I'd planned. The okra falls over without support. The nasturtium variety I picked is bushy, not spilling like I'd read online (What? Not everything you read on the internet is truth???). The freckles lettuce is an effective filler. One planting gets a bit more sunlight and is much bigger. The okra plant already has fruited. The nasturtiums are in bloom. The lettuce is wicked big and I'm harvesting enough for two-side salads every day. The other planting? The okra hasn't flowered yet. The nasturtiums failed to germinate the first time, and there's only one flower. The lettuce is much smaller and I've had to plant in a lot of Black-Seeded Simpson lettuce to try to fill it in a bit (that's all the lettuce seed I had left). The second planting is under a tree, so it get's less sunlight, and I think more rain since it is right under a branch end. It is often flooded (Yes, I need to drill a couple holes). I'll keep trying at edible landscaping, but this planting does not work.

The Pea High Chair. I have an old wooden chair I dumpster dived. It's wobbly but pretty. I imagined it covered in pea vines. I plopped it in the garden and planted peas all around it. I planted spinach underneath it, thinking that since spinach bolts easily, maybe the shade from noon-sun would protect it. The peas germinated well and looked great. And then....then the groundhogs came in. They ate them down, and then we'd attempt to repel them with airguns, solar-powered high-pitched squealing motion detectors, screaming, cursing, and finally, even some organic small-mammal repellent (I believe it was some sort of predator urine). They kept coming back and nibbling the shoots. Sigh. I got a few peas, but that's it. The spinach germinated okay, but died off shortly. Failure. I will not grow peas again at this property. Two years I've planted, multiple times a spring, and the groundhogs or rabbits always get them.

The Hugelbeet-Inspired Bed. There was a low spot in the back yard, so I decided to do a hugelkulture-inspired project. I dug out the sod and top soil, then laid down a bunch of branches and logs. I sprinkled in compost and composted cow manure, then added some leaves then turned the sod upside down on top. I put the top soil on top of that, and added a couple bags of compost. It rested a good 6 inches higher than the rest of the yard. As time has passed, it has shrunk down so it is roughly even with the rest of the yard instead of being 6 inches lower than the surrounding ground. On that count, it is a success. In other ways, it is mixed. I planted beans,cukes and squash on the bed. I know that squash is a heavy feeder, but I had extra seedlings, so there they went. The squash and cukes have flowered, but no fruit. The beans all flowered like mad and have put on a thick set of beans. The leaves on everything are light green and yellow. I think this is simply a matter of it being a first-year bed, and the wood is tying up some nitrogen while it breaks down. Between the aging of the wood, some coffee grounds I've been dumping on it, and my plans to work in the expired bean plants, I think next year will be better. I'm getting a harvest from it, and that's the important thing! There have been a lot of weeds, but I've noticed that in every new bed. I've been faithful at weeding, however, and the stand of weeds has diminished significantly.

The Crowded Room. I have a couple containers in the front garden by the front door overcrowded in an attempt to see just how much I can cram in and still get a harvest. One planter has a tomato plant and an underplanting of radishes and beets. The other has 4 pepper plants and an underplanting of radishes. In the first container, I have a lot of tomatoes. Score. The beets have been sulking and not putting on any growth. The radishes are starting to bolt. I will likely harvest the beet greens for salad and allow the radishes to put on those deliciously crunchy seedpods. In the second container, the peppers look okay and have unopened flower buds so far. I will likely harvest half of the many radish plants to put into salads and see if the remaining plants will bulb up at all.

So what about you? Have you had any fun experiments in the garden?


Shared on:
Homestead Barn HopThe Self Sufficient HomeAcreWildcrafting Wednesday
Related Posts Plugin for WordPress, Blogger...