Tuesday, July 8, 2014

Roasting Coffee

I love coffee. I can't imagine a morning not spent with a lovely cup. I don't love the high price tag, however—or, worse yet, a stale, tasteless brew. Fortunately, I can roast my own coffee for out-of-this-world flavor.

And that’s just one reason to roast your own! You can roast and brew your coffee at the peak of freshness. (No more stale coffee.) You can roast your coffee to the exact darkness you enjoy. (No more weak coffee.) You can explore all the nuances of the bean. (Roasting the same bean to two different degrees will give you two different experiences.) You can even make your own special blends.

And then there’s the price: Fair-trade organic green coffee beans purchased in bulk are often cheaper than a similar quality and quantity bought preroasted. Plus, green coffee beans have an almost infinite lifespan. You can buy coffee once a year and save yourself the hassle of worrying about running out. Maybe best of all, roasting coffee at home is a fun new skill to add to your repertoire. Let’s get started!

WHAT YOU'LL NEED
» green coffee beans (more info below on amounts and where to find them)
» metal colander
» wooden spoon

AND
» popcorn popper (with small vents around the bottom—not mesh)
» large glass bowl

OR
» large skillet (not nonstick)


BUY YOUR BEANS. Remember, you’re looking for green, unroasted coffee beans. If you live in or near a major city, you may be able to find a local supplier (search online for “green coffee beans” and the name of your city). Most coffee brokers only deal in large quantities of coffee, though: 50 to 100 pounds, depending on the company. While this is not a good route for your first time out, a bulk buy might be worthwhile if you become addicted to roasting. If a friend also roasts, you can split a bag for a more manageable price tag. Either way, green beans will keep for years.

I buy my beans online. Many online sources cater to the home roaster and sell in smaller quantities, anywhere from 1 to 20 pounds. Most sites offer a discount on larger quantities, so once you find a bean you love, you might want to buy in bulk. You can browse sites by region/country of origin, and some sites even offer sampler packs so you can try several different beans. Some sites I recommend that offer organic and fair-trade green beans include Roastmasters, Dean's Beans, Coffee Bean Corral, and Sweet Maria's (on this last site, look for the "Farm Gate" label indicating fair-trade options).

2. ROAST YOUR BEANS. Some people buy a fancy home roaster. Since I roast my own beans for self-reliance and for saving money, I avoid extra single-use gadgets that crowd my kitchen. If you don't use a roaster, there are two practical ways to proceed at home, and neither requires special equipment: roasting coffee in the popcorn popper and roasting coffee in a skillet. That said, not just any popcorn popper will do. You need one that has small vents along the bottom of the popper rather than a mesh bottom. Mesh bottoms are a fire hazard since coffee beans shed a chaff that can ignite.
The popcorn popper provides the most even roast and is the neater of the two methods, so it’s probably best for perfectionist types. On the other hand, the skillet method is more hands-on, and therefore, more fun—at least for me. You can also roast more in each batch by using a large skillet and save yourself some time.

One warning: Roasting coffee stinks. Your beloved brew-to-be doesn't smell like a warm, lovely cuppa during the roasting process. There's a bit of smoke and some fumes, so turn on the exhaust fan or open a few windows.

METHOD 1: POPCORN POPPER
Add ¼ to ½ cup green coffee beans to your popper, following your machine’s recommended amount for making popcorn, and put the plastic hood on top. Place your metal bowl under the hood opening, as you would when popping popcorn. As the beans roast, the papery chaff will blow out of the opening into the bowl and can be dumped in the compost bin.

Turn on your popper and listen. You will hear the beans swirling around, eventually followed by a chorus of tiny pops. This is the first crack. Within 30 to 60 seconds after the cracking ends, your coffee is at what is called a “city roast.” This is a very light roast but has the highest caffeine content of any roast, since caffeine degrades at higher temperatures.

As the coffee continues to roast, you’ll move through city++ to full city—a still light, still flavorful roast with moderate to high caffeine levels. Right after the beans have reached full city roast, you’ll hear a second cracking. In the middle of the second crack, the coffee turns darker, with a richer flavor. This is Vienna roast, a good espresso roast.
About 30 seconds after the cracking has stopped, the beans reach French roast. At this point, the beans will be oily. Remove them immediately. If the beans continue to roast, they will burn and you'll be left with charcoal and a smoky kitchen. (From here, skip down to "Finishing," below.)

METHOD 2: SKILLET
Bring your skillet to medium heat. Pour in enough beans to form a single layer in the pan, approximately 1 to 1 ½ cups, and start stirring. Stir constantly to keep the beans from burning. The roasting indicators here are the same as in the popcorn popper. After the first crack, turn down the heat slightly, as your beans will get dark fast. Remove the skillet from heat when the beans are slightly lighter in color than your desired roast. Even once the skillet is off the stove, the beans continue to cook for a bit, due to residual heat.

FINISHING YOUR BEANS
Pour your roasted beans into a colander and swirl them around or stir with a wooden spoon. This will help to cool them quickly and keep them from continuing to darken.

After roasting, the beans should rest for 24 hours before grinding and brewing. This rest period seals in a better flavor. In a rush? At the very least, let them rest for 8 hours.

Storing your roasted beans in an air-tight glass jar out of direct sunlight will keep them fresh for 5 to 7 days. For the freshest cup, wait to grind them until right before you brew your coffee. Enjoy!

Shared on:
From The Farm Blog HopHomestead Barn HopWildcrafting WednesdayThe Self Sufficient HomeAcre

Tuesday, June 24, 2014

Homemade Bone Broth

Bone broth makes (almost) everything better. It is chock full of all sorts of incredible health benefits. It tastes amazing and takes a so-so dish and turns it into an OMG-this-is-the-best-thing-ever meal. It is also one of the things that money just can't buy. The stuff at the store is a weak imitation of real, from-scratch bone broth. It doesn't have the same full flavor, it isn't sexy gelatinous goodness, and it is full of ingredients of a questionable nature. Fortunately, the real deal is crazy easy.

Making bone broth can either be a pricey (although worthwhile) endeavor or one of the most frugal things you can do. The costly way involves buying bones at the market for $3/lb and big bags full of veggies. The frugal way involves salvaging ingredients to squeeze every bit of nutrition out of good food that you have either arduously produced or purchased from a good farmer. Either way, by making it at home instead of buying that awful stuff at the grocery, you'll be rewarded with incredible flavor and superb nutrition.

WHAT YOU'LL NEED
* Bones (these can be saved from other meals or purchased)
* Veggies or veggie scraps
* seasonings as desired-you can add wine, peppercorns, salt, to taste
* apple cider vinegar (although white will do in a pinch)
* Stockpot or crock pot
* spoons/ladle
* strainer
* cheesecloth (optional)

WHAT TO DO

If you chose to buy your bones, you can pick the very best bones for broth. Veal bones of any kind are great to use, as are beef "knuckle" bones or feet. These bones are the highest in cartilage and will give you a good jello-type stock. If you are making chicken stock, you can't go wrong with chicken feet.

Whenever I cook bone-in meat, I save the bones. If I only have a small quantity, I toss them into the freezer until I have more. The Thanksgiving turkey carcass is the perfect amount for a big batch of bone broth. While this doesn't give me the most high-cartilage bones, it is free and reduces waste.

Some people buy veggies for making bone broth, typically onions, carrots and celery. I tend to use veggie scraps to eliminate waste and cut costs. Since a lot of nutrients are just under the skin, peelings are very nutritious. As I prep veggies for cooking, I place the trimmings in a bag in the freezer to use when I make broth. Freezing the veggies will make the broth a bit cloudier, but for home-cooking, I've never felt the need for crystal clear broth. Things I save include: carrot peels and leaves, onion skins and root ends, celery leaves, potato skins, tomato skins, sweet potato skins, squash peels, rosemary stems, mushroom stems, garlic skins, pepper stems, corn cobs, and pea pods. Veggies that are past their prime, but not molded or slimy, can be added. Cabbage family veggies will dominate the flavor of a broth, and beets will turn it red, so use discretion when adding these to your broth.

To get the best flavored broth, you'll need to roast your bones. Put them in a greased baking dish. If you are using beef bones, use this trick my boss told me: rub the bones with a bit of unflavored tomato paste or sauce before roasting. The tomato will caramelize and add great color and flavor. Roast in the oven for 30 minutes at 400 degrees or an hour at 350. If you have large chunks of carrots, onions or celery, roast it with the meat for a richer flavor. Make sure that the veggies get to a dark brown, but not black. You want caramelization, not charcoal.

Place the roasted bones and veggies into a large pot on the stove or into the crock pot. Add a bit of warm water to the roasting pan. Use a spoon or spatula to scrub off all of the toasty bits from the pan. This is high-flavor goodness, so you want to get it all. Dump the water and flavored bits over the bones. Cover with cool water. Add seasonings, as desired, such as salt, pepper, bay leaves, parsley, etc. You can add a bit of wine if you'd like. Add a tablespoon of vinegar per quart of water added. The acid in the vinegar will help pull out the minerals in the bones giving you a more nutritious, gelatinous broth.

If you are using a slow cooker, set it to low, cover it and don't remove the lid. If you are cooking it on the stove top, set it to medium-low heat and check after a half hour to make sure that it is gently simmering, but not boiling. Cover and allow it to simmer away for hours. At a minimum, it should simmer for 8 hours, but it is not unreasonable to allow it to simmer for up to 24 hours. Some people even have perpetual broth simmering, removing broth and adding bones as needed. A slow cooker is perfect for allowing it to simmer all day and night, but don't leave the stove on while you sleep.

After it has cooked for 8-24 hours, turn it off and let it cool slightly. Pour through a strainer to remove the bones and veggie scraps. If you want a more clear broth, strain it through a cheesecloth. You can compost the veggie scraps. The bones can be saved and reused for a second or third batch of broth. After a very long cooking time, or being used a few times, the bones are quite soft and could be composted or worked into the garden.

Pour the broth into containers and place in the refrigerator overnight. The fat will rise to the surface and once cool, you can easily remove it from the top in one piece. Save this flavorful fat for cooking.

Check the consistency of your broth. Ideally, when cold, it will have the consistency of jello. That means that you extracted lots of gelatin from the bones. Once you reheat the broth, it will turn to liquid again. If the cold broth is runny, it doesn't have a high gelatin content. Next time add a bit more vinegar, use less water for the amount of bones, or cook it longer. Don't worry though, even the most poorly made from-scratch broth is better than the pale, weak stuff at the store.

Use your broth in soups and stews. Use it to make gravy. Cook your rice in it. Simmer veggies in it. Drink it as a nourishing beverage. Add it to casseroles. Use it to make stuffing. Rehydrate dried veggies, especially mushrooms. Enjoy incredible flavor, incredible nutrition and the pleasure of reducing food waste.

I originally published this on: Homegrown.

Shared on; The Self Sufficient HomeAcreHomestead Barn Hop

Sunday, June 8, 2014

Eat Your Thinnings!


Today I thinned out my first plantings of carrots, beets, radishes, turnips, spinach and pak choi. I was a bit hurried as I planted, so there were a lot of clumps of seedlings. Leaving them as is would mean a fair amount of leaf growth, but no roots, so I thinned them to their proper spacing. I feel really bad about wasting seeds though, especially since I like to buy really good seed.

All of these veggies have edible leaves, so instead of tossing them into the compost, I tossed them into my salad bowl. I ended up with 2 cups of beautiful microgreens to add to our dinner salad. No waste, and I get fantastic nutrition and flavor. And just look at that color!

Also, while I was thinning out the beds, I weeded them as well. There were a few baby dandelion plants that had popped up since I first prepped the beds in spring. I picked those and tossed them in with the microgreens. When this young, dandelions are rather mild. I sometimes toss in violet and plantain leaves as well.

While weeding, I accidentally uprooted one of the pea plants. This is devastating because I have been in a battle against a ground hog over my pea patches. One of the few pea plants that survived his greed fell to my momentary carelessness. Rather than let it go to waste, I'm going to add those tasty tendrils to our salad.


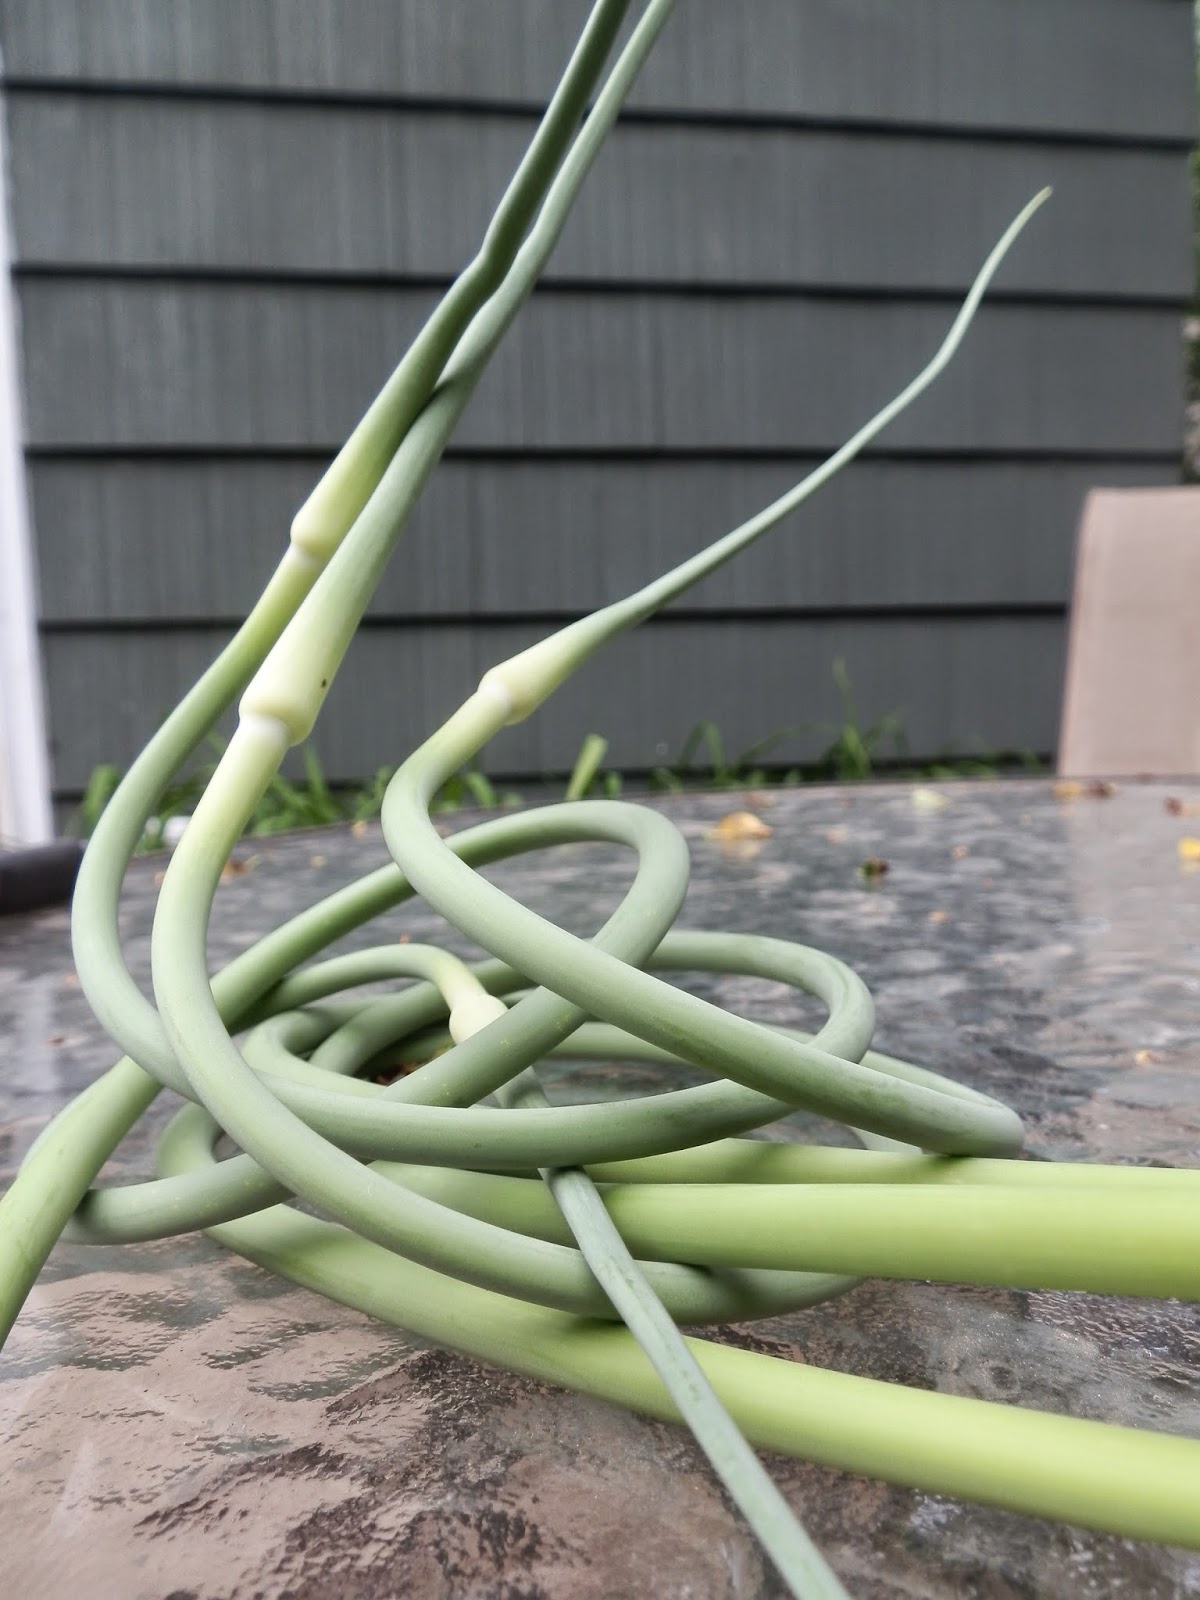
If you grow hardneck garlic, it will attempt to go to seed and send up a scape. They are really beautiful with a cute little curl to them. It is best to cut them off so that energy can be put into producing large heads instead of seeds. Instead of throwing them away, eat them! They are crunchy and have a milder garlic flavor. They can be used to make pesto or added to stir-fry or casseroles. I'm adding mine to a quiche tonight.

Onions, leeks and scallions will sometimes produce scapes, so harvest those too. If you let them stay, eventually they will bloom int little pop-poms. These flowers are also edible and can be added to salads, pizzas, soups, etc.


Shared on:
13 Heritage Homesteaders Hop #1Homestead Barn HopThe Self Sufficient HomeAcre

Sunday, June 1, 2014

The Prettiest, Fluffiest Mulch I've Ever Seen

A few weeks ago, I was working in the garden, getting the garden beds ready for a thick planting of tomatoes, peppers, eggplants, squashes, peas, beans, etc. I was working compost into the beds and thought that I wished I knew of a good, cheap source of mulch for the beds. Every source I'd found was too expensive for my tastes. I'd thought about rounding up all of the neighbors' yard waste and spending the $100 to rent a wood chipper for a day. Then it hit me.


When we moved in, there was a large tree stump that we knocked over while cleaning up the tree line. It had sat outside through two winters, at least. I stepped on it. My foot caved into the fluffiest, softest, most beautiful mulch I'd ever seen. I was easily able to break apart almost all of it by hand. The few pieces that weren't able to be broken apart easily were tossed aside. When I dig my next garden bed, I'll bury those pieces in the bottom to continue decomposing and improving my clay soil.

The stump was huge and I was able to mulch 2 1/2 out of 4 beds for free. This is a good reminder that I should look for ways to repurpose or reuse items around the stead before considering buying something I need.

Shared with:


Homestead Barn Hop13 Heritage Homesteaders Hop #1The Self Sufficient HomeAcre

Friday, May 30, 2014

Antique Jewelry


I love jewelry. Not fancy, expensive jewelry (Years ago, I actually told Trucker that if he bought me a diamond I'd say "no"), but fun stuff. What I don't like is paying high prices for something that is boring and everyone else has. I don't like going to discount stores at the mall for jewelry that was cheaply made. My solution? Go antiquing!


I like to browse antique stores with Trucker, but I never thought they would be a good source for my cheap jewelry fix.  Then one day I saw it: a bin of costume jewelry, $3 apiece. I dug through the bin and found a few pieces I loved. Now, every time I go to an antique store, I look for a bin of cheap jewelry. Often, it is $2-4 apiece. Sometimes it's only $1 per piece.

If you go to the mall or department store for cheap jewelry, you can expect to pay $4-20 per piece. The costume jewelry bins are at least competitive, and often much lower than similar pieces bought new.

You do have to sort through some broken, ugly, outdated or just plain weird jewelry. Don't let that dissuade you. There is likely some really good stuff buried beneath it.  

The jewelry I find is interesting. It has personality. It is different than the stuff I would find at a mall. I have never seen anyone wearing a piece I own. I am able to find jewelry that fits my style and my personality. Many of the pieces I find are very fun and quirky.

Each of the pieces in this post were purchased for $1-5, most of them $1-2. Except for the cactus earrings and the insulting pin. Those stayed at the store.


Thanks to the Bookworm in Wanatah, IN, for letting me take photos and for talking with us! If you are ever in the area, check them out!
Related Posts Plugin for WordPress, Blogger...