Monday, December 9, 2013

Use It Up: Breadcrumbs

Many things are tossed into the garbage can when they still have lots of good life left in them. Use It Up is a section on how to use this "trash" to make new, useful items for your home or to re-purpose items to avoid a purchase. 

I'm always surprised (horrified) when someone at the bakery asks if they can buy bread crumbs. Using bread crumbs is supposed to be a way to use up the crumbs that break off the loaf while you're cutting a slice of a good rustic bread, or a way to use bread that has become hopelessly dry. Not something you buy.

Whenever I have bread that gets hard and dry (the bread I eat is preservative free, so there's often a good 1/4 of the loaf that gets dry before I can get to it), I cut it up into cubes. I let it air dry on the counter. The cubes dry quickly, especially in winter when the air is so dry. These cubes are perfect for bread pudding, strata, croutons or stuffing. I had a lot of them saved up, and wasn't feeling like making stuffing anytime soon, so I decided to make bread crumbs.

First I placed the dry bread cubes in the blender. I pulsed it for one second blasts, letting the blades come to a complete stop before pulsing again. This allows the bread crumbs to fall back against the blade, speeding up the time and keeping the motor from burning out.


Once all of the bread was in crumbles, I poured a small amount into a strainer.  I sifted out as much of the smaller crumbs as possible, and worked more through by rubbing the crumbs against the sifter. Any pieces not easily worked through were dumped into another bowl. I kept going til I got through all of the crumbs in the blender, then pulsed all of the crumbs in the second bowl. I repeated this a few times until most of the crumbs were fine.


I stored the crumbs in a glass jar. I left the lid off the jar and will stir it daily for a few days to make sure it's completely dry before I seal it up. I'll use these crumbs for frying chicken, fish, and veggies. I can top casseroles with it or add it to enchildada or stuffed pepper filling. I can use it to stretch ground meat in meat loaf, meat balls or hamburgers. Last night I used it for coating the best-tasting pan-fried pork chops ever.

Making your own bread crumbs is easy, cheap and reduces your food waste. Plus there is a simple pleasure in making something that most people buy at the grocery.


For more tips on using up stale bread, check out Use It Up: Stale Bread

Shared on:
Homesteader's Hop
From The Farm Blog Hop

The Self Sufficient HomeAcre
TTF CoHost 1Homestead Barn Hop

Friday, November 29, 2013

Reducing Dependence on the Grocery Store

What would you do if you couldn't get to the grocery store? What if the grocery store was empty? What if it closed? Could you eat? What would you eat?

Most of us depend on restaurants and grocery stores for all of our food. Without them, we'd go hungry. In an age of climate change, economic instability and a terrifying dependence on cheap oil to grow and distribute food, we leave ourselves in a precarious position. By increasing our self reliance and learning new skills, we can increase our security, eat better and have fun! Here are some ways you can take control of your food.

* Learn to cook. If you are dependent on restaurants or convenience foods, the best place to begin is to learn to cook. Start simple, start small. Learn to fry an egg. Learn to make chicken noodle soup. Progressively challenge yourself. Pinpoint your favorite restaurant meals and see if you can recreate them at home. My favorite things at a Chinese restaurant are wonton soup, egg rolls and crab rangoon. These are all really easy to make from scratch, and so I do.

* Learn to make things you think have to "come from the store". Many store-bought items can be made easily at home. Sour cream, butter, pasta, hot chocolate mix, creme fraiche, yogurt, bread, cakes, and more can be made easily. They are usually tastier when made from scratch, and often cheaper.

* Grow some herbs. Whether you want fresh herbs for cooking, or herbs to dry for medicinal teas, growing herbs is a great gateway into growing your own food. Many kinds of herbs grow well in containers or even indoors,so you can get growing even if you live in an apartment.

* Plant a fruit tree or two. If you have the space in the yard, plant some fruit trees for beauty and produce. Apple trees are a sight to see when in blossom, and you can get loads of fruit for snacking, applesauce or pies! Cherry trees are also lovely, and cherries are not cheap in the stores. It'll take a few years to provide a harvest, but then you'll get a harvest for years.

* Grow vegetables. If you have a little sunny spot in the backyard, plant something yummy. Tomatoes fresh from the garden are beyond compare. So are the hundreds of varieties of lettuce, the many varieties of radishes and carrots, peppers of all sorts, eggplants, cucumbers, and zucchini by the bushel! By growing it yourself, you control what goes in them and on them and ultimately into you. You can eat them at the peak of freshness and they don't travel 1500 miles to get to your stomach, either.

* Go to a farmers market. Not only will you find top-quality produce, but you can support small, local farmers. Sometimes you can find produce much cheaper than the grocery store, too. The best way to get great prices is to buy something that is in it's peak season. Since every booth will be offering it, the price will be lower. Ask questions and try new things.

* Get to know a good, local farmer. Whether you meet them at the market or stop by their farm stand, get to know the people who grow your food. You can then make sure that it is of a good quality. It benefits both you and the farmer to cut out all the middle men. The farmer gets a reasonable amount for the food they produce, and you get top quality veg, fresh from the earth. Look for farm stands along your work commute or near your home.

* Preserve it. When you have a surplus of a perishable food, preserve it for later when you won't have as much. During the summer and autumn months when harvests are at their peak, put up food that you grew or found a great bargain on at the farmers market. Canning is a great way to put up tomato sauce, jams, jellies, and pickles, but is intimidating for beginners. Fermenting is also a great way to extend the life of food, but again, intimidating (I still haven't gotten up the nerve to give it a go). The best intros into food preservation are freezing and drying. They are easy, quick to learn, pretty much foolproof and quite safe. Freeze peppers and onions for stir-fries and omelets. Freeze bananas and berries for smoothies. You can also freeze homemade foods. Freeze muffins and breads for later use. Freeze pancakes and waffles for a convenient breakfast food that doesn't come in a box. Dehydrating food is my favorite way to preserve. I use a dehydrator but you can also use the oven or just put them outside or in a car on a hot, dry day. Apple chips are a favorite snack food and dried tomatoes are to die for. I also dehydrate cucumbers, peppers, pumpkin, zucchini, onions, mushrooms, strawberries, plums, peaches and pears.

* Have family preserving/cooking days. If you have fruit trees that produce more fruit than your family can eat, or that you can put up alone, or if you find a great deal on a 100 pounds of tomatoes, get the family (or a group of friends) together for a day of preserving food for everyone to enjoy throughout the year. Make jams and jellies to give as holiday gifts. Cook apple sauce like my family does on our apple processing days.

* Plant some edible landscaping. If your homeowners association or zoning commission doesn't allow formal vegetable gardens, mix some edibles into the landscaping. Nasturtiums are a beautiful edible flower. Rosemary bushes can double as hedge and flavoring. Lavender is beautiful and makes a calming tea.  Asparagus ferns could be worked in as a lovely background plant.

* Get a few hens for entertainment and breakfast. Nothing compares to a honest-to-goodness, fresh egg from a loved hen. The yolks are a rich orange and stand up tall and taste worlds different than that crap they sell at the grocery. If you are less queasy, you can also get into raising a few chickens (or rabbits) for meat. If you aren't caught up in the cute-fuzziness of rabbits, they can be a great source of local, ethically raised and humanely slaughtered meat.

* Get a bee hive, especially if you live in the city. Cities have a lot more flowers for the bees to visit, don't take up much space and you don't have to worry about composting their manure. In exchange for a home, access to flowers and a bit of attention, you can get honey. Sounds like a bargain to me! If you start raising bees, adapt all of your recipes to use honey instead of sugar.

* Forage for wild food. Foraging is an incredibly fun hobby, especially fun with friends or children. Pick mulberries, crab apples, wild apples, forgotten pears, acorns, walnuts, and blackberries. Learn to identify wild greens to use in cooked or fresh salads. Dandelions are my favorite wild food and can be used in many recipes, from flower fritters to bud soup to muffins.

* Speaking of dandelions, the roots can be cleaned, dried and roasted to use instead of coffee. They are earthy, nutty and slightly sweet. While most of us can't produce our own coffee (although you can roast your own!), dandelions grow all over. It's a great way to use an invasive weed, is often raised without chemicals, and as local as they come.

* Buy produce from unconventional sources such as a neighbor's produce stand by their driveway or a produce auction in farm country (these are for bulk purchases, so they pair well with family processing days or canning marathons). Approach feed stores for cheap prices on bulk oats or wheat.

* Brew your own alcohol. With practice, you can brew craft beer on a cheap-nasty beer budget. Country wines can be made with foraged or home-grown ingredients. And if you have bees, mead is definitely something fun to try.


Featured on:
The Self Sufficient HomeAcre
Shared on:


The Homesteaders Blog HopHomestead Barn Hop

From The Farm Blog HopThe Self Sufficient HomeAcre

Monday, November 18, 2013

Salad from the Winter Garden

I am experimenting with winter gardening this year. Nothing big. I'm not going to be supplying all of the family's veg from the winter garden this year but it's still worth doing. I like the idea of learning some basics to supplement my families food. Being able to grow some food in winter will save us a bit of money, increase our self sufficiency, provide valuable fresh veggies in a season when they are hard to come by (eating either the stored veg dehydrated, frozen or canned in season, or veg from the grocery that's flown in 1500 miles before I eat it), and will possibly clean the air in the home as well. And it's fun!

In the back yard, I have carrots, radishes and kale planted. I planted them in late August and they are all very small. Growth is pretty slow. However, the last few winters have been pretty mild, so maybe if this year is mild too I'll get a bit more growth. I had loads of seed leftover from the main gardening season, and was given some seed while talking with gardeners at the World's Longest Yard Sale, so I lose nothing by putting some extra seeds in the ground. If a strong freeze hits and all the outdoor plants die, I'll just work the green matter back into the earth and call it fertilizer.


Indoors I started several pots of greens. They grow in my laundry room on the south-facing windowsill.  I have two pots of spinach and four pots of two different varieties of lettuce. They are still in the baby green stage of growth and have been growing for a few weeks. I need to plant a second batch of greens so that there is no (or not much) gap in fresh salads. The real problem I will run into is space, as Ray cat has claimed all of the other south-facing windowsills and will push off anything I put on them. 
I planted them in sterile potting soil I had leftover from starting seedlings this spring. When I harvest the last of these lettuces and replant, I will mix in a bit of compost from the bottom of the bin just to freshen it up a bit. I water them about once a day, when I remember. I'm bad about that. I know that using self-watering containers would be best, but I don't have any. These pots I found at yard sales for pennies apiece, so I use them. My parents saved the plastic seed packs from their flower garden last spring, so I can use those also. Again, these are seeds leftover from the main gardening season. So I'm not really out much money, just a few pennies worth of water over the season.

After reading this article on overwintering peppers indoors, I selected my best two pepper plants. They are Jimmy Nardello peppers. One plant was the plant that gave me the first pepper of the season. The other was the plant that gave me the highest number of peppers. I dug the plants out of the ground leaving as much dirt and roots intact as possible. I filled in the rest of the pot with potting soil. I sprayed them off and picked off all of the flowers and flower buds. I took them inside and have watered them a few times. I don't have any really cool areas to store them (the article recommends a constant 55 degrees), but I put them by a leaky patio door so once the cold weather hits, it should stay around 55-60. One of the plants produced a huge amount of flowers once it was brought in, but I picked them off. If they survive the winter, I'll plant them after the threat of frost. Hopefully I'll get an early bumper crop of my favorite pepper.

Yesterday I picked the first salad from the winter garden. From the outdoor garden, I had two baby kale plants, 3 medium sized radishes, 1 radish seedpod, 6 baby radishes, and 5 baby carrots. I left the leaves intact on the carrots and baby radishes for more bulk. I thinned out the lettuces in the indoor garden with a pair of scissors. I first trimmed out any tiny plants, then any that looked weaker than the others. From there, I thinned out any that were too close to each other. That gave me the little pile of greens you see in center right on the photo.

I added some mixed greens from the farmers market and had enough for two nice-sized salads to accompany dinner. They were delicious.

I'm very excited about getting fresh salad throughout the winter. I may plant a few containers of radishes for snacking. Wisconsin Vegetable Gardeners posted a video on growing carrots. They had good success planting carrots in a home-made hanging basket. I think I may try some of these as well so I can get some yummy carrots throughout winter and don't have to resort to those cardboard orange things at the grocery store.


Shared on:


From The Farm Blog Hop

Homestead Barn Hop
The Homesteaders Blog Hop


Monday, November 11, 2013

Use It Up: Make Pudding!

Many things are tossed into the garbage can when they still have lots of good life left in them. Use It Up is a section on how to use this "trash" to make new, useful items for your home or to re-purpose items to avoid a purchase.

Bread pudding before baking.
Want to stretch your grocery budget, avoid food waste but still make a tasty dessert? Make pudding using leftovers!

When you bake your own bread or buy good bread made without preservatives, it can be hard to use it all up before it gets stale. Never fear! You can use leftover bread to make bread pudding. You can make it as simple or extravagant as you'd like. Here's the basic recipe I use:

* 4 c stale bread, torn into bite-sized pieces (Most people cut the crusts off, but since I'm trying to reduce waste as much as possible, I leave them on)

* 2 c milk, half and half, cream, coconut/almond/rice/soy milk

* 1/4 c butter* 1/2 c sugar, brown, white or raw

* 2 eggs

* 1/2 tsp cinnamon

* dash of vanilla extract

Heat the milk and butter. Mix in the bread pieces; add the sugar, eggs, cinnamon and vanilla. Bake in a baking dish at 375 degrees until the pudding is set in the middle.

You can add raisins, dried fruit, fresh fruit, more seasoning, caramel topping, streusel topping, nuts, or citrus zest.Don't be limited to plain breads. Use panettone, sour dough, cinnamon raisin bread, challah, brioche, and rolls of all types.

Varieties
If you have croissants that have become stale or if you bake some that don't turn out quite right, you can make plain croissant pudding. This recipe calls for plain croissant, but you can modify it for any variety you have on hand.

Take corn bread that is too crumbly or that gets dry to make Cornbread pudding.
Plain leftover rice can be used to make rice pudding.

Leftover cake, or cake edges can be used to make cake scrap pudding.

Leftover doughnuts can make doughnut bread pudding.

Made too much spaghetti? Make chocolate pasta pudding.

On the off chance you have leftover biscotti (something that has never, ever happened to me), you can make biscotti bread pudding.

Dried-out muffins? make muffin bread pudding.

Made too many waffles? Make waffle pudding.

Hard or dry cookies can be made into cookie pudding.

Extra bagels can be made into sweet or savory bagel pudding.

Mix-Ins and Add-Ons

Match the add-ins to the flavor. Imagine toasted walnuts and cinnamon in a maple custard. Yum!

Crumble up dry, leftover sweets for a crunchy topping.

If you dehydrate a lot of fruit, you likely have lots of little broken bits of fruit. These are perfect for tossing into the pudding for a bit of flavor and nutrition (yeah, that's it...it's a nutritious dessert..).

If you have an almost-empty jar of jam or jelly, swish some of the milk from the recipe in the jar to get that last little bit out. Add the flavored milk to the custard recipe. Just make sure that the flavors complement each other.

Swish milk in an almost-empty bottle of chocolate or maple syrup and use the flavored milk in the recipe.

Serving:
You can serve your puddings hot or cold, or with ice cream or whipped cream. The more decadent puddings, such as croissant or doughnut pudding, are best served as is, while more basic recipes wouldn't be overpowered by a scoop of ice cream.

If you are having company, make mini bread puddings in ramekins for an elegant, easy dessert.

Bread pudding holds up well for potlucks, and can be served at room temperature.


Have a "leftovers" pudding recipe I've forgotten? Tell me about it in the comments.


Shared on:

Monday, October 21, 2013

Grocery Shopping Primer

For those just striking out on their own, or who are for the first time trying to get their grocery budget under control, here is a crash course in grocery shopping. The tips below can help you spend less while getting healthier, tastier food.

First, all the basics everyone already knows: don't shop hungry, avoid bringing along the kids, pay attention, avoid impulse buys.

Always shop with the sales paper. When I get my sales paper, I highlight any items that are a good price, and that we need. If apples are on sale for $.54 a pound, I plan on picking up some for snacks, baking, applesauce or even to freeze or dehydrate to use later. If pasta is on sale for $.75 a box, I circle that and plan on buying a lot. If you don't receive the sales paper in the paper or mail, grab it when you get to the grocery  or check online.

Make a list of items you definitely need and try to stick to it as much as reasonable possible. You don't want to just waltz in and throw whatever looks good at the moment or you'll end up with lots of snacks and sweets, and spend a lot more than you budgeted. On the other hand, you don't want to be so rigid that you pass up a fantastic deal on an item you regularly use just because it wasn't on your list. Some people also find great value in making a meal plan around the best sales in the paper, and this is especially good for those who have very busy schedules so you can avoid the after-work "what's for dinner?!?!" panic.

Shop first at the cheapest grocery store you can, then work your way to the more pricey ones to get anything that you can't find at cheaper venues. About every three months I shop at a really good salvage grocery and stock up on whatever they have at a good price, usually breakfast cereal, salad dressing, pasta, and juice. I save weekly for this grocery trip and plan to stock up on three months worth of food to get me through to the next trip. It's an hour away, so if I lived closer I'd shop more frequently. I often shop at Aldi or similar discount, no-frills grocery store. That's the best way to buy dairy, eggs, baking supplies and canned soups and veggies. Sometimes I shop at Kroger, Meijer or similar big grocery store chain. I get everything left on my list after the cheaper stores.

Sometimes bulk purchases save lots of money. Sometimes they don't. Sometimes generic brands are a fantastic deal, other times they're the same price as name-brand. So always, always, bring a calculator (this is the one benefit to everyone always having their cell phone on them). Divide the price for the item by the units of the package (pound, number, ounce, etc). Check this for the big package and the small package, the generic and the name brand. In this way you'll know which item is actually the cheapest, and can purchase accordingly.

Generic is often just as good as name brand, but not always. Especially for things such as salad dressing, the recipe may be better with one brand than another, or there may be a limit to selection in the generic (then again, since when do we need 30 different varieties of ranch dressing?). However, do try the generic. If you like it, you'll likely save a lot of money over the long haul. If you don't, you're probably not out much money. If you have a bad experience with one store or knock-off brand, try another. Items such as white sugar are the same regardless of brand. Buy the cheapest per pound. Regular all purpose flour is pretty much the same. Differences in flour come with buying bread, cake or other specialty flours, and are really not a big concern for the casual home baker. I'll bet your kids won't hate you because your cake was just moderately fluffy instead of being extra fluffy.

Clip coupons with caution. I use coupons sometimes, but not nearly as much as I used to. Coupons are often for snacks or convenience foods that aren't the most nutritious. This isn't always true though. I do clip coupons for juice, pasta, breakfast cereal (Trucker's guilty pleasure snack food), and condiments. Clip coupons only for foods you enjoy eating and that are nutritious (at least reasonably so). When you look over your sales paper, match coupons to sales and mark that on the sales paper. Sometimes you'll find that Barilla pasta is on sale for $1 a box, and you have a coupon for $.50 off two boxes, making it $.75 a box. Always bring all of your coupons with you so you can match the coupons with unadvertised sales or clearance items.

Before you shop anywhere else in your grocery store, check the clearance bin. If the item is nearing it's sell-by date, has damaged packaging, has old-design packaging, or is a discontinued variety, it is marked down, often 25-75%. Some stores have better deals than others, but it's always worth checking. See if you have any coupons for any of the items. If so, subtract the coupon value from the clearance price, divide by unit and compare to regular priced items (sometimes the clearance mark down isn't that great and won't be better than generic, even with the coupon).

Bread that is labelled "whole grain" or "whole wheat" is almost certainly not. It just has some whole grain or wheat added, and legally that's a-okay. The only way you can be sure it is completely whole wheat or grain is if it says "100% whole wheat" or "100% whole grain". "Wheat" bread is just a lot of white flour with a bit of bran thrown in and maybe some dye. Don't pay extra for the same basic product.

Store-brands of pasta are usually satisfactory and a great bargain compared to national brands. Many stores even offer whole grain pasta that is only nominally higher than their white pasta. Whole grain pasta is more healthful and filling that white pasta, so it is a great deal. Those pastas that have veggies mixed in are usually a lot more expensive, and I doubt that they are that much more healthful. Buy them if you find a great deal, but don't expect them to change your health.

Pasta sauces vary greatly brand to brand, but some of that can be overcome in cooking. Add seasoning to jazz up a bland sauce. A thin sauce can be cooked down to evaporate some of the extra water yielding a thicker sauce. Do experiment with all of the brands in your price range. There are three different brands that I like, and I buy whatever is the cheapest of those three.

If you buy canned soup, buy concentrate when possible as this is usually a better deal. If you dilute the concentrate with a can of water, halve the price per ounce when comparing the price to full-strength soup. Discount grocery stores usually have satisfactory canned soups in the basic varieties (chicken noodle, bean, tomato, chicken rice and beef vegetable).

Avoid baking mixes. They really don't save that much time and usually cost a heck of a lot more. Also, they lock you into baking whatever mixes you have in the cupboard instead of getting creative with what you have.

Ultra-pasteurized homogenized milk is ultra-pasteurized homogenized milk. Don't pay extra for one brand over another. However, raw milk, organic milk, goat's milk, lactose-free milk, or non-homogenized milk may very well be worth paying more for and is a higher quality product.

Be wary of labels on eggs touting "cage-free" "free-range" or "vegetarian fed". These are tricky labels. "Cage-free" may mean that a thousand chickens are crammed in a building with no access to the outside, but no bars. "Free-range" may mean that the hens are allowed access to a little dirt-patch, but never do because their first few weeks of life they were cooped up inside "for safety" and are now afraid to go out. "Vegetarian-fed" is pretty much a guarantee that those chickens never saw the outdoors. Chickens are omnivores and adore insects and mice. If they see a bug, they are eating it. If they are guaranteed vegetarian-fed, it means they weren't allowed outside and were fed a diet of grain. If you're going to pay extra for eggs, buy from a neighbor or local farmer you know.

Check the clearance meat section for marked down meat. When the package is a few days from its sell-by date, it is often marked down 25-50%. Buy what you can use within a day or two, or freeze for using later. Sometimes the deals are fabulous. Once I found ground hormone-free, pastured beefalo for $2/lb. I bought all they had and froze to use all summer long. When turkeys go on those wonderful deals around Thanksgiving (or hams around Christmas or Easter, or corned beef around St. Patty's), buy one or two extra. I love to pull a turkey out of the freezer in February and roast it, then package it into meal-sized portions (chunks for stir-fry and casserole, shreds for omelets, sandwiches or soups, and cook the carcass down for stock).

Most importantly, the grocery store is not the only place to buy groceries. It's also not usually the best, nor is it the cheapest.

Bakeries can be expensive, but they offer a very high quality product. Sometimes you can find a bakery that is outrageously cheap. One of my favorite bakeries in Chicago sells sub rolls for $.33 apiece and mini cookies 5 for $1. Ask your baker how long they ferment their bread before baking. The longer ferment times means that the bread is better for those with a gluten sensitivity or blood-sugar issues. At many bakeries, you can also find individual rolls (which are often great for sandwiches) or small loaves of bread so you can avoid waste if you're buying for one or two. (If you do have stale bread though, check out this article for ways to use it up)

Farmers markets can be very expensive if you just go in and buy whatever looks good (hint: it all does). If you eat very seasonally, it can be the best deal around. Once at the height of the tomato harvest, I saw a sign advertisting canning tomatoes 50 pounds for $25. Someone asked the farmer what made them canning tomatoes. He said, "Everyone here has tomatoes for sale. This is the only way I can move a lot of them." They were perfect tomatoes at a perfect price. My favorite farmer sells peppers at these prices: small cherry bomb hot peppers 5 for $1, jalapenos 5 for $1, hungarian wax peppers 4 for $1, green bell peppers $.5, red/purple/orange/yellow/black bell peppers for $.75. Another sells small hot peppers $.10/each and small sweet peppers $.15/each. Compare this to the grocery store that sold green bell peppers for $1 and red or yellow bell peppers for $1.50. When zucchini are in season, I often find them 4 for $1. When you find prices like these, stock up and preserve for later (shred and freeze zucchini for baking, dehydrate tomatoes or can sauce, freeze or dehydrate peppers, make pickles out of cucumbers, and puree cooked pumpkin for pies and muffins all winter long).

If you live in farm country, farm stands are great. You get great bargains and the items are very fresh. You also get to peek at the farm and talk with the farmer, two vital steps for responsible eating. You get to support a small farmer and thus save the world from Monsanto, and you keep the money in your community. So many wins.

If a neighbor sells produce in a little stand in their front yard, go nuts! These hold the best deals I've found on produce anywhere, except for growing it myself. I often find tomatoes, peppers, eggplant and winter squash for $.50-.75 each and cucumbers and zucchini for $.25. Again, you're keeping the money in your community and supporting cottage industry.

If eating pasture-raised meats, organic produce or raw milk is important to me, going through small farmers or homesteaders is the best way to go. For raw milk, it's the only way you can get your hands on it. For eggs, I pay $1.50-2.50 a dozen when buying from a small "hobby" farm, versus paying $7-8 through other venues for a similar product. Buying a share of a cow, pig, goat or sheep is often the best way to be able to get pasture-raised/hormone-free/organic meat at a price that's realistic for working and middle class families. You can even go in with friends or family members for a more manageable price and quantity.

Ethic grocery stores are almost always cheaper than grocery stores for ethnic foods. The price differences are astounding. At the grocery store, an 11 oz bottle of sweet roll sauce is $2.79 or more. At my Asian market, a 32.5 oz bottle is $3.25. White rice is over $2 for a pound bag at the grocery, but I just bought jasmine rice at the market for $12 for a 10 pound bag (50 pound bags are an even better deal, so next time I'm going to split a bag with family members). You can also find veggie varieties that the grocery doesn't offer for the same price or less than the same-ol-same-ol varieties at the grocery. Latino grocers are great for finding the less common parts of the animal. My favorite sells chicken feet for $.20/pound so I can make killer stock.

Talk with your local butcher about buying meat from the animals that people dropped off, but never picked up. The butcher often can't sell the meat, so you just pay the processing fee. This is common during deer hunting season. I get a whole deer for around $80.

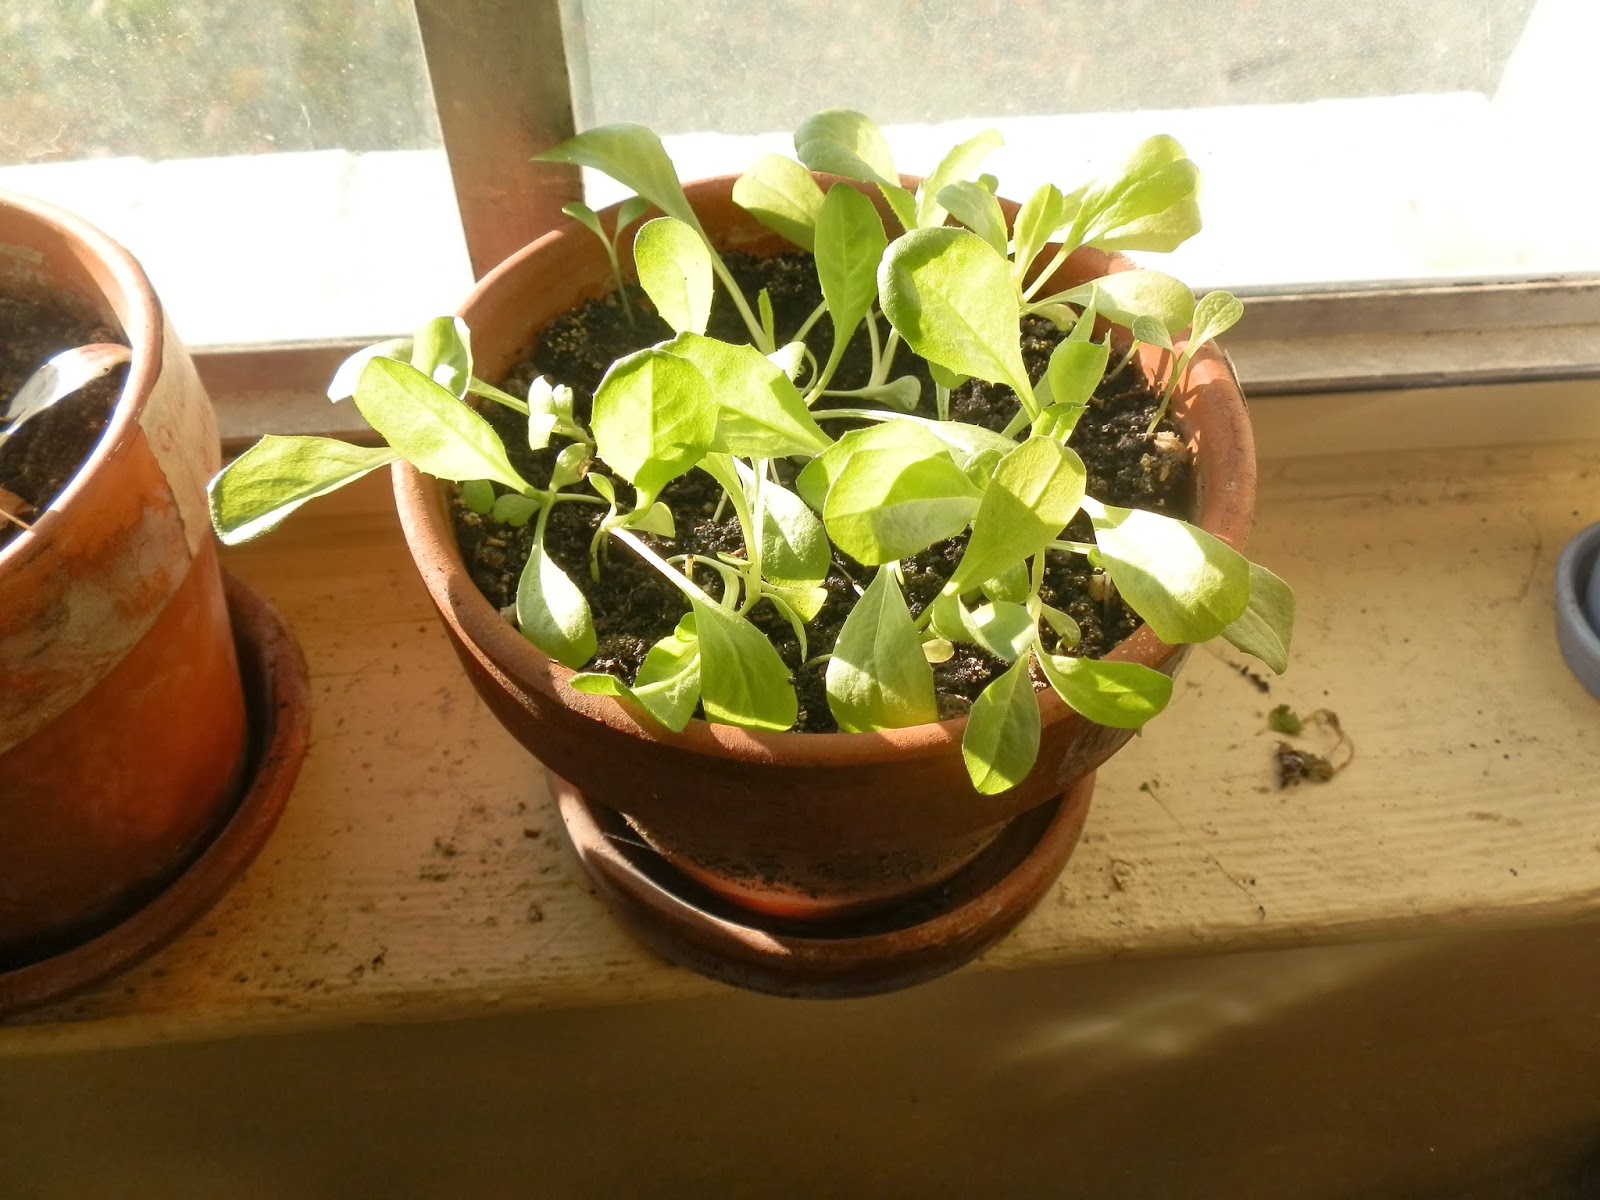
If you have a bit of space, whether in the backyard, the patio or a windowsill, grow some of your own food. Seeds cost a penny or less. If you limit your inputs of store-bought chemicals, and instead compost your kitchen and yard wastes to make your own fertilizer, you can get practically free food. A penny for a seed, plus 10 cents worth of potting soil, put into a repurposed container such as a coffee cup, turns into a tomato plant that provides 4-10 pounds of tomatoes for your family. Lettuce is really easy to grow, and right now I'm even growing several pots on a sunny windowsill to add to salads in winter.

As you shop, work towards building a stockpile of food at the lowest price possible. Buy non-perishables in large quantity when the price is low. Pull the old ones to the front and put the new ones in back so nothing goes bad. Freeze, can or dehydrate produce when it's in season to use when it is out of season so has to be flown in. Freeze meat in meal-sized portions whenever you find a great price. Eventually you'll be buying not for the week's meals, but to replenish your pantry. At that point, you never have to pay full-price, you can just eat from the pantry while you wait for the next great sale.

Monday, September 30, 2013

Beginner Gardening Mistakes and Lessons

This year had a lot of firsts for me, especially in the garden. In the past I've had tiny container gardens or did lazy-man's guerrilla gardening on a small scale. This year was my first year to go full scale in the garden and dig up a huge chunk of my backyard to grow veggies. I grew tomatoes (4 varieties), peppers (3 varieties), cucumbers, peas, runner beans, radishes (8 varieties), carrots (two varieties), basil, lettuce (10+ varieties), eggplant, beets and pak choi. Phew. Just listing that is tiring.

I learned a lot this year and am very excited for next year's garden (I'm planning on doubling my garden space in the backyard and putting in some edibles in the landscaping in the front yard).

Here are a few of the beginner's mistakes and lessons I've learned to hopefully help other newbie gardeners have a great start.

* Pick varieties based on flavor over yield. One of the tomato varieties I grew produced fantastic yields, but tasted flat. If I wanted flat tasting tomatoes, I'd continue to buy them. I grow tomatoes because homegrown tastes better. These tomato plants made up 1/4 of my tomato plants, so I now have a lot of kinda-bland dehydrated tomatoes that I guess I'll just smuggle into chili over winter. I can't throw them away because I worked so hard to grow them, but I'm really disappointed in them. Grow the varieties that taste awesome and that the grocer never carries.

* Tomatoes and beans go well together. I planted my scarlet runner beans next to the tomatoes in one bed. They kept wanting to climb up the tomato plants instead of up their trellis and I kept gently moving them over to the trellis. When I didn't check on the garden for a couple days, they swirled all around the tomato plants. I left them this time, and I'm glad they did. The pretty little red flowers looked lovely against the dark green tomato leaves. The beans got a free trellis, but the tomatoes really benefited. The mortgage lifter tomatoes I grew got to be about 10-12 feet tall and were falling all over. However, the tomatoes that had runner beans growing up them stayed off the ground and stood tall. Next year I'm planning on intentionally mixing my tomatoes and beans together. I'm thinking of planting purple podded beans so they will be easy to find and add more color to the garden.

* Go for free gardening supplies when you can. All winter long, I looked out for items thrown to the curb that could be repurposed in my garden. I found a baby crib and an old bed. I took apart the crib and put it sideways into the ground and used it as a trellis for my peas. I planted the headboard into the ground and used it as a trellis for my runner beans. When the beans got too be too tall, I stuck some tree branches from the brush pile into the ground behind them and they grew up those just fine (one plant grew into the tree on the side of the yard). Next year I'm going to use branches to trellis all the beans and peas and use the bed and crib sides for cucumbers.

* Have a plan for succession planting. When the first of the lettuce, carrots, beets and radishes came out of the garden, I planted some more crops. However, I didn't have a good plan in place, and so parts of the garden were empty for a few weeks. Over winter I want to make a good solid garden plan so I can avoid those empty times. Radishes are perfect for filling in gaps since they grow so quickly, and I can never have enough radishes.

* Don't panic when things don't go perfectly. In late summer I planted more radishes, but half of them quickly sent up flower stalks. I was disappointed but let them grow. Now I'm harvesting lots of delicious, peppery seed pods. I'm getting several from each crop, so I'm really not losing anything. They are perfect in salads and stir-fries. Bonus: Trucker doesn't particularly like radishes, but it turns out he loves these seed pods. Next year I'll plant radishes throughout the growing season and plan on getting a harvest of seed pods during the heat of summer.

* Be ready for preserving because once the harvest comes in, it comes in strong. I underestimated the amount of produce my garden would dump on me all at once, so now my dehydrators have to run around the clock to get it all put up. Wouldn't you know that the main harvest would start mere days after I bought 2 bushels of apples to dehydrate?

* Plan for success as well as failure. I have a bit of self-esteem issues (don't we all), so I expected quite a bit of failure on my part in the garden. I planned to make up for my shortcomings. I decided to grow tomatoes from seed, but expected that I would kill most of the seedlings before they could get out into the garden, so I planted a lot. I guess I did something right. Next thing you know, I have 200+ tomato seedlings, 100+ pepper seedlings and 50 eggplant seedlings taking over the laundry room. I refused to throw them into the compost heap, but didn't have the space for all that. I gave 1/4 to my parents for their garden, then took more into work to give out to coworkers and customers, really anyone who I could pressure into taking just one seedling. This time I'm going to be a bit more reasonable in the number I plant. And if I fail and kill them all? Well, I'll just buy my seedlings for the year.

* Talk with anyone and everyone about gardening. I was amazed to find out just how many people in my life have green thumbs of various hues. I got so many great tips from them.

The best thing of all about gardening is: "next year..." I love that gardening is a never ending source of learning. There's always something new to learn, a new variety to grow, a new recipe to try.

What has the garden taught you this year?
  Shared on:
Homestead Barn Hop
Homesteader's Hop

Sunday, September 8, 2013

Building a Winter Wardrobe on the Cheap

With summer ending, it's time to start thinking about getting ready for winter. If you have growing children to clothe, have changed sizes, or have moved to a colder climate, you'll need to build a winter wardrobe to stay warm and healthy. Rather than rush out to the mall as soon as the winter clothes hit the rack and spend a paycheck or two, make a plan and shop around to build a winter wardrobe for less.

Evaluate your clothing. Will last year's coat work? Can you pass down clothing from older children to younger children? Make a list of everything you'll need before you go out shopping.

Generally, you'll need a warm coat, some thick shirts (sweaters or flannels), thick socks, warm boots or shoes, a scarf, a hat and at least one pair or gloves/mittens. If you live in frigid areas or spend lots of time exposed to the elements, you'll need extremely warm gloves and a pair of long-johns. Tights/leggings can make looser fitting pants or even skirts appropriate for winter wear.

I would invest the most in a good pair of winter boots. While you can layer clothes under a thinner coat, there's not much you can do about an inferior pair of boots. Get a good, warm pair, especially if you/your children spend much time outside in the winter. Frostbitten toes are not worth the savings on buying cheap boots. If you see a great pair of boots on clearance in late winter/early spring, stockpile them for the next winter. A couple of years ago, I found a $100 pair of boots for Trucker for $19.99 and he still wears them.

If you are buying a new coat, consider buying a coat with a removable lining. My dad has a coat that is a medium weight coat with a jacket that zips together for a warm winter coat for frigid days. On warmer winter days he can wear only the medium weight coat and he can wear the jacket alone in autumn and early spring. It helps a lot during these weird winters where the temperature can go from 10 to 60 within a week.

Layering helps a lot. Where I live there are some frigid days, but generally speaking it's cold but not unbearable. I wear a long sleeved t-shirt with a short sleeved shirt over it on most days. On really cold days I'll also wear a flannel over that. This keeps me from needing to buy an expensive heavy-duty winter coat that I'd really only need a few days a year, and I can wear the coat for more months of the year. When I lived up North and lived without a car (aka spent hours waiting in below-freezing temperatures for a bus), my winter coat wasn't the warmest, but it was slightly loose so on the worst days, I'd wear 3-4 flannel shirts under it, with a thin scarf wrapped around my neck under the coat and a thicker one over the coat. By layering your clothes, you can wear items for more months of the year, so you need fewer items.

Call the thrift stores in your area and ask them about sales. All of the thrift stores in my area have at least one day a month that everything is half off. Go early on those days and be prepared for crowds. Go straight to the winter clothes as they will be picked over quickly. Most thrift stores have a tag sale, e.g. everything with a red tag is 50% off. One thrift store in my area has a $.50 sale each Monday on a particular tag color. Sometimes smaller thrift stores will have bag sales, say everything you can fit in a paper grocery bag for $5. Go then and cram in everything you can. Start by cramming in a coat, then work your way to cheaper items (flannel shirts to thick socks). Roll items to fit the most in one bag.

Thrift stores usually have a respectable selection of winter items. In late fall there are lots of winter coats to chose from. You can also find various styles of winter hats and more scarves than you can believe, from the dollar store junk to name brand to crocheted by a cute old lady scarves. Look for leggings and thick socks too, just make sure you wash them well before wearing.

If you need business or business casual wear, check mid- to upper-level consignment shops for winter apparel appropriate for the office. Consignment shops are especially good sources of nice looking winter coats, especially if your local thrift shops only have ratty coats. If you like the shop (and their prices), but don't see a coat you like, leave your number and size with the owner and ask for a phone call if something comes in.

End of season yard sales are an option for buying winter clothes at a bargain, especially sweaters. People are desperate to sell items so they don't have to store them overwinter, but shoppers are not thinking about needing sweaters when the temperature is over 80. Look for coats, sweaters, hats, gloves and flannels. If you find a sweater in a color that you like, but hate the style/size, check it over to make sure it is not pilled or felted. You can unravel that sweater to make scarves, hats, mittens or even another sweater. Here's a great article on unraveling sweaters.

If you are crafty, look for wool yarn at thrift stores and yard sales. There's still plenty of time to make scarves for the whole family. You can also make hats, mittens, arm warmers, leg warmers, socks, etc. Generally, it costs about the same to make a scarf from thrift-store yarn as to buy a thrift-store scarf, but you get more control of the end product. However, if you would be crafting anyway, you may as well make something you can use and avoid needing to purchase an item.

Shared on:


Sunday, September 1, 2013

Use it Up: Veggie Powder

Many things are tossed into the garbage can when they still have lots of good life left in them. Use It Up is a section on how to use this "trash" to make new, useful items for your home or to re-purpose items to avoid a purchase.

My garden is producing massive quantities of veggies right now, and I'm adding them to every meal and also preserving as much as possible. With this harvest, I'm faced with another problem: waste. I harvest several radishes for a nice little snack, and I'm left with a gallon-sized container of radish greens. When cutting up celery for stir-fry, I'm left with lots of celery leaves. If you can tomatoes, you'll have loads of tomato skins. Whatever edible veggie-parts you're left with, it seems a shame to throw them away (or into the compost bin) when you worked so hard to grow them (or spent so much to buy them). A great way to use them up is to make veggie powder.

Veggie powder is a mix of dehydrated veggies, pulverized into a powder, used to add flavor to dishes. You can add it to eggs, casseroles, breads or soups. You can us it in place of seasoning packets when making rice, or sprinkle a pinch on top of a baked potato. You can add them to salads or to salad dressing. This winter, I plan to dump large quantities into the soups and chilis I make every couple of days to add more flavor and nutrition in a time when I'm craving produce.

Here are some ideas of veggies to add to your powder: tomatoes or skins, carrot leaves or peelings, beet leaves and stems, radishes that are too spicy to eat or the leaves or stems, celery leaves, pea or bean pods left from shelling, any green leafy veggie that you have too much of, any herbs in surplus, pepper skins, broccoli/cauliflower stems, and any other veggies that you just have way too much of (or find a fantastic clearance rack bargain on).

Dehydrate leaves separately from more dense items that will take longer to dehydrate. Leaves only take a few hours in my dehydrator, while many veggies take 8 hours or longer. Cut denser veggies into small pieces or shred them to expose as much surface area as possible to the warm, dry air. This will also make it easier to pulverize.

Once you have your leaves and veggies dehydrated, toss them into a food processor or blender and pulse until you've got a nice, fine powder. Pour the mixture into a flour sifter to sift out large pieces. Reprocess the large pieces. Mix the powders well and you're done! You now have veggie powder to add to all sorts of savory dishes and reduced the amount of green matter you tossed into the garbage bin!

Shared with:

The Homesteaders Blog Hop


monday's homestead barn hop

Monday, August 19, 2013

Dehydrating Peppers

I use a lot of peppers in my cooking, especially in winter when I make lots of soups, stews and chilis. During the winter, however, peppers are ridiculously expensive and the quality is terrible. Instead of just settling for crappy, expensive peppers, I dehydrate wonderful and cheap peppers during summer to use all winter long. Dehydrated sweet peppers make a wonderful snack, especially for road trips or hiking. Peppers can also be added to eggs, casseroles or pasta dishes.

Last night at a farm stand, I found beautiful Hungarian Wax peppers for $1/3 and jalapenos for $1/5. Sometimes I find peppers on the clearance rack at the grocery store 4 bell peppers for $1 or a 5 lb bag of hot peppers for $2. If you get a bumper crop of peppers in your garden, dehydrating is a perfect way to stretch your harvest with minimal expense or space.

First, clean the peppers well, and dry. Trim off the stem and any bad spots and cut out the seeds and membrane. I cut small peppers into rings and larger peppers into thin strips. You could cut them into chunks or thick strips, but you won't be able to fit as many on a tray and it will take much longer to dehydrate.

Lay them out evenly over your dehydrator trays and dehydrate for 6-18 hours, depending on types of pepper, size of pieces, humidity, etc. When they are fully dry, they will crack easily when squeezed and clatter when you stir them.

reuse food jars left over from pasta sauce, pickles or relish to store my dehydrated food. I have stored dried peppers for several months without noticing any loss in quality. If you wanted to save food for a longer term, add oxygen packs, vacuum seal or oven can the peppers. 

You can snack on them (drink plenty of water if you regularly snack on dehydrated food). You can rehydrate them by pouring boiling water over them for about 20 minutes. If you are making soups or chili or a slow cooker meal, just add them to the dish dehydrated, and simply add a bit more water than the recipe calls for.


Republished on: Homegrown.org
The Homesteaders Blog HopShared on: 


Related Posts Plugin for WordPress, Blogger...