Showing posts with label baking. Show all posts

Saturday, July 15, 2017

Basic Galette, Pie, or Tart Instructions


When I teach someone to cook, I like to teach a skill rather than a recipe. If you learn a recipe, you know how to make one dish, but if you learn a skill, the whole world opens up. When teaching a newbie to cook, I often make Goldenrod Eggs. That teaches two important skills: how to hard boil an egg and how to make a bechamel. From those two skills, you can make a wide variety of dishes for a wide variety of circumstances.

When I teach someone to bake, I aim to do the same thing and galettes are the perfect intro to baking. Even for someone who has been baking for years, the endless variations make this one of my favorite dishes to bake. The hardest part of this recipe is making a good pie dough, but even if you take the cheater's way out and buy a pre-made crust, it will still turn out good. (Moment of confession: I did use a store-bought crust once because I was doing my last-minute grocery shopping for company coming over in a little over an hour). The recipe is super flexible and can be modified in a nearly infinite number of ways.

First, make a nice pie crust. I always use the King Arthur recipe: 2 c AP flour, 1 T sugar (leave out if making a savory dish), 1 t salt,  2 sticks of butter cut into pats, 1 egg, 2 T milk. If it is really hot, you can toss the ingredients into the freezer to prevent the butter melting (which would result in a tougher, less flaky crust, which no one wants). Sift together AP, sugar and salt, then cut in butter just til it holds together if you squeeze it, but you still want to see little lumps of butter as this will result in a flaky crust. Gently mix in the egg and milk just until moistened and no more. Divide in two, shape, wrap and let it rest in the refrigerator for at least a half hour or up to 2 days. You can freeze if desired. I've found that this batch of dough will make several galettes, so freezing the extra can make it much easier to whip up a dessert later.

Generously flour your work surface and roll out your dough to roughly 1/8 inch thick (it doesn't have to be perfect). When making galette, I usually pull off a chunk of dough and roll it into a really rough circle, about 8-9 inches across. Once I have the dough rolled, I put it back in the refrigerator to rest while I make the filling.
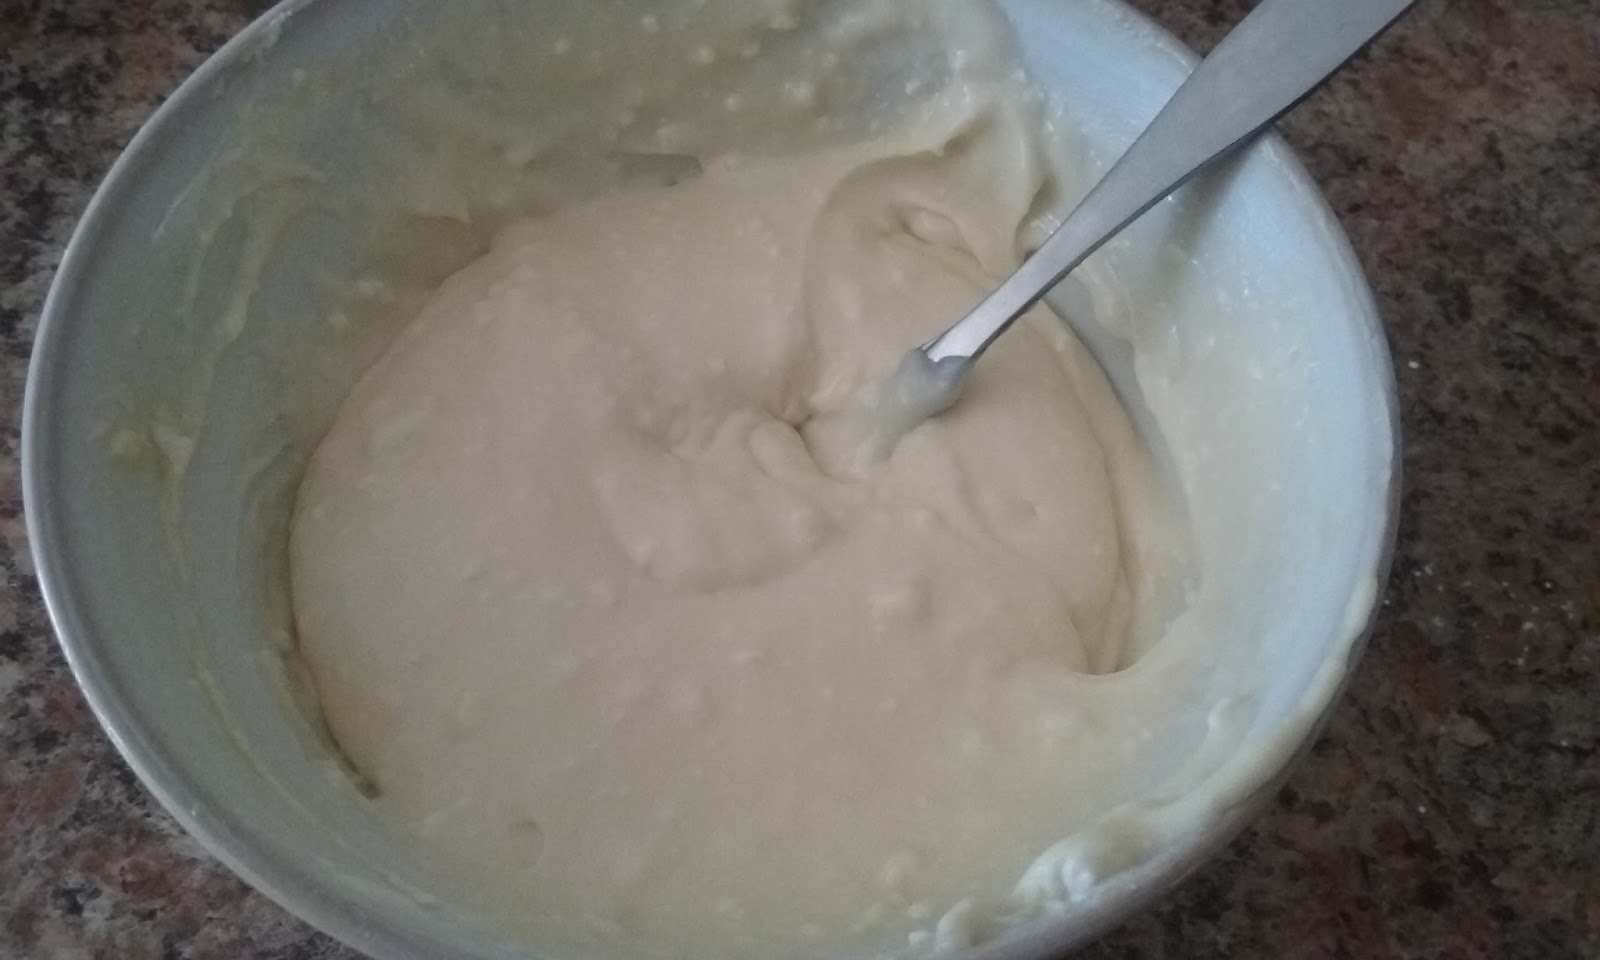
I use a basic cream cheese filling for a lot of my fruit galettes. I can't remember where I found the recipe originally, but most recipes are just variations of this recipe: 1 8-oz package cream cheese, softened, 1/2 cup sugar (leave out if making a savory dish), 1 egg and a tsp of vanilla. This recipe is pretty flexible. You can use a little less cream cheese or a little more egg or reduce the sugar and it will still turn out. Beat together well. If you do it by hand, it will feel like it is taking forever, then all of a sudden it is ready. It doesn't have to be perfectly smooth and it will still bake fine. This recipe is enough for 2-3 galettes and it stores well for a few days in the refrigerator. If you want to make a smaller batch, just halve everything and you can either use the full egg (I've tried it and it works fine) or use about half the egg and use the other half as an egg wash (which makes for a great color and allows you to sprinkle the crust with some grainy sugar). This filling is really forgiving which is why I love it.

I spread a layer of filling over the middle of the dough, leaving about an inch around the edge. You can do a thin layer (makes for a less filling dessert) or thicker (cooks up fine and you can serve smaller slices). Layer on some fruit. Basically use whatever you like that you have on hand. I love to use apples or peaches. Sometimes I mix a variety of fruits, placing in a pretty design. Whatever you do, either slice thin (pears, apples, peaches, plums) or cut in half (larger blueberries, cherries) if needed so they cook through. Smaller berries can be left whole.

Fold over the extra dough around the edges. Don't make it too pretty. I like having some variation. Some slices of galette have less crust, others more so everyone can get a piece they like best (I like the extra flaky crust). Plus if you try to make it perfect, you really need to make it perfect. If you aren't trying to make it perfect, there's less pressure. Every little "mistake" just gives it more rustic charm.

If you'd like, you can brush some egg wash onto the edges and sprinkle with some grainy sugar. The egg wash will give a nice shine and color to the crust, but left bare it has more ruggedness.

Bake in a preheated oven at 350 degrees for 25-30 minutes, or until golden brown. You want the bottom to be nicely golden as well.

Beef Pot Pie is an easy way to give
life to leftover beef stew.
I love how flexible this recipe is. If made free-form and flat, you have a galette. You can make a rustic pie by quickly placing the dough in a pie plate and coarsely folding the excess pie dough back in. You can make a large tart or little tartlets. Put the filling on just one half, then fold over, crimp the edges and you have a hand pie. Roll dough into a rectangle, cut into smaller rectangles, put filling on one and top with another rectangle and you have pop tarts. Put into a pie plate and add a savory custard for a great quiche. Put in a pie plate, add some leftover beef stew and cover with another layer of crust for a quick beef pot pie.
I placed some curly garlic scapes
on top of this quiche for great
presentation as well as flavor.

 The basic cream cheese filling goes brilliantly with a variety of fruits, or you could leave out the sugar and make a savory galette. It would be perfect to mix in some fresh herbs or scallions before layering on some roasting tomatoes (especially heirlooms in a variety of colors), caramelized onions, bacon, ham or asparagus. Garlic scapes or fern fronds would make unbelievable presentation.

You don't have to stick with cream cheese filling. I like to use a goat's milk caramel when I make apple galettes. Try real maple syrup, honey, jelly or jam. Spread nutella on the dough under strawberries.

Use fresh fruit. Use frozen fruit. Cook down some overripe fruits into a lovely compote. Add nuts. Make a streusel topping. Sprinkle with cinnamon. Sprinkle with salt and freshly cracked pepper if making a savory dish or sprinkle some cheese around the edges.

Make it your own. Make it for breakfast, brunch, a light lunch, appetizer, dinner entree or dessert. Make it tonight!

Have fun baking!

Tuesday, December 16, 2014

Homemade Pop Tarts


I never cared much for those pathetic Pop Tarts that come in a blue box. The pastry didn't taste good, the fillings were off, and they left you hungry as soon as you finished them. I stopped eating them as a child and never bothered again—until one beautiful day: the day I made pop tarts from scratch. Oh, my.

They were wonderfully flaky. The pastry was rich with butter and of perfect texture. The filling was real and explosive. And wonder of all wonders, two of these little pastries filled me up for a glorious breakfast.

Making pop tarts from scratch is easy, frugal, and allows you to experiment with lots of fun flavors. In my two-person household, we used to have a hard time using up an entire jar of jam or jelly in a reasonable timeframe. But now that I make pop tarts, we’re able to use up a jar before it goes bad. Homemade pop tarts are also incredibly frugal. I did a cost analysis of the flour, butter, egg, and fillings and found that the homemade variety is about 16 to 20 cents each, with two or three being a decent breakfast for me or my husband. This is cheaper than the store-bought ones that cost about 33 cents a pop where I live and aren't nearly as delicious or filling—or free of suspicious-sounding ingredients, for that matter.

Making pop tarts is ridiculously simple, although it does take some time. I like to set aside a couple of hours to make a massive batch, all at once. Raw pop tarts freeze brilliantly, so you can pull out a couple and toss them in the toaster oven for an easy breakfast or a sweet-tooth fix. Make a few different flavors at once and you'll satisfy any craving!
I use a pie dough recipe from King Arthur, but you can sub in the pie dough of your choice.

What you'll need:

* 2 cups all-purpose flour
* 1 Tbsp sugar
* 1 tsp salt
* 2 sticks butter, cut into pats
* 1 large egg
* 2 Tbsp milk
* filling of your choice, such as jams or jellies, nut butters, spreads, etc. (See ideas below!)
* rolling pin (or wine bottle, in a pinch)
* butter knife or bench knife
* fork
* baking sheet
* brush
* pastry blender (or a stand mixer—just be careful not to overwork the dough)
* paring knife

To make your pie dough as flaky and tender as possible, you need all of your ingredients as cold as can be. Crack one egg into a bowl and put it back in the fridge. Cut the butter into pats and place them in the freezer until just before you begin. If you want your dough to be perfect, you can even pop the flour, sugar, and salt in the freezer. If the butter melts, it will absorb a lot of flour, making for a tough dough, so you want to do whatever you can to prevent that—including handling it as little as possible.

When you're ready to make your dough, mix together the flour, salt, and sugar. Add the butter pats then, using your pastry cutter, mix in the butter until it’s in pea-sized pieces, not fully blended. These little bits of butter will make for a flaky crust. Once the butter is roughly pea-sized, add one egg and the milk. Mix just until it’s combined. Don't over-beat it. You can (and should!) store this prepared dough in the fridge until you're ready to make your tarts.


Clear a workspace and liberally sprinkle it with flour. Pull the pie dough out of the refrigerator and place it on the flour. Sprinkle the dough lightly with flour and very lightly coat your rolling pin to keep the dough from sticking. Roll the dough out to 1/8 inch thick.


Using a butter knife or a bench knife, cut the dough into rectangles about 3 by 4 inches, or whatever size your heart desires. You can even use cookie cutters to cut out fun shapes or you can make tiny two-bite pop tarts. If you make super small pop tarts, roll the dough a little thinner to keep the filling-to-pastry ratio in balance.


Beat the second egg to use as an egg wash. Place about a tablespoon of filling on one half of each pop tart. You can use jam or jelly, nut butters, or one of the suggestions listed below. Spread evenly but make sure you leave a good centimeter of space around each edge and the other half bare. Brush the egg wash around the edge; this will act like glue to keep the filling inside.


Fold the bare half over the filled half and gently press the edges to seal the pieces together. Using the fork tines, press about 1 centimeter in all the way around the edges. This seals the dough closed and looks beautiful.


Steam will need to escape, so you’ll need to cut some holes in the pastry top. Either prick the top side of the dough several times with a fork or use the paring knife to cut out shapes or initials. If you have mad scoring skills, you can cut notes, initials, or simple drawings into the pop tarts for fun.


Now it's time to chill the pop tarts. You can either chill them for half an hour in the refrigerator or freeze them to bake another time. If freezing, do so on a flat surface then transfer them to a freezer bag once they’re completely frozen.

When it's time to bake them, brush the top of the pastry liberally with egg wash, if desired. (I enjoy them either way. They’re shinier with the egg wash but look more rugged without it.) If you'd like, you can sprinkle the tops with decorative sugar—the bigger grain, the better—which the egg wash will hold in place. If you plan to ice the pop tarts, don't add sugar. Bake in a 350 degree oven for 25 minutes or until the tarts are golden brown and solid on the bottom. Perfect doneness occurs just after you smell something so incredible, you’ll be prepared to burn your tongue off just to get those tarts in your mouth RIGHT NOW.


Allow the tarts to cool for 10 to 15 minutes—if you’re able to wait that long. If you want to ice them, you can use any icing you'd like. My favorite simply requires mixing together 1 cup powdered sugar with 1 to 2 Tbsp milk. You can make this thick (less milk) to spread over the still-warm tarts, allowing it to run off the sides, or you can make it thinner (more milk) and drizzle it across the top with a fork.

If you bake a large batch of tarts at once and plan to reheat them in the toaster later, don't ice them. Wait until they come out of the toaster. Unlike the store-bought pastries, this homemade icing won’t stick to the pastries when they’re standing straight up in the toaster. And really, when you think about it, what's in the store-bought stuff that makes it impervious to toasting? Shiver.


FILLING SUGGESTIONS
Unless otherwise specified, use 1 Tbsp filling per pop tart.

* Apple butter. For a nice complement, you can sprinkle cinnamon sugar after egg washing/before baking or sprinkle cinnamon over the icing.
* S'mores: 1 Tbsp marshmallow cream, a pinch of crushed graham crackers, and several chocolate chips. For a campfire touch, sprinkle a bit of smoked sugar over the egg wash before baking.
* PBJ: 2 tsp peanut butter plus 1 tsp grape jelly
* Nutella...yes, oh yes!
* Cinnamon sugar (King Arthur calls for a mix of 1/2 cup brown sugar, 1 to 1 ½ tsp cinnamon, and 4 tsp all-purpose flour.)
* Peanut butter cups—or Buckeyes, if you're from my home state of Ohio: 2 Tbsp peanut butter mixed with 1 tsp powdered sugar and several chocolate chips
* Lemon curd
* Apple: 1 Tbsp diced apple and 1 tsp brown sugar


Shared on:

Wordless Wednesday Hop

Thursday, December 11, 2014

Use It Up: Stale Baked Goods

Many things are tossed into the garbage can when they still have lots of good life left in them. Use It Up is a section on how to use this "trash" to make new useful items for your home or to re-purpose items to avoid a purchase.

Trucker gets a lot of free day-old baked goods from his job and sometimes they get stale before we get a chance to eat them. They would have been thrown away otherwise, but I did want to use them if at all possible.

Our aim is to completely eliminate all food waste. This is for both environmental and economic values. Americans throw away about half of the food they buy, and that's not including the food wasted at the farm and grocery levels. While I can't change some aspects of food waste, I can work really hard to reduce the amount my family wastes. So many resources-land, fresh water, fertilizers (both artificial and natural), and time-go into producing food and it is immoral to throw it in the garbage, where it produces gases that poison our air. Then there's the financial side of it. I have to spend time and money to get to work, then work long hours, and then drive home every day. I get my paycheck and pay taxes on it. Then I pay taxes at the store. Why would I want to let any food go to waste when I had to work so hard to get it? If I can reduce that expense, I can save more money and then not have to work as much in the future. The case of a crunched muffin is a small thing, but it is a part of a larger lifestyle modification that allows me to live in accordance to my goals, dreams and values.

A lot of people get squeamish about using "less than fresh" items in cooking at home, but our grandparents did this as a matter of course. Throwing away food that was still edible just wasn't an option when food was hard to come by. Not only this, but I have worked in bakeries for the better part of a decade, and let me tell you, bakeries know how to use it up! Every bakery I've worked at had recipes for using up items that didn't sell to make a new, fresh item. It helped profits, reduced waste and some of the items were customer favorites. If it's good enough for a professional bakery, it's certainly good enough for your home kitchen. If your family is squeamish about the idea, don't tell them.


The other day I had a scone for breakfast, but wasn't hungry enough to eat the entire thing. The other half was hard by the time I got back to it. One of the muffins that Trucker brought home from his job got smooshed in his backpack. Rather than throw them away, I crumbled them and let them air dry. This morning I wanted to make an apple crisp, and decided to use these sweets crumbles in place of the flour or oats in the topping. As you can see in the photos, I used a variety of crumbs: cranberry scone, a crunched chocolate chip cookie, the crumbs from the bottom of the bag from the bakery we visited on our trip, and a morning glory muffin (carrot, pumpkin, coconut, oats, and raisins).

 I simply melted a stick of butter, and added in the crumbles. Since the baked goods were already sweetened, I didn't add any more sugar (although I always drizzle a bit of maple syrup over the apples before topping). I baked as usual. It turned out perfectly!

There are many other ways to use up baked sweets that get stale before you eat them, or get broken, or simply the crumbs at the bottom of the bag. This will not only reduce your waste, but can save you money on the ingredients you are replacing (In the case of my crisp, I avoided using 2 cups of oats, 1/2 cup of flour, and a cup of sugar!)

Use crumbs of baked goods for a crunchy topping for muffins, pies and sweet breads.

Make bread crumb cookies with either regular bread crumbs, or crumbled sweets. I first heard of this idea in the Tightwad Gazette books. Sounds weird, but tastes fine and is a very frugal dessert.

Use stale or broken cookies in place of graham crackers to make crusts for cheesecakes and pudding pies.

Bread pudding is a great way to use up not just stale bread, but also muffins, bagels, croissants, waffles, cookies, doughnuts or cake.

One of the bakeries I've worked at makes crisps from stale pies. When they are still perfectly edible, but the pie crust is less flaky and wonderful, we would smoosh the entire pie, pack into a baking dish, top with struesel and bake until the top was golden. People loved them and never realized that they were just a way to reduce our shrink.

Cake pops are a perfect way to use up cake that is dry or stale. It's an easy and kid-friendly recipe. I've taken it to potlucks and it has disappeared in minutes.

Slice bagels thin, like bread. Then use them to make french toast dippers-a fun breakfast for kids. Plus the smaller size will allow you to fit more pieces into the skillet at a time. Cinnamon raisin bagels are particularly amazing for this.

Use baked goods either as an ice cream topping or to make homemade blizzards. Use brownies, cheesecake, chocolate chip cookies, 7-layer bars, buckeye bars, etc. Crumble if using as a topping, or chuck the whole thing in the blender when making shakes.

If you make your own ice cream, you can mix some items into the custard right before freezing for treats such as "brownie ice cream" or "red velvet cake ice cream".

Make a trifle with leftover cake or muffins.

Use as the stuffing in stuffed apples. This is a good use for muffins or scones or anything cinnamony or caramelly.

Once at a bakery I worked at, we put chunks of leftover cheesecake into brownie batter. It was good in a strange way and had its fans.

Use berry based muffins to make a sweet crouton for topping fruit salads.

Add crumbled scones to granola mixes.

While not a baked good, I have another apple crisp tip. Save the crumbs at the bottom of cereal bags and use this as the topping. Bran flakes, cheerios or other bland cereals are perfect and the more colorful ones are okay, as long as you don't get overwhelmed by the psychedelic colors.

I've already written posts on using stale bread and making breadcrumbs if you'd like more tips for using up baked goods.

Did I miss anything? Do you have a favorite way to use up baked goods that are broken or stale? Share in the comment!

Shared on:
Wordless Wednesday Hop!

Thursday, October 2, 2014

Grilled Apple Crisp

I'm a bit obsessed with apples. They are my favorite part of autumn. I go to pick-your-own orchards a few times a season, and also buy apples at market. I dehydrated 200 lbs of apple chips last year-enough for lots of snacking over the winter. My very favorite way to use them is to make apple crisp. And seriously, what's not to love? Apples, sugar, oats, cinnamon and baked til the sugar is all rich and caramelly (It's my blog; I can make up my own words if I want to!) and you have found paradise. I thought it couldn't get any better. Until I put it on the grill.

Oh my.

Take all that goodness and now add just a hint of smokiness for an out of this world dessert.

As usual, I don't have a formal recipe to follow and just sort of wing it each time I make it. Here's the basics:

* Cast iron skillet in whatever size suits your needs. For a big family, pull out the giant one. I use my mini cast iron skillet for a perfect dessert for two.
* 3-6 tbsp+ butter, depending on the size of your crisp, plus extra or pan spray for greasing the skillet
* Apples of any sort, but I prefer the more flavorful apples like granny smithy or fuji rather than bland ones like "delicious" (I've never thought so) or gala. For a small skillet, you will use around 2 large or 3 small apples, for a large skillet you will use 6-7 large.
* 2 tsp - 2 Tbsp cinnamon (the more the merrier, I think)
* 1/2-1 c sugar-brown, white or raw (use more or less to taste; I like to use less so I can taste the apples more than just sweetness)
* 2-3 c oats, any kind (I've even been known to use packets of instant oats that had been given to me) or a mix of oats and flour or just flour or even some kind of plain breakfast cereal.
* maple syrup (optional, but encouraged)

Grease your skillet. Slice the apples into bite-sized pieces, enough to fill the skillet to the brim. When you add the crumble, it will be higher than the top of the skillet, but it will sink as the apples cook down. Melt the butter and add the oats, flour, sugar and cinnamon. Mix together thoroughly with your fingers then sprinkle it liberally over the top of the apples, making sure to cover to the edges. It's always better to err on the side of extra crumble, so make more if you don't have enough. If you'd like, drizzle maple syrup over the top of the crumble.

Place the skillet on the grill grates over direct medium heat. I cook it while grilling other items to maximize my propane use. Cook for 20-30 minutes until the filling is bubbly, the sugars are caramelized and the topping is browned, but not burned.

This dessert is perfect as is, hot and bubbly off the grill. If you want to be really naughty, add a scoop of vanilla ice cream. It's also perfect the next morning cold for breakfast.

Shared on:
The Self Sufficient HomeAcre photo ftfhopbutton.jpgWordless Wednesday Hop!

Saturday, February 22, 2014

Use It Up: Orange Syrup


Many things are tossed into the garbage can when they still have lots of good life left in them. Use It Up is a section on how to use this "trash" to make new, useful items for your home or to re-purpose items to avoid a purchase.


Whenever I eat citrus, I dry all those peels, knowing that someday, somehow I'll use them. Today I found that use. I was making homemade syrups and wanted to try some new flavors. An AHA! moment! What about an orange syrup for teas, coffees, drizzling over desserts, or mixing with sangria?


I made a simple syrup using one part white sugar with one part water. I put it in a saucepan on medium heat and stirred it together until the sugar dissolved. I dumped in some orange peel pieces and let it simmer. I stirred it often so that it didn't burn and heated it until it thickened and the volume had decreased by about a fourth. I let a spoonful cool and tasted it. Perfection. I strained the orange peels and was left with a bright, cheery syrup.

 I was about to dump the spent orange peels into the compost container when I decided to taste one. It was incredible. Sweet, bitter and citrusy. I nibbled on them as a snack throughout the day. If I have any left the next time I make orange scones, those will be a perfect add in. They would also be nice in cranberry orange muffins, on top of ice cream (especially a sunday drizzled with the orange syrup!), in oatmeal or in pancakes.


Shared on:
simple saturdays 300 final
13 Heritage Homesteaders Hop #1Homestead Barn Hop
Wordless Wednesday HopThe Chicken ChickThe Self Sufficient HomeAcre

Monday, December 9, 2013

Use It Up: Breadcrumbs

Many things are tossed into the garbage can when they still have lots of good life left in them. Use It Up is a section on how to use this "trash" to make new, useful items for your home or to re-purpose items to avoid a purchase. 

I'm always surprised (horrified) when someone at the bakery asks if they can buy bread crumbs. Using bread crumbs is supposed to be a way to use up the crumbs that break off the loaf while you're cutting a slice of a good rustic bread, or a way to use bread that has become hopelessly dry. Not something you buy.

Whenever I have bread that gets hard and dry (the bread I eat is preservative free, so there's often a good 1/4 of the loaf that gets dry before I can get to it), I cut it up into cubes. I let it air dry on the counter. The cubes dry quickly, especially in winter when the air is so dry. These cubes are perfect for bread pudding, strata, croutons or stuffing. I had a lot of them saved up, and wasn't feeling like making stuffing anytime soon, so I decided to make bread crumbs.

First I placed the dry bread cubes in the blender. I pulsed it for one second blasts, letting the blades come to a complete stop before pulsing again. This allows the bread crumbs to fall back against the blade, speeding up the time and keeping the motor from burning out.


Once all of the bread was in crumbles, I poured a small amount into a strainer.  I sifted out as much of the smaller crumbs as possible, and worked more through by rubbing the crumbs against the sifter. Any pieces not easily worked through were dumped into another bowl. I kept going til I got through all of the crumbs in the blender, then pulsed all of the crumbs in the second bowl. I repeated this a few times until most of the crumbs were fine.


I stored the crumbs in a glass jar. I left the lid off the jar and will stir it daily for a few days to make sure it's completely dry before I seal it up. I'll use these crumbs for frying chicken, fish, and veggies. I can top casseroles with it or add it to enchildada or stuffed pepper filling. I can use it to stretch ground meat in meat loaf, meat balls or hamburgers. Last night I used it for coating the best-tasting pan-fried pork chops ever.

Making your own bread crumbs is easy, cheap and reduces your food waste. Plus there is a simple pleasure in making something that most people buy at the grocery.


For more tips on using up stale bread, check out Use It Up: Stale Bread

Shared on:
Homesteader's Hop
From The Farm Blog Hop

The Self Sufficient HomeAcre
TTF CoHost 1Homestead Barn Hop

Related Posts Plugin for WordPress, Blogger...